Automatic Chicken Waterer Parts List

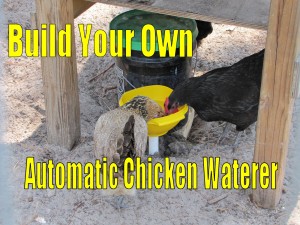
Automatic Chicken Waterer

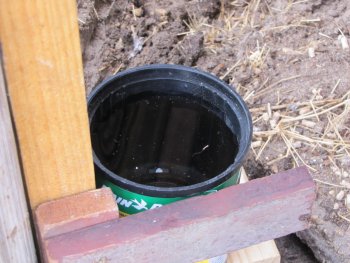
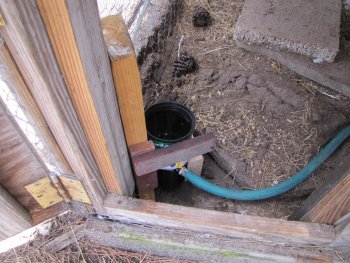
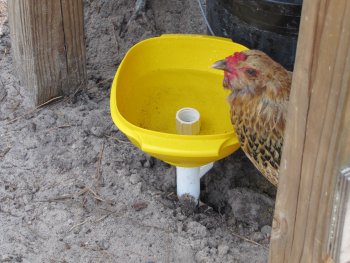
The original Automatic Chicken Waterer.

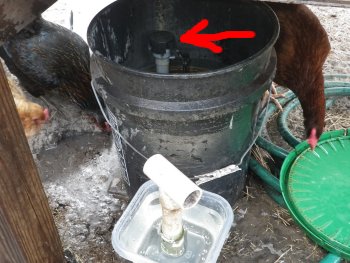
The Automatic Chicken Waterer has been doing well for me and I know that many are viewing my site for the design. Hopefully it inspires ideas into creating a similar or expanded version. The Automatic Chicken Waterer concept can be customized many different ways so there is not one right way, but the right way for YOUR situation. My design uses a 5-gallon bucket as the frame and reservoir.

Below is a parts list for the Automatic Chicken Waterer with the 5-gallon bucket for the frame and reservoir. I tried to put together a few of the options, but make sure and identify what will work for you and your specific situation. I am in South Florida and we deal with heat and sand. The winters are not cold enough to freeze the water, but the summers are hot enough to worry about water that is hot. I keep my automatic chicken waterer shaded for this purpose and the sand has to get washed out periodically by cleaning out or changing the cup.

The Automatic Chicken Waterer is made up of 3 parts. The reservoir, supply, and the cup or bowl. I will identify each of the parts within these labels. I have included links to Amazon.com via affiliate links so just hover over the link to get an idea of what they look like. Also some parts may not be priced efficiently and may be better to get at your local hardware store.

Automatic Chicken Waterer Reservoir

The reservoir in my design is a 5 gallon bucket. Any “tank-like” item that is big enough, will hold water, keep light out, and be able to be covered will do. You also need to be able to drill through it. I would use a black bucket for the purpose of not letting any light in. A lighter colored bucket would be good if you are able to put the reservoir in a hidden location that doesn’t get any direct sunlight. Again, you would customize it to your situation.
5 Gallon White Bucket & Lid – Durable 90 Mil All Purpose Pail – Food Grade – BPA Free Plastic –
Black bucket only – Hydrofarm HG5G 5-Gallon Black Bucket
Black bucket only – Encore Plastics 250003 Bucket Space Black 5 Gallon
Black bucket with lid – Dynamic Enviro Paintware KK053000 5-Gallon Enviro Recycled Plastic Pail Lid
Blue bucket with lid – Petco Bucket, 5 gallons, Color: Blue
Black bucket with screw on lid – Bucket Kit, One Black 5 Gallon Bucket with Black Gamma Seal Lid
Screw on lid to retrofit 5-gallon bucket – The Gamma Seal Lid, Black
Here is a heater for a 2-10 gallon aquarium in case you are in snow country – Tetra 26447 Submersible Aquarium Heater, 50-Watt


Automatic Chicken Waterer Supply

REMEMBER THIS PORTION MAY BE UNDER PRESSURE!
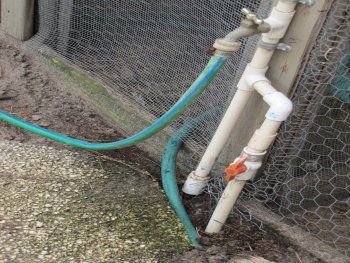
The supply consists of either a water hose or hard line water supply, or even a combination of both. You could run pvc from the automatic chicken waterer to a select location and then a water hose from there (so you could remove it when you want to and not worry that it is running water all the time). Then either a toilet fill valve, which is in my design, or just a way to fill it with water periodically. There are other types of float valves out there, but the toilet fill valves are straight up and down, and already have a way to hook up to a water supply line. This section will take us from hooking up to a water source (or not) to filling the reservoir.

Toilet Fill Valve – Float valve

Standard toilet fill valve – Fluidmaster 400A Anti-Siphon Toilet Tank Fill Valve

Drill Hole for Toilet Fill Valve

1″ paddle bit to drill the hole for the toilet supply valve and also for drilling the thru-wall for the cup – DEWALT DW1582 1-Inch by 6-Inch Spade Drill Bit


Water Supply Line

The following three items are the same, but each is a little different type. 7/8″ to connect to the toilet supply valve, then a 3/8″ compression (which typically hooks up to the supply valve on the wall behind the toilet). This is strictly to get from the toilet fill valve to regular pvc (the 7/8″ thread does not exist in pvc that I know of, there may be a brass fitting somewhere, but I have not been able to find one) then everything is pretty standard from there.
Fluidmaster PRO1T12CS Click-Seal Stainless Steel 12-Inch Toilet Supply Line
This one appears to have metal connections on both ends – Aviditi 30462AVI Stainless Steel Braided Supply Line for Toilet with Brass Steel Nuts, 3/8-Inch Compression by 12-Inch
Fluidmaster B1T12 Toilet Connector, Braided Stainless Steel – 3/8″ Female Compression Thread x 7/8″ Female Ballcock Thread, 12″ Length


Water Supply Line to PVC thread

So now we are past the toilet fill valve and getting to regular pvc – the first thing we have to do is go from compression to pipe thread. The following 3 items will get from the 3/8″ compression at the end of the toilet supply hose to 1/2″ Female pipe thread, which can then be taken 100 different directions. PVC parts are better chosen at your local hardware store where you can put the parts together and make sure you have the right sizes and parts to build what you want.
Watts LFA124 Compression Male Adapter, 3/8-Inch OD x 1/2-Inch MIP
Brasscraft 66-6-8X 3/8 OD by 1/2-Inch Female Reducing Adapter Lead-Free, Rough Brass
This achieves the same thing, but is a valve (just like the one probably in your house) – LDR 537 6101 Low Lead Shut Off Street Valve 3/8-Inch Compression x 1/2-Inch FIP, Chrome


Standard PVC Fittings to Water Supply Source

I am going to go 1/2″ pvc to the ball valve (which will give me control out at the waterer or near it) then 3/4″ from there. You can move into 3/4″ anytime by finding the right parts.

To go directly to a water hose

1/2″ male to male nipple – Banjo NIP150-SH Polypropylene Pipe Fitting, Short Nipple, Schedule 80, 1-1/2″ NPT Male, 2-1/2″ Length
1/2″ female to 3/4″ female water hose (the female end of the water hose usually comes out of the water hose valve so you would have the male end to connect to) – Anderson Metals Brass Garden Hose Fitting, Swivel, 3/4″ Female Hose ID x 1/2″ Female Pipe

To go directly to pvc piping

1/2″ male to slip pvc – LDR FP4 MA-112 PVC Male Adapter, 1-1/2-Inch Slip x Slip x MIP
2 feet of 1/2″ pvc – Charlotte Pipe Pvc Sch 40 Solid Pipe 1/2 ” X 2 ‘
1/2″ threaded ball valve – Homewerks VBV-P40-B3B Ball Valve, PVC Schedule 40, Female Thread x Female Thread, 1/2-Inch
1/2″ slip ball valve – PVC Schedule 40 Slip Ball Valve. Size: 1/2 inch
Now go from 1/2″ slip to female water hose thread – LASCO 15-1621 PVC Hose Adapter with 3/4-Inch Female Hose and 1/2-Inch PVC Pipe Glue Connection


Automatic Chicken Waterer Cup

This portion is not under pressure. For this section I am using 3/4″ pvc because the fitting is bigger and seals better on the bucket or reservoir. The 1/2″ fitting is too small, though it may work in your application. PVC parts are better chosen at your local hardware store where you can put the parts together and make sure you have the right sizes and parts to build what you want.
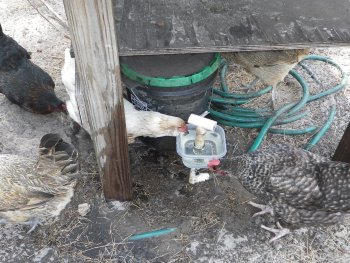
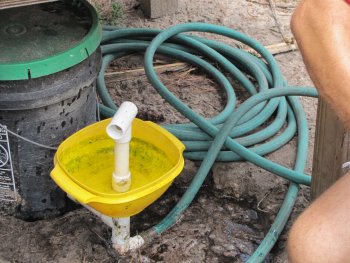
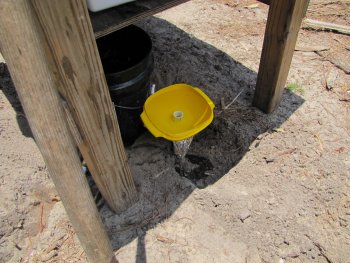
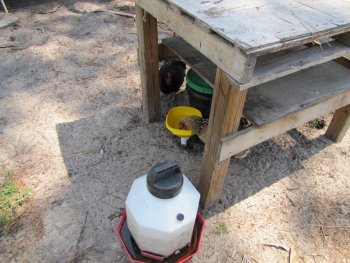
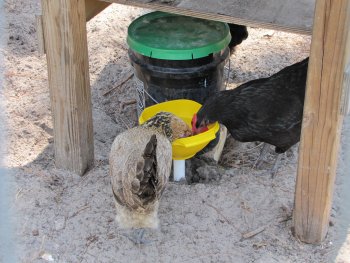
The cup or bowl is where the chickens or other pets would actually drink out of. The automatic chicken waterer needs to be situated so the chickens do not use it as a roost, or roost above it. I was able to salvage an old wooden table to put my automatic chicken waterer under, so this provided shade and the chickens cannot get on top of it, but can easily get in to drink as much as they want.

Thru-wall fittings

The way I have done it.
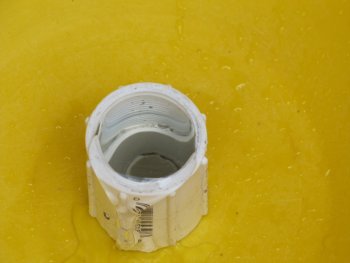
3/4″ male threads to put into the reservoir – 3/4″ slip to build cup (this same fitting will be used to fill the actual bowl) – LDR FP4 MA-34 PVC Male Adapter, 3/4-Inch Slip x Slip x MIP I believe I put the slip side in the bucket with the threads out.
Rubber gasket material – You will also use this to seal to the bowl or cup LASCO 02-1048E Rubber Sheet, 6X6-Inch and 1/16-Inch Thick I put the gasket inside the bucket so the fitting would press against it and never let the water out.
3/4″ female thread to tighten and seal to bucket – The most important thing with this is the female threads to lock and seal the pvc fitting into the reservoir so several different fittings can be used (except a cap) – LDR FP4 FA-34 Female Adapter, 3/4-Inch PVC Slip x FIP So at this point you could be slip or threads.

A way you may want to try – seems to be a little more sleek and may also work with the bowl or cup as well.
3/4″ thru-wall assembly – This should have 3/4″ female thread inside- Lifegard Aquatics 3/4-Inch Double Threaded Bulkhead

Misc. 3/4″ PVC Fittings

3/4″ pipe – Charlotte Pipe Pvc Sch 40 Solid Pipe 3/4 ” X 2 ‘
3/4″ Tee slip – LDR FP4 T-34 PVC Slip Tee, 3/4-Inch
3/4″ Tee threaded – Lasco 405-007 0.75 in. PVC Threaded Tee
3/4″ cap slip – LDR FP4 CA-34 PVC Slip Cap, 3/4-Inch
3/4″ cap threaded – Can’t find one on Amazon
3/4″ nipple 2″ – GF Piping Systems PVC Pipe Fitting, Nipple, Schedule 80, Gray, 2″ Length, 3/4″ MPT
3/4″ nipple 3″ – GF Piping Systems PVC Pipe Fitting, Nipple, Schedule 80, Gray, 3″ Length, 3/4″ MPT
3/4″ nipple 4″ – GF Piping Systems PVC Pipe Fitting, Nipple, Schedule 80, Gray, 4″ Length, 3/4″ MPT
3/4″ nipple 5″ – GF Piping Systems PVC Pipe Fitting, Nipple, Schedule 80, Gray, 5″ Length, 3/4″ MPT
3/4″ nipple 6″ – GF Piping Systems PVC Pipe Fitting, Nipple, Schedule 80, Gray, 6″ Length, 3/4″ MPT

Automatic Chicken Waterer Cup

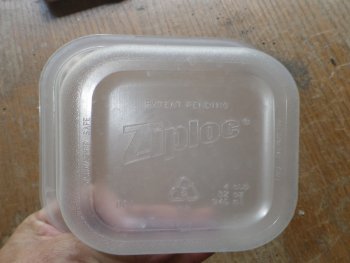
The cup can be any stronger plastic recycled item. I like to find things that will be thrown away and drill a 1″ hole through it. The cup has to be tall enough for the high water not to overflow and the low water not to run completely out. The fill valve can be adjusted so it does not have so much of a spread between the time it turns on(low water in the bowl) and the time it shuts off(full)
These should work good – Glad Food Storage Containers, Tall Entree, 3 Count
You can also use this with the watering nipples already in place – BriteTap Chicken Waterer The description says to just drill a 5/8″ hole – here is a 5/8″ bit – Bosch Daredevil DSBS1007 5/8-Inch by 4-Inch Stubby Spade Bit

Automatic Chicken Waterer Parts List Short Version

Reservoir – I used a black 5-gallon bucket with a drywall bucket lid (it just snaps on)
Water supply – Toilet fill valve, 1-inch paddle or spade bit to drill hole, toilet supply line 7/8″ x 3/8″ compression, 3/8″ male compression x 1/2″ female pipe thread fitting, 1/2″ pvc piping to 1/2″ ball valve, to my water supply or you can fit it to the hose.
Cup or Bowl – 3/4″ male thread x 3/4″ slip + custom rubber gasket + 3/4″ female x 3/4″ slip (to go through bucket), 3/4″ piping to 3/4″ tee slip, down to cap to stabilize bowl, up to 3/4″ slip x 3/4″ male threads through bowl + custom rubber gasket + 3/4″ female x 3/4″ slip + 3/4″ pipe up to a Tee to easier remove bowl or cup for cleaning or replacement (See T-handle Post), The cup or bowl is tall enough so the spread in the fill valve can fill and empty, and big enough around so the chickens can get in and drink around the T-handle. I have used Tupperware, Gladware, and recycled drink containers that I cut the bottom off of.

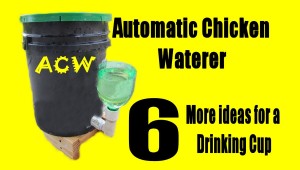
Automatic Chicken Waterer – 6 More Ideas on Drinking Cup

Looking for Automatic Chicken Waterer Parts List?

Automatic Chicken Waterer - 6 more ideas for Drinking Cup

More ideas for the automatic chicken waterer drinking cup. This is a very important part of the chicken waterer. This concept is very flexible and can be customized for many different situations. One fill valve can be set up to deliver water to many different stations at one time, if needed.

  1. Adhere caps to pvc fittings before you need them. In the video I am using a 3/4″ male thread and 1″ slip fitting. I used Liquid Nails to adhere the 2 liter bottle cap to the pvc fitting. Then I drilled a hole in it to deliver the water. This can be duplicated and stored. If there is trouble with the seal of the 2 liter bottle cap that is in the automatic chicken waterer now, you have some back up fittings to eliminate down time.
  2. A traditional bowl that I documented in a previous post. You can read more about it at How To: Build an Automatic Chicken Waterer. This is a similar fitting to the water delivery fitting on the reservoir. It just needs to be small enough so the chickens can get the water around it. The bowl needs to be big enough or tall enough to capture the on/off spread of the fill valve.
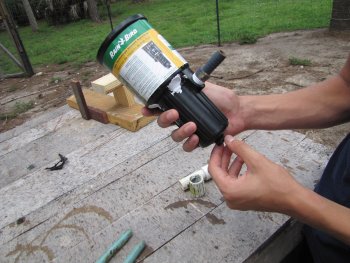
  3. The rain bird sprinkler housing. This can be a Mobile Drinking Station or fitted to sit right on the reservoir.
  4. A Gatorade bottle can be used instead of a 2 liter bottle. I have a lot more 2 liter bottles to be recycled than Gatorade bottles, but the same concept would apply. I would still only drill a small 1/2″ hole in the cap, as it would add strength to keep the cap in tact as much as possible.
  5. Use a pvc pipe approximately 1″ – 2″ in size, then install some prefab watering nipples like the ones found at Avian Aqua Miser. This can be done 2 or more ways. The first is to hard line the pvc to the place you want to install the watering pipe, this method does not allow for too much adjustment. You can also use a flexible hose instead. This way it can be adjusted over time if your flock changes, or if you just want to move it. The chicken waterer nipples only have to be lower than the lowest point of the water level in the reservoir. The reservoir can be put in an elevated position to accommodate this method.

    Click the image to go right to the Amazon.com product page. This kit comes in a 2, 4, or 6 nipple kit. Everything that is needed for water delivery on your reservoir including the bits for the holes and gaskets.
  6. Use the chicken waterer nipples directly in the reservoir bucket. This will eliminate the fitting that is for the water delivery now. This method may be desired if you don’t need it to be spread out. You could set the reservoir in a predicament where the edge of the bucket hangs over and the nipples would be accessible by your birds.

    Click the images to go directly to the Amazon.com product page.
  7. I have since came up with a 7th Idea. It requires purchasing a new “cup” or water delivery design from Amazon. Automatic Chicken Waterer – 7th Idea for water delivery. Click to go to post.

These ideas can be altered to fit your specific situation. Once you get started, then you can customize your chicken waterer as time goes by to work well for you and your situation. I know from experience that it is worth the effort to eliminate the task of “changing” out the water every day. Even reducing it to once a week, or once every two weeks would be good.

Automatic Chicken Waterer – Building it

Looking for Automatic Chicken Waterer Parts List?

Automatic Chicken Waterer

Build your own automatic chicken waterer

The automatic chicken waterer is a great addition to any chicken coop. This DIY project can give you time and save your effort when taking care of your chickens. Works on water pressure alone, and does not require any power. Once it is set up, it is generally maintenance free for months. The automatic chicken waterer can be built to serve many different applications, even watering other birds or animals. The possibilities are vast. This video is a step by step walkthrough in building an automatic chicken waterer for yourself. It is not hard. If you cannot get the parts, or have trouble drilling and such, I can sell you a basic kit. You can message me on Google Plus!
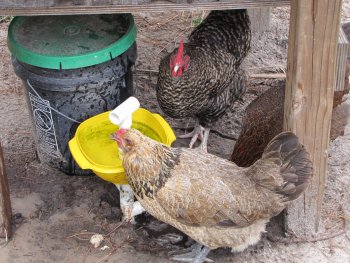
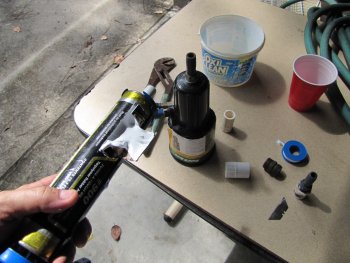
Automatic Chicken Waterer Parts List

1 – 5 gallon bucket with tight fitting lid
2 – 1 regular toilet tank fill valve
3 – Toilet fill valve supply line
4 – PVC fittings for the delivery pipe
5 – An extra seal for a toilet tank fill valve for the deliver piping.
6 – 1″ drill bit – either paddle bit or hole saw bit

This Chicken Waterer is Great!

Once you see the basic structure of the automatic chicken waterer, you can see how the applications start to come to mind. In the future, I will be creating some more videos and take it farther. The drinking bowl, and some more ideas I have on different ways to deliver the water. Along with the nipples, that can be purchased here – Automatic Chicken Waterer nipples at Avian Aquamiser.

Now you can get started on this project. Once the automatic chicken waterer is built you can rest a little easier knowing that your chickens are well watered, even when your not home. Going out of town is not so bad now, because you know that they are, at least, getting water.

THE DRINKING BOWL IS NEXT – COMING SOON!!!!

Don’t forget to subscribe to my YouTube channel above. Thank you.

How to Clean a Coffee Maker

If it seems like your coffee maker is taking an awful long time to finish, you may need to clean it. It’s not dirty, the ports where the steaming hot water go through are clogged with minerals from your water. A simple process with some vinegar will do an amazing job of speeding up the coffee making process. I was amazed at how quick the coffee finishes now when I clean out my coffee maker with vinegar.

How to Clean a Coffee Pot

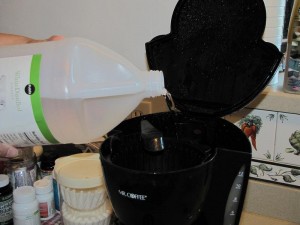
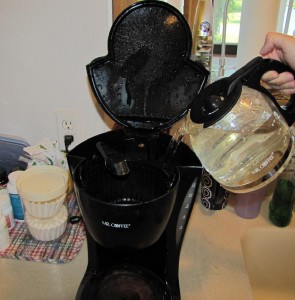
Pour the vinegar in the water holding area. You want to mix half vinegar and half water. Make a full pot.

Is your coffee maker slow?

Is your coffee maker taking forever to make the coffee? You may need to clean your coffee maker. This post will show you how to clean a coffee maker. It is not difficult to clean a coffee maker, it will just take some time. All you need is some vinegar, and some patience. Coffee is almost like air, especially in the morning. It just feels right.

Now the first thing to do is get finished with the coffee that is already in the pot. Rinse it out like you are getting it ready to sit for the day. Then get out the vinegar.

Pour the vinegar in the water holding area. The coffee maker in the photos is a 12 cup coffee maker. So we will use 6 cups or half of the coffee maker capacity.

How to Clean a Coffee maker

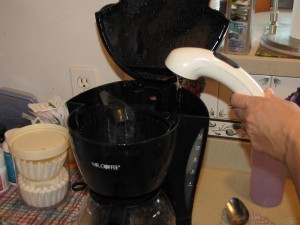
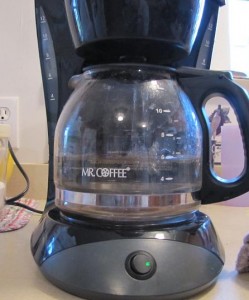
Fill it the rest of the way with water. Half vinegar and half water. Make a full pot.


Now fill it the rest of the way with water. If you want to use bottled or distilled water, it may be a good idea since the normal water you use may be heavy in minerals (which is what is clogging up your coffee maker in the first place). I don’t, and it seems to work fine for a while.


How to Clean a Coffee maker

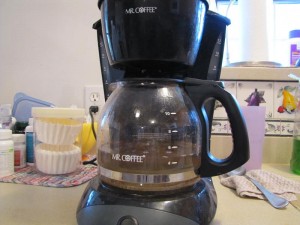
A little cloudy, but hopefully that will go away.


It may look a little cloudy, but there is still some coffee from this morning in there too. It will still be cloudy, because it is cleaning it out. Once this is percolated all the way through, turn the coffee maker off. Then you want to either pour the vinegar and water mixture out or pour it into another container. This vinegar and water mixture can now be re-used to do some cleaning.

How to clean a coffee maker

Add clean water now!

1 – Pour it into the bottom of the dishwasher before you turn it on later. It will help clean out the dishwasher and your dishes from hard water stains.

2 – Use it to clean the shower or bath tub area. This is where hard water and soap leaves residue. The vinegar and water mixture will help.

3 – Vinegar is a mild acid, so it will help in other cleaning jobs as well.

How to clean a coffee maker

Looking a lot cleaner. Rinse out with fresh water.

At this point you can either run vinegar and water through it again, or go ahead and start the rinsing process.

Rinse the pot out one time, then fill it back up to as many cups as it will hold with fresh water and then fill up the water holding area. Again, you can use bottled  or distilled water or just the tap. Again, let it percolate all the way through the pot.

Now rinse it again. You can do half a pot, or a full pot. Just for another preventive measure to get the vinegar smell out. At this point, there is no reason to fear ingesting it, because it is so diluted that it is now just the smell.


Reuse Your To Go Cups for Seed Starters

Reuse your to go cups and it can help you in the garden, as well as helping the environment. Reuse the to go cup by saving the lid and the cup to create a mini-greenhouse. I know whenever I am having lunch out, one of my most favorite things is to ask for a to go cup of sweet tea.

Reuse The To Go Cup

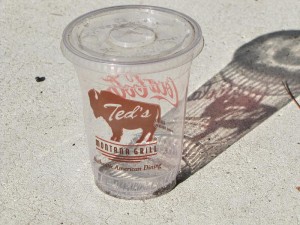
This is actually one of the things I look for in an establishment to keep coming back, but that will be in a different post. This lid on this Ted’s to go cup fits the solo cups so I can use them as well.

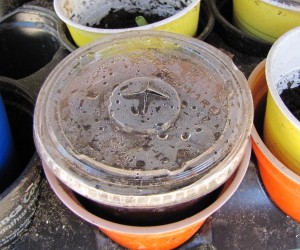
Reuse - Drill the Holes So it does not fill up with water

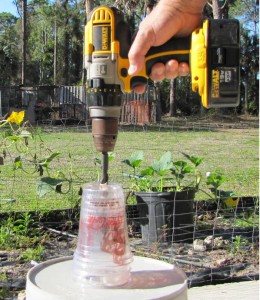
2 – Drill Holes in the bottom of the cups so they don’t hold water. This is a 1/2″ drill bit, but even several small holes will do good.


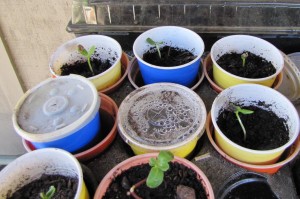
Some cups can be used over and over, and others are a one time shot. Using this method creates an environment that does not disturb the other seedlings if they are not progressing at the same rate. This way you can take them out as they sprout and add others to that flat. Then the ones that sprouted can be taken out into the sun to get to where they can be transplanted from here.

Make sure and drill holes in the cups. Seeds won’t do well in standing water. They may sprout, but then die soon after.

Reuse and create the Mini-Greenhouse

3 – Creating a Mini-Greenhouse keeps the moisture in. This is more consistent than trying to keep watering them.

Once the lid is put back on the moisture stays in and then when the seed sprouts, just take the top off and it has its own small pot to get past the seedling stage. This method can be duplicated over and over, or just done one at a time. The lids are sometimes interchangeable so many different cups can be used and collected. The sun will make plastic brittle so keep this in mind.

Now that we are finished we can reuse some of them again!

reuse - Take the top off once it sprouts save it

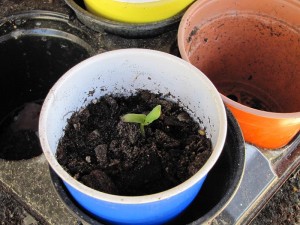
4 – Once the seedling sprouts, take the top off so it can get some sun.

The seedlings that you see in these photos are sunflowers. I try to grow things that I can use, and that does not need a lot of attention. I can feed the sunflowers to my chickens, in exchange for eggs. So it is like I am growing chicken eggs.
Now these seedlings can be dealt with one at a time.

There are many different things you can do now that you have them separated. Sharpie marker can be used to identify each cup. Cross it out and write again for the next trip.

Reuse - Seedling Sprouts almost time to plant

5 – Each of the seeds sprout at different times. Depending on what you are growing, there may be days and weeks difference.

Chicken Waterer – Changing the Bowl on the Homemade Automatic Chicken Waterer

Looking for Automatic Chicken Waterer Parts List?

This is what makes this Chicken Waterer unique. You can remove the bowl, wash it, replace it, or then put it back. It also makes it so that it can be upgraded or changed, if it is not working like it needs to for whatever you are trying to provide water to. Chickens need clean water.

Chicken Waterer Still Kicking


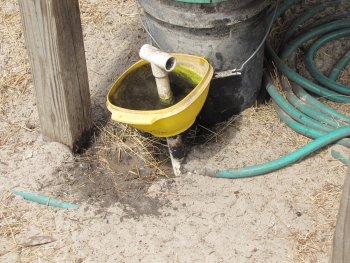
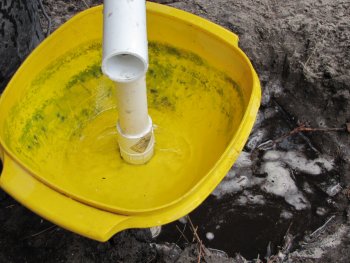
This chicken waterer has been cleaned out a couple of times since it was installed about a year ago. Mostly by just swishing out the dirt. Sometimes the bowl would come off the waterer so that the dirt could be washed out. There is only dirt in here, and it is from the chickens having it on their beaks. It was placed under a shade maker so they would not try to roost on it. It seemed to work, as there has not been any poop in it so far. This has worked out very well as we have not had to “worry” about the water. Of course, we still feed and collect eggs every day, but this has really helped.

Chicken Waterer out of anything

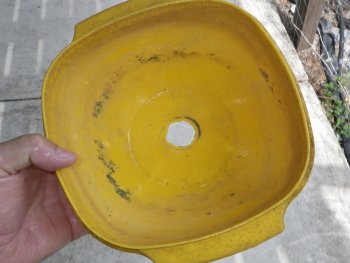
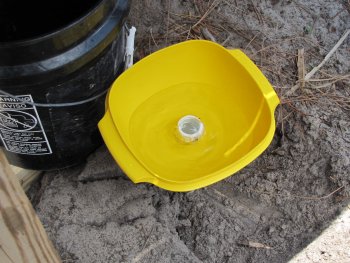
This is an ordinary container. It has a little height to it, and also some width. It just needs enough to hold the depth of water for the toilet fill valve to spread, around 3″ or so. Then it needs to be wide enough for the chickens to get their head in and around the fill pipe.


1 inch paddle bit to drill hole for Chicken Waterer

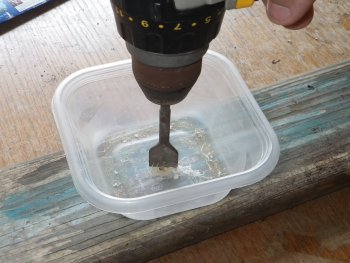
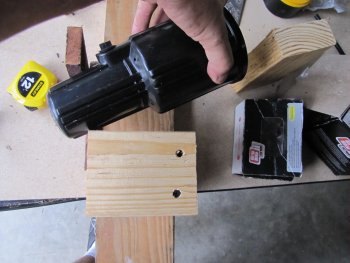
The 1 inch paddle bit is the perfect size to drill the hole for the cup to change out for the chicken waterer. Using 3/4″ thread, the one inch hole fits it perfectly. The paddle bit will drift, so go slow. The drilling creates heat and starts melting the plastic. Notice there is a board underneath. This helps stabilize the bowl, but it still wants to drift.


Remove the chicken waterer bowl


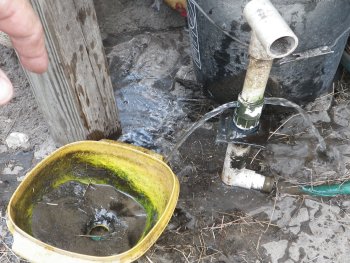
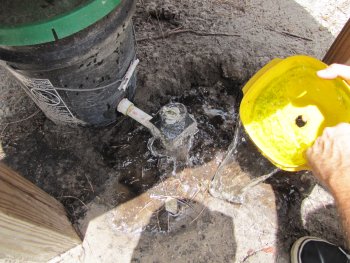
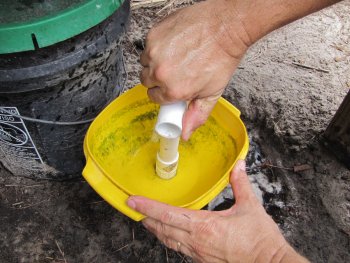
Unscrew the Chicken Waterer T-handle and remove the existing bowl from the chicken waterer system. Let the system flush and rinse it off as desired. Having the other bowl or cup ready will limit the waste of water. It is good to flush the system out anyway.


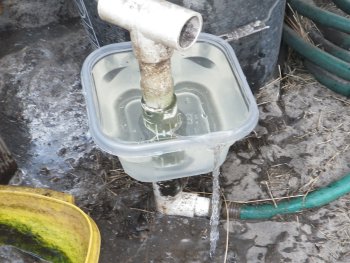
Chicken waterer cup is overflowing


As you can see, the top of the water line has changed, due to the different size of the chicken waterer cup. This can be tackled with some adjustments to the toilet fill valve.


Adjust the chicken waterer toilet valve


There is an adjustment screw, or a holding clamp to adjust the depth of the float. If the water is overflowing, you want the float to go down so it will turn off sooner. It may only take a little to get it to turn off where you want it.


The finished chicken waterer bowl


The chicken waterer bowl is installed and is clean as a whistle. Now this bowl can serve as a spare when the other bowl is being cleaned.

Wash the old chicken waterer bowl


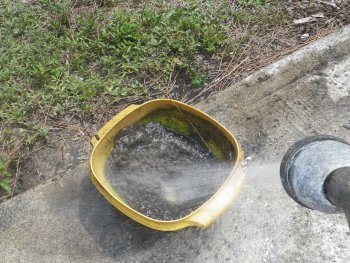
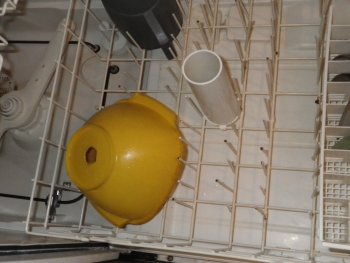
Wash out all the dirt from the old bowl.


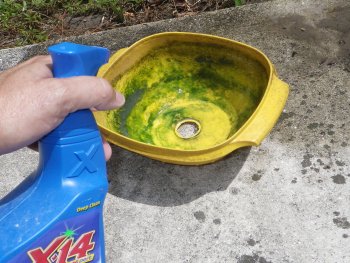
Use mold and mildew cleaner for chicken waterer bowl


Any mold and mildew cleaner has a little chlorine in it, which will kill the algae. This is a good way to have two chicken waterer bowls that are real easy to change out and clean.


Chicken waterer bowl nice and clean


Now the chicken waterer bowl is nice and clean, ready for the next step.


Nuke the chicken waterer bowl


One more step will assure this chicken waterer bowl is ready to continue service. You can never be too sure. Now there are two chicken waterer bowls to switch out whenever it does get dirty. Anytime the water is in the sun, it is going to get algae in it after a while.

Chicken Waterer IMPROVEMENT: How to build an Automatic Chicken Watering device – T-Handle

Looking for Automatic Chicken Waterer Parts List?

All parts to the T-handle


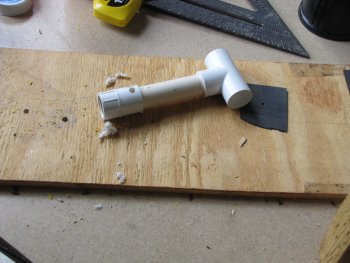
There are only 3 parts. The female thread to slip fitting, the short piece of pipe, and the Tee.

Glue the parts together


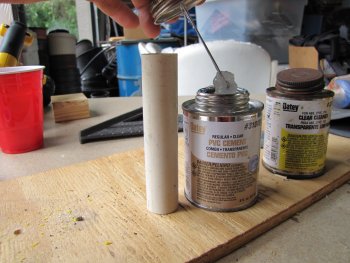
Glue all the parts together. Make sure it is solid, because there will be pressure on it in the future.
Drill holes in the T-handle


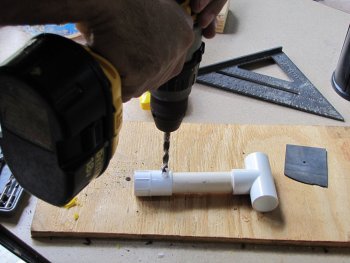
Drill the holes. These holes can be variable in size. They should be small enough to fit in the pipe and large enough so they don’t get clogged if trash gets in the lines. Holes should be drilled just above the threads.
Finished holes in the T-handle


Holes look good. It is time to install.
Turn off the water supply to the Automatic Chicken Watering System


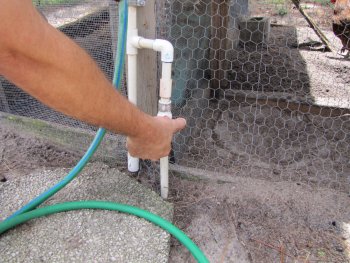
Turn off the water. Always install control for the water close.
Remove the existing cup holder


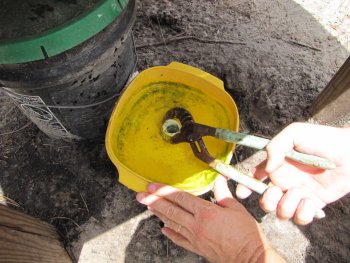
Remove the fitting that is holding the cup on now. As you can see, it is hard to get off and needs a tool. Not good.
Go ahead and clean the cup


Go ahead and clean the cup while it is off. It might be a good idea to put some teflon tape on the threads, just to keep it “by the book”.
T-handle


Put on the new T-handle. It should go on pretty easy.

It is working


Turn on the water. The water should be coming out of the holes we drilled.
Now the Chickens are happy once again


Now this is the most important part, that is does not interfere with the chickens drinking the water. It will now be a little easier to clean out the cup.

Improvement to: How to make an Automatic Chicken Waterer – Mobile drinking station

Looking for Automatic Chicken Waterer Parts List?

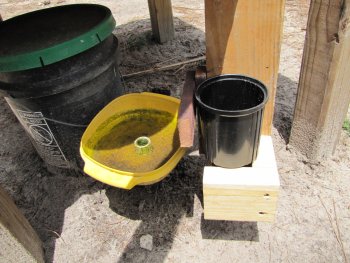
This segment is an addition to the other segments on How to Make an Automatic Chicken or Bird watering system. In the last few posts, we built the initial reservoir and drinking cup. Now we can use the tee we left capped and run a mobile drinking station inside one of the coops. This can be duplicated many times over. The hose cannot be higher than the top of the water in the reservoir or the cups at any time or it won’t work.All parts to the mobile chicken drinking station
Sprinkler housing has drain holes


The sprinkler housing is the best option I found, because it has a lip and already has a threaded insert on the bottom or the side.
Now for the Frame


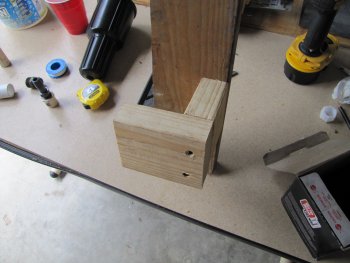
Starting the frame, the cup will sit on this at the lip.
Make the frame to remove the cup easily


Make the keeper so the cup can be removed. This cup can be many other things, but it needs to have room for the birds to drink and have an insert for the water feed.
The top level of the cup has to equal the top level of the water


The level has to go down when it gets placed.
Expose the tee of the drinking station


Expose the tee we left in the line. The most important guide line is the top of the water.
drain the drinking station


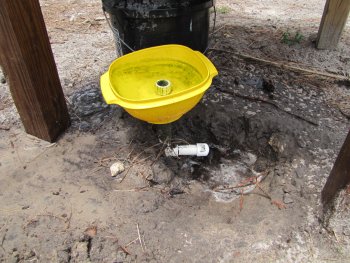
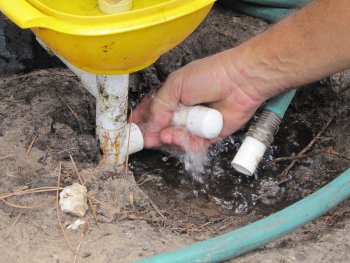
Drain the water so the hose fitting can get installed.

hose is hooked up to the chicken mobile drinking station


Hose is hooked up, it is time to get it into the other coop.

sprinkler cup has two options


Set the cap and the barbed fitting to wherever you want. My installation was better on the side, because I had to dig it down.
get the hose into the chicken coop


Get the hose into the other place. Be sure the hose never gets above the top level of the water at any time.
bury the hose to keep it cool


Burying the hose will keep you from tripping over it and keep it cool. It also keeps the sun from wearing it out.

top of the cup is where we want it


We want the water as close to the top as possible, without going over. This way there will be more the chickens won’t have to get way down there.
perspective - put it where it needs to go


The frame allows you to move the cup up and down until it is right. Then you can fasten it where you want.

dump out the cup to clean


Dump out the cup to get all the sand out. This will have to be done periodically to clean.

chickens are drinking from the cup


They know where the water is now.


Make a T-handle for the main cup

RESULTS: How to Build an Automatic Chicken Watering System – INSTALLED

Looking for Automatic Chicken Waterer Parts List?

It is just sand and debris NO POOP!

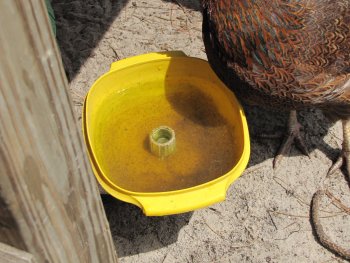
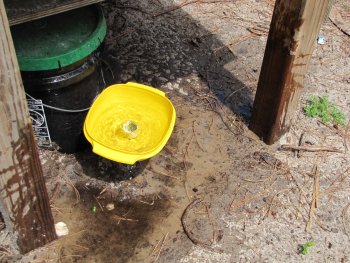
Now we have a field tested Automatic Chicken Watering System. It works great! I have since only found a couple of flaws, which are not that bad. The flaws are definitely not worth going back to the old method. As you can see the water is not clean and clear. The good thing is there is not any poop in this water. Most of what you see is sand and debris that is on the chicken’s beak when they drink. you can also see a hint of algae on the top side of the bowl.

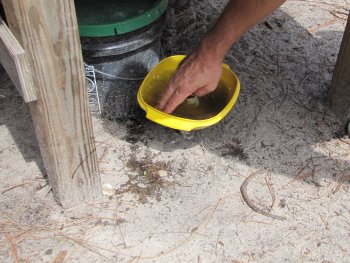
Just a little agitation to clean it up


As long as there is not poop in this cup, I am not afraid to put my hand in it and swoosh it out! It only takes a minute to splash all the sand and debris out of the cup.
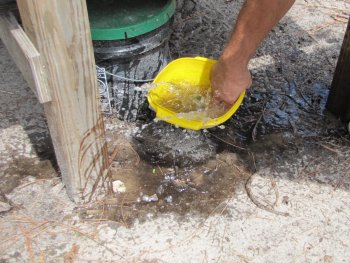
More and More agitation


Keep going, not there yet. One of my designs that will be featured in the coming days is a flexible hose for the cup assembly. This flexible system will allow for the cup to be emptied out and turned back over to be ready once again. The sun will always create algae, and I see this as a future problem.

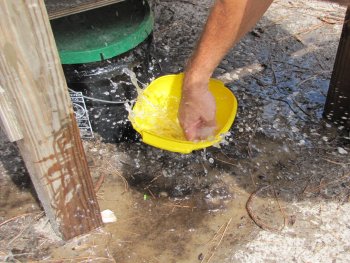
Starting to see some clarity


Now it is starting to clean up a little. The sand just takes some more agitation to get out.
Automatically Fills Back Up - NICE!


This is the best part.

Ready for Action once again!


OK – We are finished and it is time to move on to the next activity. You can see now in this photo that the bowl is leaning a little. It has not affected anything, because it is not overflowing. A little adjustment to the Toilet Fill Valve and it will be good again. My next project is a tee handle to make it easier to remove the cup and clean.
The next article on How to build an Automatic Watering System for Chickens will be focused on a cup attached to a hose or flexible pipe to move as needed. It is here Now!

Make a T-handle for the main cup

Automatic Waterer for your Chickens, Ducks, Peacocks, Dogs, Cats, Goats, Pets, Emus, Ostrich, Pheasants, and more – 5

Looking for Automatic Chicken Waterer Parts List?

Water Supply with control


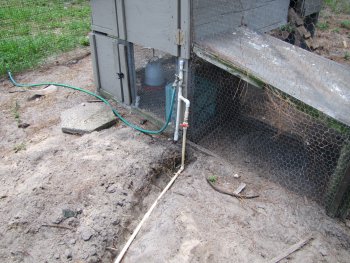
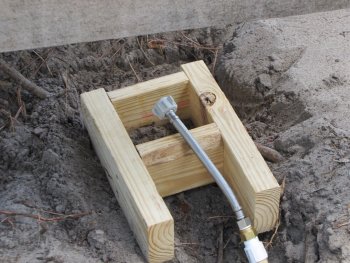
The most important part of this project is a constant water supply. This water supply is under pressure. I am not sure if a standard toilet fill valve will work on a low pressure or gravity feed system. It could be tested with a few fittings and an afternoon. The ball valve is important in case this thing tips over or the bucket or cup develops a crack. Then the water can be shut off at the source and still have water in the chicken coop area.

Water supply to the Bucket Reservior ready


All the water supply lines are in place and ready to place the bucket reservior in place and connect. I turned the water on one time to flush the line and have nice fresh water for my new valve. I am sure the sand is not friendly to it.
We have power


Ok. The bucket is now filling up and we can field test the cup assembly. The valve can be adjusted now for the top height of the water to come up or down by 1 or 2 inches. The spread is still about 3 1/2″.
It is working


Ok we are in business for the moment. Water is coming into the cup. This is a plus. Now to see what happens next.


I think this is going to work it is not stopping yet


Still filling up and seems to be working. Is this it?
Toilet fill Valve needs some Adjustment


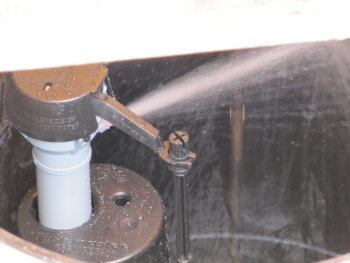
Here we go, filled up to the top and is running over. Time to adjust the toilet fill valve and bring the water level down an inch or so.
Water is Good!


AAAAHHHHHHH!!!!!!
We have a Winner!


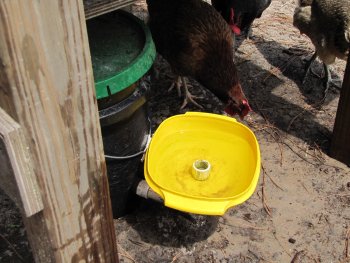
Seems to be working out, the other watering device is right there. All dirty as usual. They have been drinking out of the other one for almost a year now. I tried to put the new automatic watering system in a position where they cannot poop in it.

Business as Usual


Added a lid and we are now on a path to better living. This project was well worth the effort. I had many ideas and PVC seems to bring it together. PVC also helps it to be servicable. A cup or other contraption could have been caulked in place, but that can never be cleaned without turning it all upside down. I have an idea for a tee handle to be put on the threaded coupler inside the cup so it can be removed easier. After a few days it did not want to come off.
Link to the next Automatic Chicken Watering System article with several weeks of use.

Make a T-handle for the main cup