Top 20 Most Popular Power Banks on Amazon.com

Anker PowerCore+ mini 3350mAh Lipstick-Sized Portable Charger

#1 selling power bank on Amazon.com
Anker PowerCore+ mini 3350mAh Lipstick-Sized Portable Charger

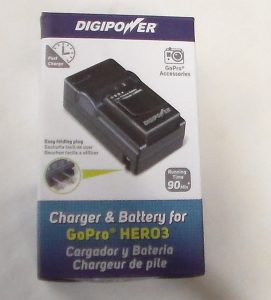
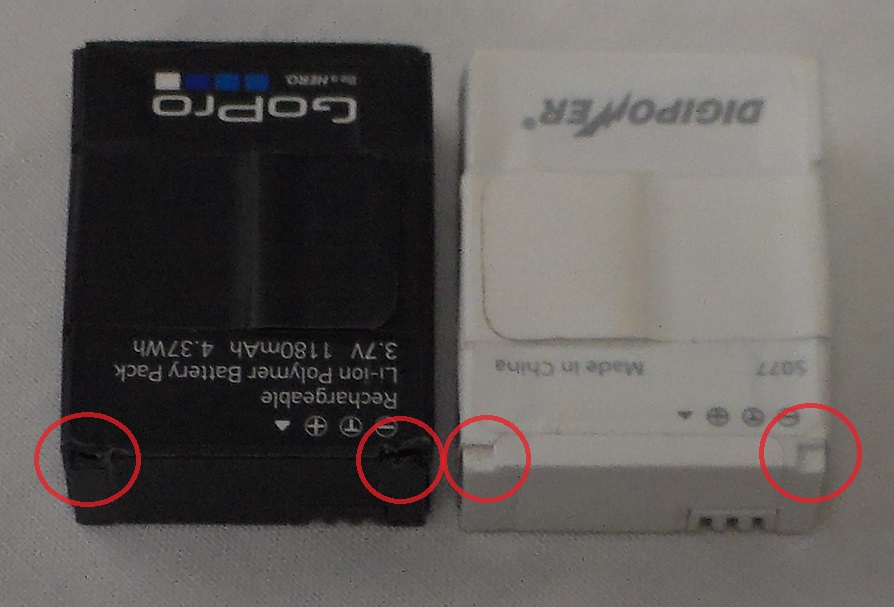
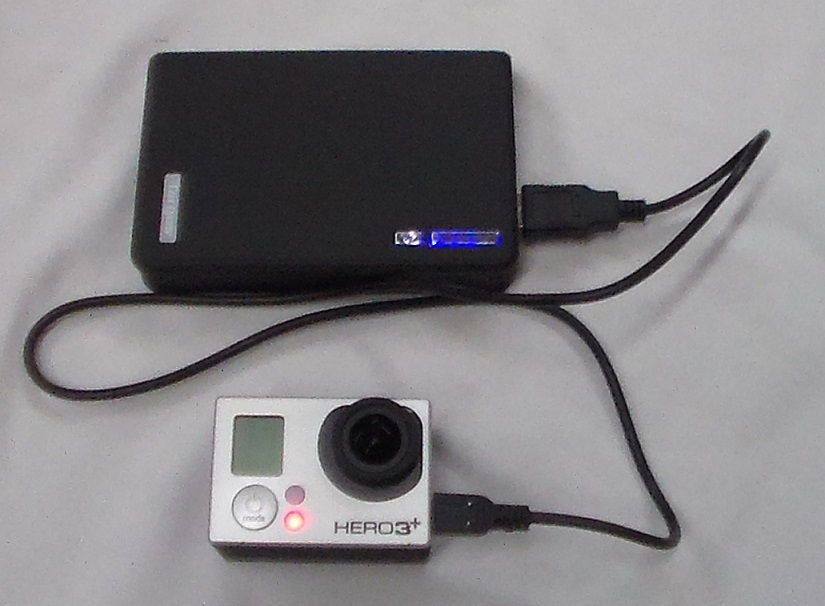
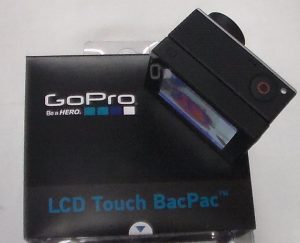
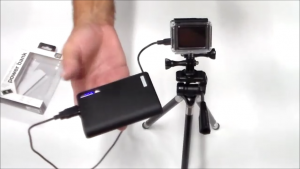
I have used power banks for several different things over the last couple of years. Keeping my cell phone charged on busy talk days is one of them. Another is powering my GoPro. I like to do time lapse videos and the battery won’t last all the way through, so I use the power bank to help with it. I can also plug the GoPro into a 110v house power supply, but it is easier to use a power bank. Digital cameras can also be charged with a power bank. If the unit has a USB port to charge, then the power bank should be able to keep it going.

Power banks are small and can be stored in a purse or a pocket. Some power banks are actually a phone case and become part of the phone. Versatility of power banks allows you to charge more than one item that you own. Some power banks have multiple ports and allow you to charge more than one item at a time. Some even have 3 USB ports.

Here are the top 20 best selling power banks on Amazon.com as of August 20th, 2016. As you are scrolling through, pay attention to the mAh as that is how much “time” the power bank will last, depending on what you are charging. More mAh means more time/energy stored in the power bank. The way I have this set up is a list of 4 full product names with Links to the Amazon.com product page. Then 4 image ads with the pricing, and again linked to the Amazon.com product page.

1 – Anker PowerCore+ mini 3350mAh Lipstick-Sized Portable Charger (3rd Generation, Premium Aluminum Power Bank) One of the Most Compact External Batteries, Uses High-Quality Panasonic Cells
PowerCore+ mini Portable Charger: A charging station in the palm of your hand.
Exclusive to Anker, PowerIQ amp-adjustment technology intelligently identifies your device to deliver its fastest possible charge.
High Capacity: Add over a full charge to an iPhone 6, almost one full charge to your Galaxy S6 or at least one full charge to most other smartphones.
Same Size, More Power: The original lipstick tube design. Now upgraded with higher density cells and efficiency 10% above most other brands to give you 6% more power.
Superior Quality:We use industrial grade materials and premium circuitry to ensure superior performance, reliability and safety.
What You Get: Anker PowerCore+ mini (3350mAh Premium Aluminum Portable Charger), Micro USB cable, travel pouch, welcome guide, our fan-favorite 18-month warranty and friendly customer service.Lightning cable for iPhone / iPad sold separately.
2 – Anker Astro E1 5200mAh Candy bar-Sized Ultra Compact Portable Charger (External Battery Power Bank) with High-Speed Charging PowerIQ Technology (White)
Astro E1 Portable Charger ?External Battery Power Bank
Charge your phone on the go.
From ANKER, America’s Leading USB Charging Brand
• Faster and safer charging with our advanced technology
• 10 million+ happy users and counting
PowerIQ
Detects your device. Delivers the fastest charge.
Exclusive to Anker, PowerIQ amp-adjustment technology intelligently identifies your device to deliver its fastest possible charge.
High Capacity
Charge your Apple or Android smartphone one to two times while on the move. You can even charge an iPad mini to about 80%!
Incredibly Compact
This thing is remarkably small. About the same size as a small candy bar, you simply will not find a more portable powerpack.
Superior Quality
We use only premium battery cells, together with the most advanced materials and cutting-edge technology, to ensure complete safety.
World Famous Warranty
At Anker, we believe in our products. That’s why we back them all with an 18-month warranty and provide friendly, easy-to-reach support.
For Optimal Use:
• Use your original cable or a third-party certified one (such as MFi).
• Compatible with the new 12 inch MacBook, 2015 (USB-C cable needed) Apple and Android smartphones, tablets (including the Nexus 7) and other USB-charged devices except for the iPod nano, iPod Classic, HP TouchPad, Dell Venue 11 Pro, Asus tablets and some GPS and Bluetooth devices.
3 – Anker PowerCore 10000 Portable Charger, One of the Smallest and Lightest 10000mAh External Battery, 10000mAh Ultra-Compact Fast-Charging-Technology Power Bank for iPhone, Samsung Galaxy and More
The Anker Advantage: Join the 10 million+ powered by our leading technology.
Remarkably Compact: The smallest and lightest 10000mAh portable charger. Provides almost three-and-a-half iPhone 6s charges or three Galaxy S6 charges.
High-speed-Charging Technology: Anker’s exclusive PowerIQ and VoltageBoost combine to deliver the fastest possible charge for any device. Qualcomm Quick Charge not supported.
Certified Safe: Anker’s MultiProtect safety system ensures complete protection for you and your devices.
What You Get: Anker PowerCore 10000 portable charger, Micro USB cable, travel pouch, welcome guide, our worry-free 18-month warranty and friendly customer service. Lightning cable for iPhone / iPad sold separately
4 – Anker 20000mAh Portable Charger PowerCore 20100 – Ultra High Capacity Power Bank with 4.8A Output, PowerIQ Technology for iPhone, iPad & Samsung Galaxy & More – Black
The Anker Advantage: Join the 10 million+ powered by our leading technology.
High-speed Technology: PowerIQ and VoltageBoost combine to deliver the fastest possible charge(does not support Qualcomm Quick Charge). Recharges itself in 10 hours with a 2 amp charger, phone chargers (generally 1 amp) may take up to 20 hours.
Fast Charging Technology: PowerIQ and VoltageBoost combine to deliver the fastest possible charge (does not support Qualcomm Quick Charge). Recharges itself in *10 hours with a 2 amp charger, phone chargers (generally 1 amp) may take up to 20 hours.
Certified Safe: Anker’s MultiProtect safety system ensures complete protection for you and your devices.
What You Get: Anker PowerCore 20100 Portable Charger, Micro USB cable, travel pouch, welcome guide, our fan-favorite 18-month warranty and friendly customer service. Lightning cable for iPhone / iPad sold separately.

5 – Anker PowerCore 5000 Portable Charger, Ultra-Compact External Battery with Fast-Charging Technology, Power Bank for iPhone, iPad, Samsung Galaxy and more
The Anker Advantage: Join the 10 million+ powered by America’s leading USB charging brand.
High Capacity: Contains 5000 mAh of power. Enough to provide two charges to an iPhone 6s or at least one to a Galaxy S7.
Ultra-Compact: Remarkably small, tubular design slides easily next to your phone in any pocket or bag. Just 10cm tall and 3cm wide.
Fast Charging: Equipped with exclusive PowerIQ technology, it provides the fastest charge to any phone or tablet (up to 2A).
What You Get: PowerCore 5000, travel pouch, Micro-USB cable, welcome guide, our worry-free 18-month warranty and friendly customer service.
6 – Portable Charger RAVPower 22000mAh 5.8A Output 3-Port Power Bank External Battery Pack (2.4A Input, Triple iSmart 2.0 USB Ports, High-density Li-polymer Battery) For Phones Tablets and More – Black
HIGHEST OUTPUT FOR 3 CHARGING DEVICES: 3 USB ports for a total current output of 5.8A (2.4A max per port). The Power Bank can charge two iPads and one iPhone 6s at once at their optimal charging speed with the iSmart 2.0 technology.
WEEKLONG 22000mAh: Charge your iPhone 6s up to 9 times, a Galaxy S7 up to 5 times, or an iPad Mini more than 3 times with a massive 22000mAh capacity. Save up to 60% of charging time with 5V / 2A or 5V / 2.4A ac adapter.
POWER EFFICIENT BATTERY: Invest in a high-density Li-polymer external battery pack that retains 70-80% of its capacity after 500 charge cycles. It’s the daily choice of Microsoft, Lenovo, Huawei, and Motorola.
NEW & IMPROVED iSMART 2.0: The new and improved iSmart 2.0 adjusts current and voltage to minimize charging time. Whereas, Panasonic Smart IC frequency technology provides a safer and higher current conversion of this portable charger.
EXCELLENT QUALITY IN & OUT: On the outside, a UL94 V-0 fire-resistant shell used by Mercedes-Benz, BMW, and others for their luxury cars. On the inside, the same battery and the same quality control as the iPhone. WHAT’S IN THE BOX: RAVPower Ace Series 22000mAh External Battery Pack, Micro-USB Charging Cables (X2), Carry Pouch, User Guide and ★ LIFETIME Warranty Card ★
7 – Portable Charger RAVPower 16750mAh External Battery Pack + 2A Wall Charger (iSmart Technology, Dual USB 5V / 4.5A Output, Upgraded Capacity) Black
2A CHARGER INCLUDED: Recharge to full capacity in 10 hour with RAVPower 2A USB charging adapter included (worth $8.99 in retail)
POWERFUL & STABILIZED 4.5A OUTPUT: Highest output in the market, featuring a 4.5A total output capable of simultaneously charging 2 tablets, making it faster and more powerful than the rest.
EXCLUSIVE ISMART TECHNOLOGY: Charge faster and smarter than others, automatically detects and delivers the optimal charging current for any connected device- ensuring the fastest and most efficient charge.
HUGE CAPACITY: 16750mAh charges an iPhone 6 almost 6 times, a Galaxy S6 almost 4 times or an iPad Air once. Safely recharges with a 2 amp or higher output charger (most phone chargers have only 1 amp).
SAFETY PROTECTION: Ultra reliable A+ Lithium-Ion battery with over 500 battery charge cycles; Security protection design: short-circuit and over-current protection. This portable power bank will automatic shutdown if a short circuit or overload output occurred while unit is charging.
8 – KMASHI 10000mAh External Battery Power Bank, Portable Charger Backup Pack For iPhone 6s 6 Plus and more
10000mAh Power Bank :Smooth varnish allows you to power up in style, while 4 status LEDs keep you informed of remaining capacity.
Ultra-high density battery cells make this compact 10000mAh external battery. Use a 5V adapter (not included) for fastest charging.
Super-fast charge output through dual USB ports (5V / 2.1A and 5V / 1A) allow for simultaneous charging of your iPad, iPhone, Android, and more at high speed.Input: 5V/ 2A.About 6.5 hours fast charging.
Intelligent power manage IC, overcharge protection, short circuit protection.With such massive capacity, in such a compact package,perfect for flights, road trips or just any time you’re away from an outlet.
Package includes: 10000mAh 2A input Fast Charger External Battery,1 Micro USB charger cable(iPhone/Samsung Galaxy S5 Note 3 cable not included),1 user manual.
 
9 – Anker PowerCore 13000 Portable Charger – Compact 13000mAh 2-Port Ultra Portable Phone Charger Power Bank with PowerIQ and VoltageBoost Technology for iPhone, iPad, Samsung Galaxy (White)
The Anker Advantage: Join the 10 million+ powered by our leading technology.
Upgraded Capacity: The successor to PowerCore 10400-identical compact size but packed with even more power. Charges an iPhone 6s 5 times, a Galaxy S6 3.5 times or an iPad Air 2 once.
Light and Compact: A super-high 13000 mAh capacity with two fast-charging USB ports is all contained in a portable charger smaller than a wallet.
Fast Charging Technology: PowerIQ and VoltageBoost combine to deliver a max speed charge to any device (up to 3A – Qualcomm Quick Charge not supported). Input: 5V / 2A.
What You Get: Anker PowerCore 13000 Portable Charger, Micro USB cable, travel pouch, welcome guide, our worry-free 18-month warranty and friendly customer service.
10 – EasyAcc Monster 20000mAh Power Bank (4A Dual-Input Fastest Charge 4.8A Smart Output) External Battery Pack Charger Portable Charger for Android iPhone Samsung HTC – Black and Orange
20000mAh High Capacity: Charge an iPhone 6 7.5 times, a Samsung S6 5 times or an iPad Mini 3 2 times.
Life Saver: Unique 4A Dual ports input (charger adapter not included), can be superfast recharged in 6 hours, reduce the recharging time up to 50% than usual 20000mah battery.
Fast Charging: 4.8A Output with 4 USB Ports. Auto detects and changes its charging speed unique to your device for fastest charging speed up to 2.4A (2 times faster than a computer USB port). Charging 4 devices simultaneously.
Safety Protection: Effectively prevents your devices from overcharge, overcurrent and short circuits as well as conform to CE, RoHS, and FCC.
Just One Enough On-the-Go. The Top Rated Power Bank. Outstanding customer service provides 18 months warranty.
11 – KMASHI 15000mAh External Battery Power Bank, Portable Charger with Powerful Dual USB Output and 2A Input
15000mAh Power bank Monster capacity (15000mAh) 2A input significantly shortens charging time for your iPhone with ultra high capacity Lithium battery charging two mobile devices conveniently
Super-fast charge output through dual USB ports (5V / 2A and 5V / 1A) allows for simultaneous charging of your iPad, iPhone, Android, and more at high speed.
Smooth, classical black design allows you to power up in style, while 4 status LEDs keep you informed of remaining capacity.
Very Practical Charger: Perfect for indoor or outdoor activities like travel, camping or hiking, emergencies, commuters and families.
Package contents: 1*Kmashi 15000mAh External Battery, 1*Micro USB cable(iPhone/Samsung Galaxy S5 Note 3 cable not included),1*instruction manual,1 year warranty.
12 – [USB-C Type-C Input Qualcomm QC 2.0] Jackery Giant S Premium 12000mAh Dual USB External Battery Pack, Power Bank for iPhone, iPad, Galaxy, Android, and More (Orange)
QUICK CHARGE 2.0: Charges compatible devices up to 75% faster. Get up to 8 hours phone usage from just 15 minutes charging! Perfect for Galaxy S6 / Note 4 / Edge, LG G4, Nexus 6, HTC M9 and more.
USB TYPE C: World’s first external battery charger with USB-C input technology, support 3A fast recharge to Jackery Giant S, only take 4 hours to recharge Jackery
BATTERY PACK: Ultra high-capacity portable charger with dual USB ports of rechargeable battery power for simultaneous charging of your iPad, iPhone, Android devices.
POWERFUL PORTABLE CHARGER: Panasonic grade A Li-ion polymer cell and premium microchips create high-quality portable charger with 4 layers of smart safety protection circuit and lasts 500+ recharge cycles over the life of the battery.
EXTERNAL BATTERY: External battery package includes: Jackery Giant S External Battery, premium USB to USB-C cable.
   
13 – [Upgraded Capacity] Anker Astro E7 Ultra-High Capacity 26800mAh 3-Port 4A Compact Portable Charger External Battery Power Bank with PowerIQ Technology and Premium Panasonic Battery Cells
The Anker Advantage: Join the 10 million+ powered by our leading technology.
Exclusive PowerIQ Technology: Detects your device to deliver its fastest possible charge speed up to 3 amps per port or 4 amps through three ports.
Giant Capacity: Charges the iPhone 6 ten times, the iPhone 6 Plus or Galaxy S6 over six times or the iPad Air twice. Safely recharges with a 2 amp or higher output charger (please note most phone chargers only have 1 amp).
Superior Quality: Premium cells, cutting-edge circuitry and a sturdy gloss exterior ensure reliability and safety. To activate the LED flashlight, hold or double click the power meter button.
What You Get: Anker Astro E7 Portable Charger External Battery Power Bank, Micro USB cable, travel pouch, welcome guide, our fan-favorite 18-month warranty and friendly customer service.
14 – EC Technology Portable Charger 22400mAh External Battery Pack, High Speed Power Bank with 3 USB Output for iPhone 6 6S Samsung iPad – Black and Red
2nd Gen 22400mAh External Battery with higher efficiency rate delivers its fastest possible current. Portable size at 6.2 x 3.1 x 0.8 inch, 0.99lb.
Rapid input charging: DC 5V 2A input (2A charger not included), twice as fast as normal 5V 1A input power banks, saving 50% of your time.
4 Integrated LED indicators show Power status. Built-in 3-modes LED flashlight makes it easier in the dark: SOS/bright/average modes.
Constructed with lithium-ion battery cells and built-in microchips to ensure safety use and long lifespan. 500+ recharge cycles over the life of the battery, after 24 months still maintains unrivaled performance.
3 USB charging Port (2.4A for iPad, 2A for Samsung Tab, 1A for iPhone) for charging 3 devices simultaneously. 3 USB ports are compatible with almost all smart devices with an input of DC 5V.
15 – Jackery Bar Premium 6000 mAh External Battery Charger – Portable Charger and Power Bank with Panasonic Battery Cells and Aluminum Shell for iPhone, iPad, Galaxy & Other Smart Devices (Sliver)
TRAVEL BATTERY CHARGER: Perfect portable travel charger for long flights, road trips, or whenever you need to charge your iPhone, iPad, and other smart devices.
SMARTPHONES & TABLETS: Battery charger and power bank adds 2-3 full charges to your iPhone and 1-2 full charges to Samsung Galaxy.
COMPACT PORTABLE CHARGER: External battery travel charger is stylish and compact to easily fit into your bag to provide instant power to smartphones and tablets.
ADVANCED TECHNOLOGY: High-capacity battery pack and portable phone charger with 6000mAh battery capacity for iPhones, iPads, and Android devices.
POWERFUL BATTERY PACK: Panasonic grade A Li-ion polymer cell and premium microchips combined into a premium aluminum case to create a high-quality and powerful portable battery charger.
16 – Polanfo M20000 10000mAh External Battery Power Bank for Smartphone & Tablets – Gold
Polymer cell with Aluminum alloy shell, there is no other design more safer than this. Buy it now! 18 months warranty, address your worries for the future.
You won’t like a brick-like power bank. Even if you put it in your bag, what if it crumple the file? But our power bank, the deluxe metal body is only 0.5 inch at its thickest point; slim as your phone, you can put it into your pocket easily.
If the charging speed is as slow as a sloth, you may want to drop your cell phone; luckily Polanfo provides 2.1 amp output, to full charge your phone within 1.5 hour.
It must be a burden to carry a heavy power bank!! However Polanfo only weighs 7.2oz, lighter than 90% other power banks in the market.
If you are calling your family, your mobile phone has run out of power, how distressed it is! Polanfo can charge your phone 5 times, providing extra 48 hours of talk times.
   
17 – Anker Astro E3 Ultra Compact 10000mAh Portable Charger (2nd Gerneration, Classic External Battery Power Bank) Slim with PowerIQ Technology Black
The Anker Advantage: Join the 10 million+ powered by our leading technology.
Exclusive PowerIQ Technology: Detects your device to deliver its fastest possible charge speed up to 3 amps.
Ultra-High Capacity: Charges the iPad Air almost once, the Galaxy S5 two and a half times, the iPhone 5s four and a half times and other smartphones multiple times.
Most Compact: Slim, sleek, smartphone-like design featuring a 4-LED power meter. Recharges in 6 hours with a 2 amp adapter (not included) and the included Micro USB cable.
What You Get: Anker Astro E3 Portable Charger External Battery Power Bank, Micro USB cable, travel pouch, welcome guide, our fan-favorite 18-month warranty and friendly customer service. Lightning cable for iPhone / iPad sold separately.
18 – [26800mah Huge Capacity + Powerful 5.5A Output] RAVPower Portable Charger 3-Port External Battery Pack with iSmart 2.0 Technology Power Bank for iPhone, iPad, Galaxy, Tablet and More – Black
MIND-BOGGING CAPACITY: 26800mAh of pure energy – charge an iPhone 6 Plus or Galaxy S6 over six times or an iPhone 6 ten whole times.
5.5A HIGHEST OUTPUT CHARGING: Three USB ports with a combined 5.5A output means you can swiftly and simultaneously charge three devices at once. Plug in and instantly charge – no buttons or on-switch required
RAPID INPUT CHARGING: DC 5V 2A input (2A charger not included), twice as fast as normal 5V 1A input power banks, saving 50% of your time
NEW & IMPROVED iSMART 2.0: The new and improved iSmart 2.0 adjusts current and voltage to minimize charging time. Whereas, Panasonic Smart IC frequency technology provides a safer and higher current conversion.
SAFETY PROTECTION: Ultra reliable A+ Lithium-Ion battery with over 500 battery charge cycles; security protection design: short-circuit and over-current protection. The battery pack will automatic shutdown if a short circuit or overload output occurs while unit is charging
19 – PowerCore 10000 with Quick Charge 3.0, Anker’s First Qualcomm Quick Charge 3.0 Portable Charger, Backwards Compatible with All Versions of Qualcomm Quick Charge, For Samsung, iPhone, iPad and more
The Anker Advantage: Join the 10 million+ powered by America’s leading USB charging brand.
Quick Charge 3.0: Up to 4x faster than standard chargers, able to charge compatible devices to 80% in just 35 minutes. Backwards compatible with all versions of Qualcomm Quick Charge.
High Capacity: Enough capacity to charge most phones at least three times and most tablets at least once (10000mAh).
Remarkably Compact: Much smaller than other high-capacity portable chargers. No other charger packs this many recharges at such high speed into such a small space.
What You Get: PowerCore 10000 with Quick Charge 3.0, travel pouch, Micro-USB cable, welcome guide, our worry-free 18-month warranty and friendly customer service.
20 – iMuto 20000mAh Compact Portable Charger External Battery Power Bank with Smart LED Digital Display and Quick Charge for iPhone 6 6S Plus 5S, iPad, Samsung Galaxy, Smart Phones and Tablets (Black)
20000mAh Capacity and Compact Size: Taurus X4 is smaller than iPhone 6 Plus, and charge iPhone 6 almost 8 times, iPad Air almost 1.7 times, Galaxy S6 almost 5.7 times, Galaxy Note 4 almost 4.8 times. For New Macbook, please buy another USB to Type-c Cable, X4 can charge New Macbook almost 1.2 times.
Smart Power Technology: Both USB ports detect your device intelligently and deliver the faster charge. 2USB ports (2.1A & 1A) charge 2 devices at the same time.
Smart Digital Screen shows remaining power in digital format, and it’s hidden until activated. Taurus X4 fits for almost all USB-powered devices. With built-in LED flashlight.
Multiple Smart Protection System: keeps your devices safe from over-charging, over-voltage, over-current, and short circuit.
What You Get: Taurus X4 Portable Battery External Battery Power Bank, Micro USB cable, Travel waterproof pouch, User guide(Back of outer paper), our 24-month warranty and friendly customer service.
 

If all else fails here is a link to the list of Best Selling Power Banks

GoPro 30 Pin Connector

GoPro 30-pin power cable I found a 30PIN POWER CABLE WITH WATERPROOF BACK DOOR HOUSING FOR GOPRO HERO3+&HERO4. The KAPAXEN product is no longer available with the waterproof back door. It is available without the backdoor and just the 30 pin Power Supply Connector.  The cord is the same and will power it the same.

I have a KAPAXEN 30 Pin Power Supply Connector with waterproof backdoor for my GoPro 3+ and GoPro 4 that I use all the time. I have the one that is through the back and waterproof. The  The USB connection is not completely waterproof, but can be protected to be outside. I have just not tried to put it under water. I have had it out in the rain with an extension cord cover and it worked great. I do time lapse photography with my GoPros and it will sometimes be plugged in for several days at a time and outside in the weather.


Same GoPro 30 Pin Connector without the back door. This will still come into play but may need to be modified to be waterproof. Click on either image to see it at Amazon.com

Top 20 Best Selling Power Banks on Amazon.com

This link is to a list of the best selling power banks on Amazon.com. Make sure and look at the mAh value as the higher the mAh the longer it will last.

You can use the 30PIN POWER CABLE WITH WATERPROOF BACK DOOR HOUSING FOR GOPRO HERO3+&HERO4 in conjunction with a power bank. Using a power bank will drastically increase the situations that you can extend your battery time. Getting the GoPro 30 pin connector with waterproof back door will extend your ability to leave the gopro oustide or even submerge the gopro under water.

GoPro Hero 4 Time Lapse Video – Night Sky Moonrise

GoPro Hero 4 Night Lapse

GoPro Hero 4 Night Lapse

I was testing the Night Lapse function of my new GoPro Hero 4 and I was really impressed with my first time lapse of the night sky. The moon ended up rising out of the east halfway through the night. Many shooting stars were visible, as well as a few constellations. There was something that left a trail, either through the clouds or on its own. It may have been a jet, but it is undetermined. I can see some possibilities with this setting and will continue to experiment. The GoPro Hero 3+ only had a Time Lapse setting. I am still going to now test the GoPro Hero 3+ at night. With the Night Lapse setting, the shutter speed has many different settings. This video was with a 5 second shutter speed and shot at 30 second intervals.

I uploaded a video on Facebook and I didn’t think it did the night lapse justice. So I thought YouTube might be a bit better. You should be able to see the constellation Orion a few inches under the moon. Just above and to the right of the moon, Taurus. Then I think Venus is rising just as daylight approaches. There may be more constellations visible. Press the bottom right button to view fullscreen.


Top 20 Best Selling Power Banks on Amazon.com

This link is to a list of the best selling power banks on Amazon.com. Make sure and look at the mAh value as the higher the mAh the longer it will last.

You can use the 30PIN POWER CABLE WITH WATERPROOF BACK DOOR HOUSING FOR GOPRO HERO3+&HERO4 in conjunction with a power bank. Using a power bank will drastically increase the situations that you can extend your battery time. Getting the GoPro 30 pin connector with waterproof back door will extend your ability to leave the gopro oustide or even submerge the gopro under water.

Creating Time Lapse Video with GoPro Studio

Wow! I stumbled on the GoPro Studio recently and it is definitely better for processing the Time Lapse images from my GoPro camera than Windows Movie Maker is. Even though it still wants to crash, at least it doesn’t crash until after I have created and exported the finished video. Movie Maker won’t even let me get through a session of creating shorts to eventually put together. More on that later, right now I am going to “Walk Through” creating a finished Time Lapse video in GoPro Studio.

GoPro Studio Convert ScreenThis is free software provided by GoPro. So after you have downloaded it here – DOWNLOAD GOPRO STUDIO PAGE – and opened it up, this is where we will start.

To summarize what we are doing, we are going to import the images that the GoPro created into the GoPro Studio. Then convert these imports into mini-videos. Then these mini-videos will be put together, along with title, and possibly effects, to create one video of the entire time lapse project.

Converting The Time Lapse images into Mini-videos

1 – At the bottom, towards the center, there is a SAVE TO: and path. This is where the conversions are going. Put them where you want them, or notate where the default path is.

Customize Advanced Settings

2 – Advanced Settings

2 – Now just to the left of this is ADVANCED SETTINGS – click this window. This is going to determine the conversion, so check the list and make sure this is what you want. The frame rate is where you are going to set how “fast” the time lapse is going to go. I set mine for .07 seconds per frame, which equates to about 15 frames per second. Then I save as AVI (as I am PC) and I check REMEMBER SETTINGS. If you are going to do different things to different sets of images, then leave the REMEMBER SETTINGS box unchecked and then add to conversion list one at a time.

3 – Now would be a good time to go ahead and save your project. This will insure that you can continue where you leave off.

4 – Import all the images into the GoPro Studio for converting into video files. Each “set” of images will be converted to a separate file. If you have created more than 1,000 images on your GoPro, then they will be in individual folders. Start with the first folder and select all (or choose the first one, then while pressing the SHIFT key, choose the last one). You can select the files by pressing the “IMPORT NEW FILES +” button on the left side, or by dragging them into the left column under that same button.

5 – Continue adding files to the left column until you have them all stacked up in there. If you want, just go ahead and press “ADD SELECTED TO CONVERSION LIST” one at a time as you import.

6 – If you want each file to have custom settings: Click your image set, change advanced settings, add a custom file name if desired, then click the ADD SELECTED TO CONVERSION LIST, each time.

6 – Otherwise select the first set, then scroll down and while holding the SHIFT key, select the last set. Now press the “ADD THE SELECTED TO CONVERSION LIST”.

7 – OK, at this point nothing has happened. You can remove clips from the conversion list, or start over. You can select each set and then click “CONVERSION DETAILS” to make sure that each one is the way you want it.

8 – Press the button labeled “CONVERT ALL” at the bottom right side, now take a break, if there are a few sets of images this may take a while. I did 9,000 images in 10 sets and it took around 2 hours to convert to AVI.

Now to Create a Go Pro Time Lapse Video

1 – Once all the conversions are complete the button on the bottom right will now say “PROCEED TO STEP 2”. Click it.

Choose the Blank Template Option

2 – Blank Template

2 – A pop-up window will appear with selections of templates. Start with a blank template. This will allow you to customize to your liking and the other templates can be accessed later when there is nothing loaded up. Now the editing window should be up.

3 – So all of the mini-video files should be loaded up on the left. Choose one at a time, or all (by clicking on the first one, hold SHIFT, and click the last one. Now drag and drop them to the timeline at the bottom center of the screen. Next to the video camera icon it says DRAG VIDEO HERE.

GoPro Studio EDIT Screen4 – A title screen can be made by pressing on the TITLE button at the top on the left.  On the right hand side towards the top is the TITLE PROPERTIES. Customize the title.

5 – now back on the left there is a Title along with the other videos that are now in the timeline. If you want this in the beginning as an opening drag the title to the beginning of the timeline and wait until the line (cursor) is in front of the first frame. If you want the title over your video then drag it to a place under the time line where it says DRAG TITLE HERE. You will have to move it to where you want it then adjust the length of time.

6 – Now you are ready to EXPORT – at the very top next to STEP 2 EDIT is STEP 3 EXPORT – Click it.

GoPro Studio Export Settings7 – I usually will leave it on the first setting YOUTUBE, but you can choose whatever you want. It will tell you the size of the frame and also how much memory it takes.

8 – Then click EXPORT and it will bring up a window for you to name the file and choose the directory.

GoPro Studio Exporting Video

Here we go!

A power bank may be useful in creating time lapse videos with your GoPro

Top 20 Best Selling Power Banks on Amazon.com

This link is to a list of the best selling power banks on Amazon.com. Make sure and look at the mAh value as the higher the mAh the longer it will last.

You can use the 30PIN POWER CABLE WITH WATERPROOF BACK DOOR HOUSING FOR GOPRO HERO3+&HERO4 in conjunction with a power bank. Using a power bank will drastically increase the situations that you can extend your battery time. Getting the GoPro 30 pin connector with waterproof back door will extend your ability to leave the gopro oustide or even submerge the gopro under water.

GoPro Battery Life – Extended Forever and Waterproof

First thing, this is not a charger. I have tested this product to charge and it does so, minimally. It is for constant power. The usb connection on the side of the Go Pro unit is for charging.
GoPro 30-pin power cable The 30PIN POWER CABLE WITH WATERPROOF BACK DOOR HOUSING FOR GOPRO HERO3+&HERO4 will extend your gopro battery life forever, if needed, and is waterproof. I stumbled on this product a while back and have been using it successfully for a while now. This is a wired option, but is solid. There are a few pitfalls that I will warn you about, but otherwise I really like this product. This product is compatible with GoPro Hero 3+ and Hero 4. I have successfully completed several projects with it. The 30-pin power cable is great for extended time lapse projects.

I have another post where I went on about batteries and power packs, which only last 8-12 hours or so. Of course, you can continue to switch out the power packs, but waterproof is still an issue. Go Pro Battery – Battery Extender


Features of the 30-pin Power Cable for GoPro Hero

1 – It is waterproof. This is the best part. The one downside is the 6′ cable where there is a USB connection. This, of course, is NOT waterproof. So this means that the GoPro unit can be placed underwater for a few feet without problems. I would suspect that the cord can be cut and a new wire be soldered or connected somehow to be waterproof, but I am not going this direction yet. This setup works fine, and I can deal with rain. I place a plant pot on the ground, then place my connection on top of it, then place a 5-gallon bucket over this. Then the connection is not on the ground and is covered. I have also found a connection cover, that is not waterproof, but will withstand the rain and being wet. It just won’t go underwater.

2- Unlimited run time. Once plugged in, it is ongoing. I have successfully done a 3-1/2 day time lapse so far, but that is the longest that I have done it. I would think that in a reasonable scenario, barring any extreme weather, that it would last as long as it had power and memory.

3 – The GoPro back door will work with my existing accessories.

4 – I have the option of 12v power, 110v power, power banks, and even plugged in to a PC. Of course, some options are as limited as they have capacity.

Pitfalls of the 30-pin Power Cable for GoPro Hero

1 – When you close the back door, the cable has a small box, which has to fit inside of the waterproof back door. This will make the cable inside the waterproof back door have to curve around to fit. There are two structural bands of plastic that run from the back of the waterproof back door towards the gopro unit itself. Make sure the cable is not in front of this. It will want to push it out into the seal, and may create a situation where the waterproof back door is not waterproof. If you are going to completely submerge the unit in water then this will come into play. If it is just getting rained on, then it may not be a problem. I found out about this the hard way.

2 – Plugging and unplugging, and withholding power may confuse it and will turn off in the middle of your project. I have had this happen. Once the 30-pin cable is plugged in, it changes the behavior of the unit. It is not like the USB plug where you can just plug and unplug and it will use the battery once it is without external power. Test, test, test.

3 – I have also had better luck with a power cord out to the project, then an adapter to plug in the USB of the 30-pin Power Cable directly to power. I am not sure why, but it seems to get to the finish line, without fail, more consistently.


Here is a link to the exact same 30-pin Power Cable without the waterproof backdoor:

Top 20 Best Selling Power Banks on Amazon.com

This link is to a list of the best selling power banks on Amazon.com. Make sure and look at the mAh value as the higher the mAh the longer it will last.

You can use the 30PIN POWER CABLE WITH WATERPROOF BACK DOOR HOUSING FOR GOPRO HERO3+&HERO4 in conjunction with a power bank. Using a power bank will drastically increase the situations that you can extend your battery time. Getting the GoPro 30 pin connector with waterproof back door will extend your ability to leave the gopro oustide or even submerge the gopro under water.

Go Pro Time Lapse – How to Process in Windows Movie Maker

1 - 4 : Add your Go Pro Time Lapse files to Windows Movie Maker.

1 – 4 : Add your Go Pro Time Lapse files to Windows Movie Maker.

1 – Once you have Windows Movie Maker open, find where all your Go Pro images are that you are wanting to process into a time lapse movie.

2 – Get your photos or images into the Movie Maker editor. Click ADD PHOTOS, or click in the square to the right of the preview where it says “Click here to browse for videos and photos”, or simply drag and drop your images into the movie maker editor. I always choose all that I want to do at one time, click the first one, then Hold <shift> and click the last one, then by clicking on the first one again to drag into the editor. I always try to click on the first one when dragging to make sure and keep them in order. I have had them get out of order before, and I believe that was the cause. The other two methods I do think this same practice applies.

———This would be a good time to make sure your Time Lapse images are in order. Just hover over the Time Lapse images and see what the file names are. If they are from your Go Pro, the Time Lapse images should be in consecutive order with their respective file names. If they are not, you can “cut and paste” just don’t do it quick.

Let the Time Lapse images load before you go any further.

Once the images are added – Let them load before moving any further.

3 – I only take 200 images at a time and make a movie with them. At 720 medium, the images are 4MB each and that is 800MB of data.

4 – If there are labels on your images, refer to this post to remove. There are two methods.

Change the duration of each image.

Change the duration of each image. This will create a FPS.

5 – Once the photos are in Windows Movie Maker, don’t click on anything, as all the images are selected currently. Also, wait for the images at the top to load. There are usually a few images that are blank, once all the images load, then these will show their thumbnails. Now choose the EDIT tab, (the edit tab will show up after you have photos or videos in the editor), change the duration of each image to your preference. This may depend on your time lapse project, I use .07 often, but have sped up or slowed down depending on what I am making a Time Lapse Movie of. Start with .07 and then you can play with it once you go through this walk-through. Then I usually scroll through the images to make sure that they are all loaded and processed before moving on.

6 – If you did click and now only have one image selected, simply go up to the first image and select it, then scroll down to the last image and hold down the shift key while selecting it. Now you should have all the images selected.

Save the Time Lapse Movie

Save the Time Lapse Movie – Short Time Lapse Movie

7 – Now save the movie in a folder of your choosing. Top left drop down arrow, select Save Movie —-> then (I usually choose) Recommended for this project (you can try some different settings, and I believe there are some custom settings somewhere. Now your browse window should pop up, navigate to the folder and name the file. In this scenario, I make sure that I am in the correct folder then I name the files with numbers, 1,2,3. This will come in handy in a few steps. Also choose MP4 or Windows Media File. I use Windows Media File, but you may want the MP4 setting. Movie Maker will read either.

Save it again if you get an error message

If you get an error message like this one or one that says there is not enough memory – try saving it again

——If you get an error message – try to just save it again the same way. I don’t know why, but this is what it does. I stumbled across this one day, after I had tried everything. Then I scaled down to 200 images and it seemed to cooperate after that.

Start a New Windows Movie Maker Project

Start a new Windows Movie Maker project.

8 – Now that this phase is complete, it is time to move on to the next set of 200 images. Again, upper left drop down, choose New Project. It will ask if you want to save, I usually don’t when I am in between like this, but you can if you want.

Put all the Time Lapse shorts into one project

Put all the Time Lapse shorts together into one WIndows Movie Maker project

9 – Repeat the process 1-8 until you have all of your Go Pro Time Lapse images processed. Continue saving your Time Lapse movies in consecutive numbers so you can retrieve later.

Make a Go Pro Time Lapse movie

Add title, music, captions, credits, etc.

10 – Now, choose New Project again to clear the editing board. Now Add Files or refer to step 2 and pull in your newly created mini-movie Time Lapse movies. Hover your mouse over them and make sure they are in order.

11 – Add a title, add captions, add music, add credits, etc. then go through step 8 again, except this time, name the Go Pro Time Lapse movie something that represents the video instead of a number. This is the file you would upload to YouTube or Facebook.

Your Go Pro Time Lapse Movie is finished - Save it.

Your Go Pro Time Lapse movie is finished. Save it.

Good Luck and comment with any suggestions or experiences you have had with processing Go Pro Time Lapse images in Windows Movie Maker.


This post was more about the sensitivity of Windows Movie Maker with the large amount of files, than a how to create a time lapse. Pay special attention to the details as I have figured out how to get past some of the more challenging ones.

A power bank may be useful in creating time lapse videos with your GoPro

Top 20 Best Selling Power Banks on Amazon.com

This link is to a list of the best selling power banks on Amazon.com. Make sure and look at the mAh value as the higher the mAh the longer it will last.

You can use the 30PIN POWER CABLE WITH WATERPROOF BACK DOOR HOUSING FOR GOPRO HERO3+&HERO4 in conjunction with a power bank. Using a power bank will drastically increase the situations that you can extend your battery time. Getting the GoPro 30 pin connector with waterproof back door will extend your ability to leave the gopro oustide or even submerge the gopro under water.

GoPro Battery – Battery Extender

GoPro on a Power Bank

GoPro on a Power Bank

To get more out of your GoPro battery you can use a power bank. A power bank is typically used to charge your cell phone in a mobile setting, without the need to find an outlet. A power bank can be used to charge your GoPro camera as a stand alone charger. The power bank can also be used to power the GoPro unit and extend the single use life of the battery by 4 or more times.

GoPro Skeleton Housing

GoPro Skeleton Housing

Using the skeleton housing, you can use a myriad of the GoPro accessories available. The skeleton housing allows the charging cable to be plugged in to the side and still be in a housing. The skeleton housing is not waterproof. It is the one downside. It sure beats drilling a hole in the standard housing.

The Power Bank that I am using is the Targus 5500 mah. This unit will charge the GoPro battery in 1 1/2 hours versus 2 hours for the PC. A normal battery will last around 2 hours and 20 minutes shooting a 30 second interval time lapse. Using a fully charged GoPro battery and plugging in the power bank the same time lapse will go for just under 12 hours. This is great, because time lapse projects usually take more than 2 hours. This means that I can set up a time lapse project and not have to rely on 110v power. There may even be bigger power banks out there.

These and other GoPro Products recommended by Project Bolony

Top 20 Best Selling Power Banks on Amazon.com

This link is to a list of the best selling power banks on Amazon.com. Make sure and look at the mAh value as the higher the mAh the longer it will last.

You can use the 30PIN POWER CABLE WITH WATERPROOF BACK DOOR HOUSING FOR GOPRO HERO3+&HERO4 in conjunction with a power bank. Using a power bank will drastically increase the situations that you can extend your battery time. Getting the GoPro 30 pin connector with waterproof back door will extend your ability to leave the gopro oustide or even submerge the gopro under water.

GoPro Battery Life – More Charging Options

The GoPro battery life can be extended with some of these methods. Charging the GoPro camera is sometimes a challenge, especially when you are wanting to be using it while the battery is charging.

DigiPower GoPro Charger

DigiPower GoPro Charger

DigiPower GoPro Charger

GoPro Batteries Notched

GoPro Batteries Notched

So now with the DigiPower charger you can be charging a GoPro battery and using the GoPro unit at the same time separately. The charger package I got also came with a battery, so I was able to alternate. The only problem was that the DigiPower battery had 2 notches in the top that snapped into the charger and the GoPro brand batteries do not have notches. I was able to take a razor blade and cut just enough of the plastic out on the GoPro brand batteries and they work and charge fine. So after a little time keeping, this charger takes 4 hours and 20 minutes to fully charge the GoPro brand battery.

Charging GoPro with PC

It only takes 2 hours and 3-5 minutes to charge the GoPro battery using the GoPro unit plugged in to a PC USB port. The one thing with charging this way is that the GoPro camera cannot be used while charging. I wanted to keep like items so I did not test the DigiPower brand battery, but I will update soon with this info.

110v Charger and 12v Charger

Using these charging methods are good, takes about 2 hours and 20 minutes. This is just a little longer than if it is connected to a PC. These charging methods can also be used to power the GoPro camera unit.

Power Bank – Cell Phone Charger

Power Bank GoPro Charging

Power Bank GoPro Charging

What is better than that? Using a power bank, specifically the Targus 5200 mah. This will charge the batteries while in the unit, as well as power the GoPro camera if you turn it on while charging. It only takes 1 hour and 33 minutes to charge the GoPro camera with the power bank. Fully charged the power bank will charge the GoPro battery 3 full times. I have used this method to prolong some of my time lapse projects. It turns a 2 1/2 hour battery into an 11 hour battery. The only thing that I lose is the ability to go underwater. I don’t do any underwater time lapse, so I’m good.

If you are using the power bank option, you can keep going by just switching out the power banks and the GoPro camera will not turn off during the process, unless you drain the power bank and battery completely. This can drastically increase the GoPro battery life and mobility.

Takes about 8 1/2 hours to fully charge the power bank.

GoPro Accessory – Skeleton Housing

The skeleton housing can be used in all these scenarios. Using an extension cord or even a USB extension can widen the range significantly.

GoPro Skeleton Housing

GoPro Skeleton Housing

Top 20 Best Selling Power Banks on Amazon.com

This link is to a list of the best selling power banks on Amazon.com. Make sure and look at the mAh value as the higher the mAh the longer it will last.

You can use the 30PIN POWER CABLE WITH WATERPROOF BACK DOOR HOUSING FOR GOPRO HERO3+&HERO4 in conjunction with a power bank. Using a power bank will drastically increase the situations that you can extend your battery time. Getting the GoPro 30 pin connector with waterproof back door will extend your ability to leave the gopro oustide or even submerge the gopro under water.

GoPro Battery Life

Charging the GoPro Hero 3+

The GoPro Hero 3+ with the charging light on.

The rechargeable battery that comes with the GoPro Hero 3+ will last a while, but has to be monitored to make sure that the camera is still on when the action comes. During some recent testing I found that the standard battery lasts for 2 hours and 10 minutes shooting video and 2 hours and 25 minutes shooting a time lapse on 30 second intervals. So that means that the GoPro batteries have to be changed out (assuming you have more than one) if your action is lasting more than the 2:10 time span.

I found that the batteries cost around $20 purchased separate from the GoPro unit. This is the GoPro brand battery too. You can also buy an off-brand charger so you did not have to use the GoPro unit as the charger. You can only use the GoPro camera while charging if it is plugged in to a non PC USB outlet. I posted info on this method here:  http://www.tagnaples.com/gopro-battery-alternative-power/.

Does the LCD Touch BacPac use more battery life?

GoPro LCD Touch BacPac

GoPro LCD Touch BacPac

YES! Using the LCD Touch BacPac definitely decreases the time the battery will last. A normal battery without using the LCD Touch BacPac shooting video lasts around 2 hours and 10 minutes. Attaching the LCD Touch BacPac decreases the time by 40 or more minutes. So the video will only shoot for 1 hour and 30 minutes, give or take a few minutes. The same goes for time lapse, but the time lapse shoot lasts a little longer than the video. So from now on, unless I need to see what I am shooting, I will not be using the LCD Touch BacPac. The LCD Touch BacPac sure is nice though, being able to see exactly where the frame is.

Does using the WiFi Remote Control use more battery life?

GoPro WiFi Remote

GoPro WiFi Remote

The answer is yes, but it is not enough to worry about. I did some extensive testing while shooting video. The WiFi remote only takes a few minutes off of the GoPro battery life.

What will kill the battery after you turn the GoPro off, is when you don’t turn off the wifi setting on the GoPro camera. Sometimes just turning off the WiFi Remote will do it, but if there is still a blue light blinking, that means that it is still searching for a wifi signal. I guess you can power on the unit with the remote and that is why it continues. If you throw the GoPro camera in your bag, the GoPro battery will surely be dead when you get ready to use it if the wifi setting is still on.

Top 20 Best Selling Power Banks on Amazon.com

This link is to a list of the best selling power banks on Amazon.com. Make sure and look at the mAh value as the higher the mAh the longer it will last.

You can use the 30PIN POWER CABLE WITH WATERPROOF BACK DOOR HOUSING FOR GOPRO HERO3+&HERO4 in conjunction with a power bank. Using a power bank will drastically increase the situations that you can extend your battery time. Getting the GoPro 30 pin connector with waterproof back door will extend your ability to leave the gopro oustide or even submerge the gopro under water.

GoPro Battery – 3 Alternative Power Methods

GoPro Connected to PC

GoPro Connected to PC and turned on

I had noticed that my GoPro had turned off (ran out of battery power) while I was walking on a trail one day and realized that I needed to invest in some more batteries. This was good for a while, but then I started using the time lapse to shoot some plants and found that I needed another power option. As I was changing the batteries, trying to shoot time lapse, the GoPro would move just a little and mess up the frame. So a 6 hour time lapse would have severe movement of the subject 3 different times. I plugged the GoPro in to my pc and it started charging. I turned it on to see if it would power and the screen went to “USB CONNECTED CAMERA FILES ACCESSIBLE”, and only wanted to read it. The GoPro camera would not switch to any other mode from there. I knew there must be a way. So I thought, I need to find a “charging” source that can’t also read it. That is when I found out there is an alternative power source for my GoPro.

GoPro 110v Power

110v receptacle as viewed through GoPro

It is my understanding that the GoPro Battery BacPac will double your battery life. The following will do much more than that. The one upside that I can see with using the GoPro Battery BacPac is that it will be waterproof.

Gopro Alternative Power sources

Since the GoPro charging cord comes with a USB connection, there are several different methods of powering it. The pc or computer just wants to charge it, or read it. Other power sources will charge it and power it, at the same time.

GoPro in 12v Power

12v Car Adapter

110v – or house power. This can be a generator, an inverter, or even the receptacle at home. All you need is a USB charging device that will charge from 110v power outlet. I used a “Just Charge It” and it works fine.

GoPro on a Power Bank

GoPro on a Power Bank

12v – this is typically in the car, but can even be one of those jump start things for the car. Some of them have 12v receptacles. Now there are many types of 12v to USB converters. I use one from Duracell that will serve both 110v and 12v from the same unit. Works great.

A power bank – This device is typically to charge your phone when you are on the go. I have found that it will power the gopro for 3-4 times a normal battery life. A power bank works real well. It will charge the GoPro on its own, or it will provide extended power to it.

Skeleton Housing – Gopro Accessories

GoPro Skeleton Housing

GoPro Skeleton Housing

The skeleton housing allows for the ports to be accessible for plugging in power. It also will help to dissipate the heat better during extended use. The skeleton housing also allows the GoPro to be mounted in the typical GoPro fashion with many more of the GoPro accessories. This way you don’t have to use a zip-tie or rubber bands to get it in the right place for your shot. The only downside to using the skeleton housing for your GoPro camera is that it is not waterproof anymore. Not even the least bit. It is no different than not having a housing at all. I have taken some time lapse shots without the housing, but it is much easier to hold position through the shoot with the GoPro camera inside of a housing.

The unit I am using is GoPro Hero 3+ with an LCD Touch BacPac (provides a viewing screen on the unit)

I do not own, nor did I test the GoPro Battery BacPac. There is always tomorrow.

Top 20 Best Selling Power Banks on Amazon.com

This link is to a list of the best selling power banks on Amazon.com. Make sure and look at the mAh value as the higher the mAh the longer it will last.

You can use the 30PIN POWER CABLE WITH WATERPROOF BACK DOOR HOUSING FOR GOPRO HERO3+&HERO4 in conjunction with a power bank. Using a power bank will drastically increase the situations that you can extend your battery time. Getting the GoPro 30 pin connector with waterproof back door will extend your ability to leave the gopro oustide or even submerge the gopro under water.