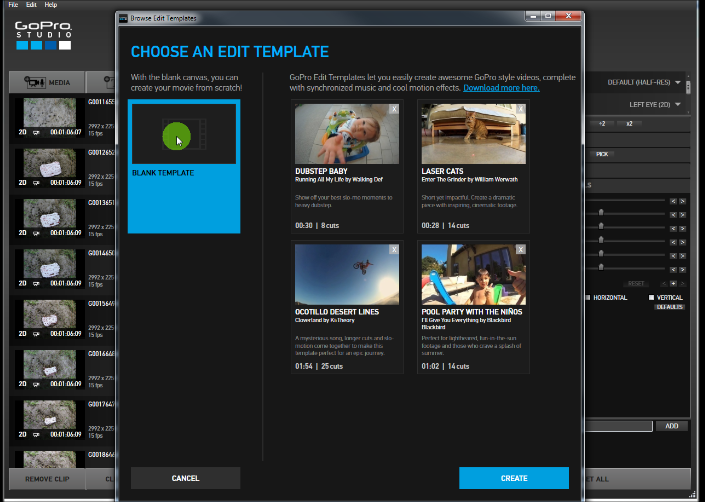
1 – 4 : Add your Go Pro Time Lapse files to Windows Movie Maker.
1 – Once you have Windows Movie Maker open, find where all your Go Pro images are that you are wanting to process into a time lapse movie.
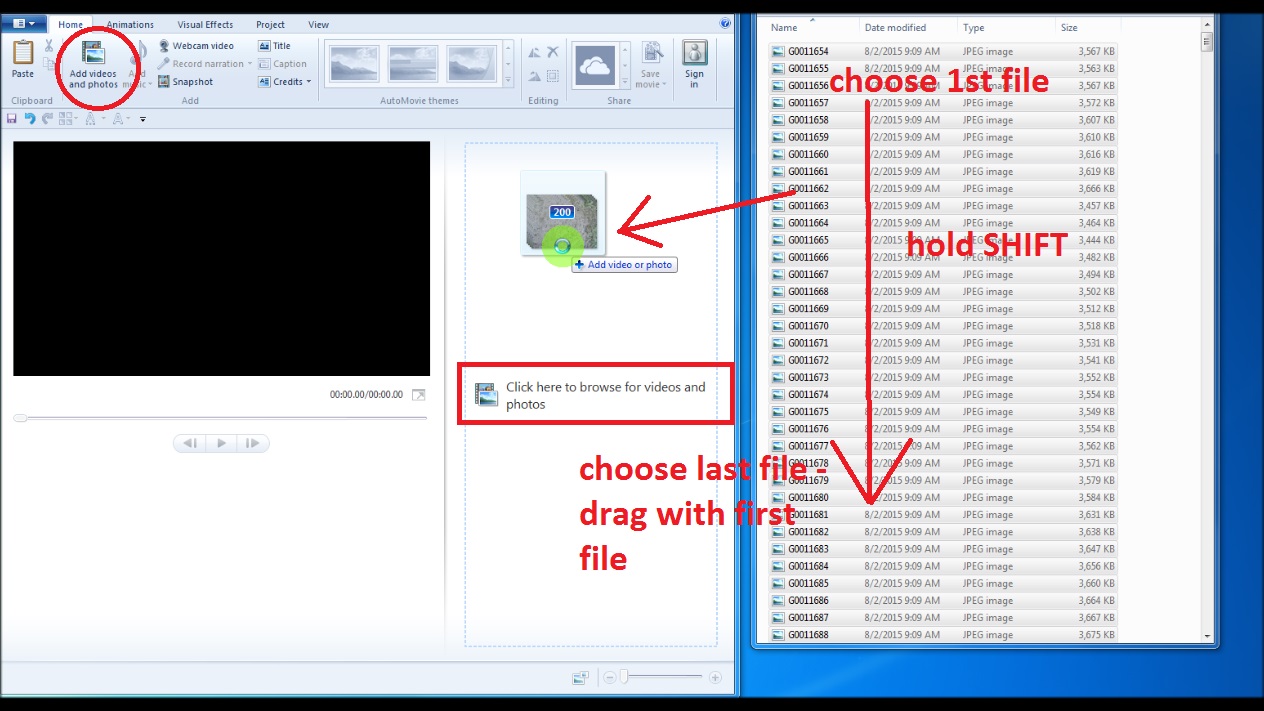
2 – Get your photos or images into the Movie Maker editor. Click ADD PHOTOS, or click in the square to the right of the preview where it says “Click here to browse for videos and photos”, or simply drag and drop your images into the movie maker editor. I always choose all that I want to do at one time, click the first one, then Hold <shift> and click the last one, then by clicking on the first one again to drag into the editor. I always try to click on the first one when dragging to make sure and keep them in order. I have had them get out of order before, and I believe that was the cause. The other two methods I do think this same practice applies.
———This would be a good time to make sure your Time Lapse images are in order. Just hover over the Time Lapse images and see what the file names are. If they are from your Go Pro, the Time Lapse images should be in consecutive order with their respective file names. If they are not, you can “cut and paste” just don’t do it quick.
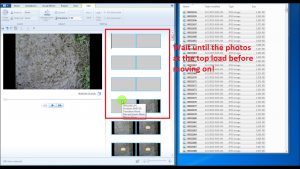
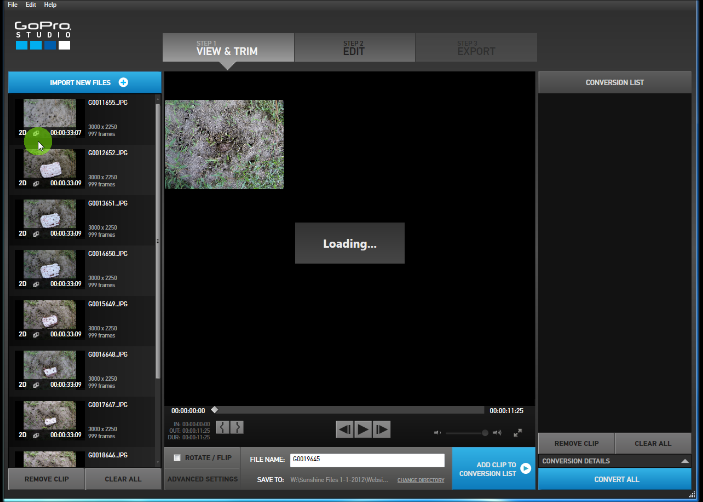
Once the images are added – Let them load before moving any further.
3 – I only take 200 images at a time and make a movie with them. At 720 medium, the images are 4MB each and that is 800MB of data.
4 – If there are labels on your images, refer to this post to remove. There are two methods.
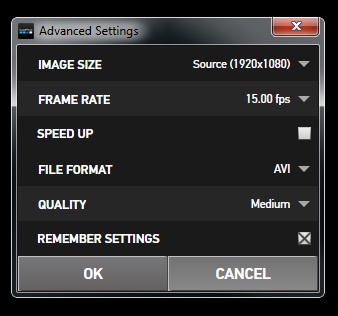
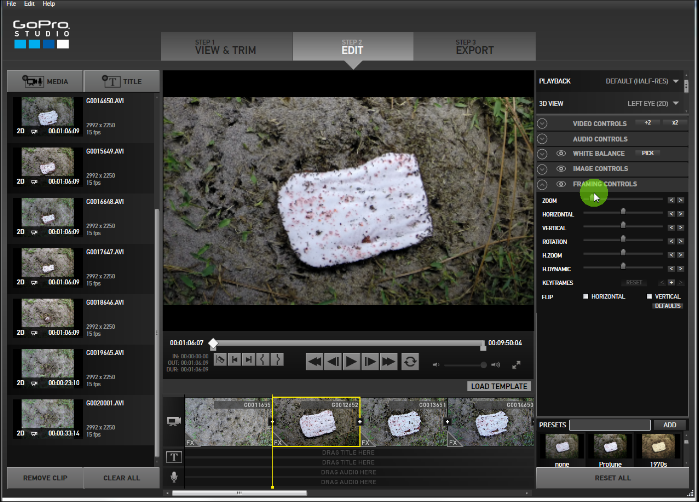
Change the duration of each image. This will create a FPS.
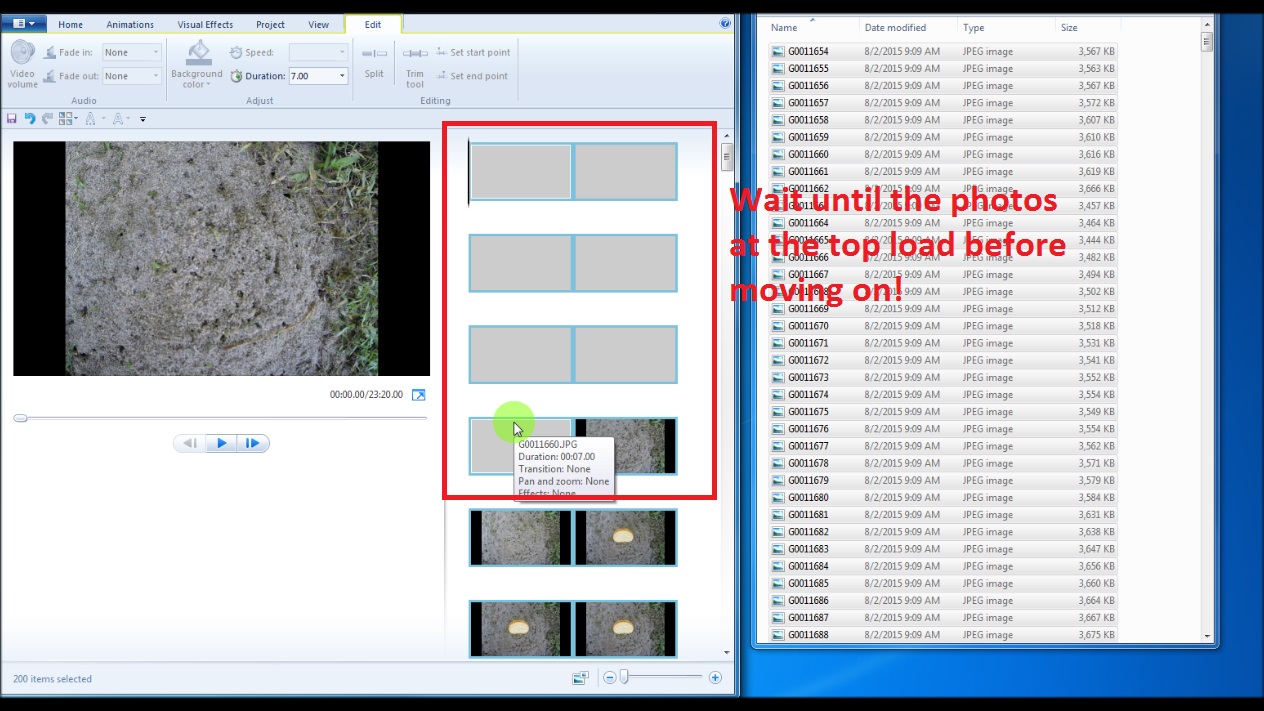
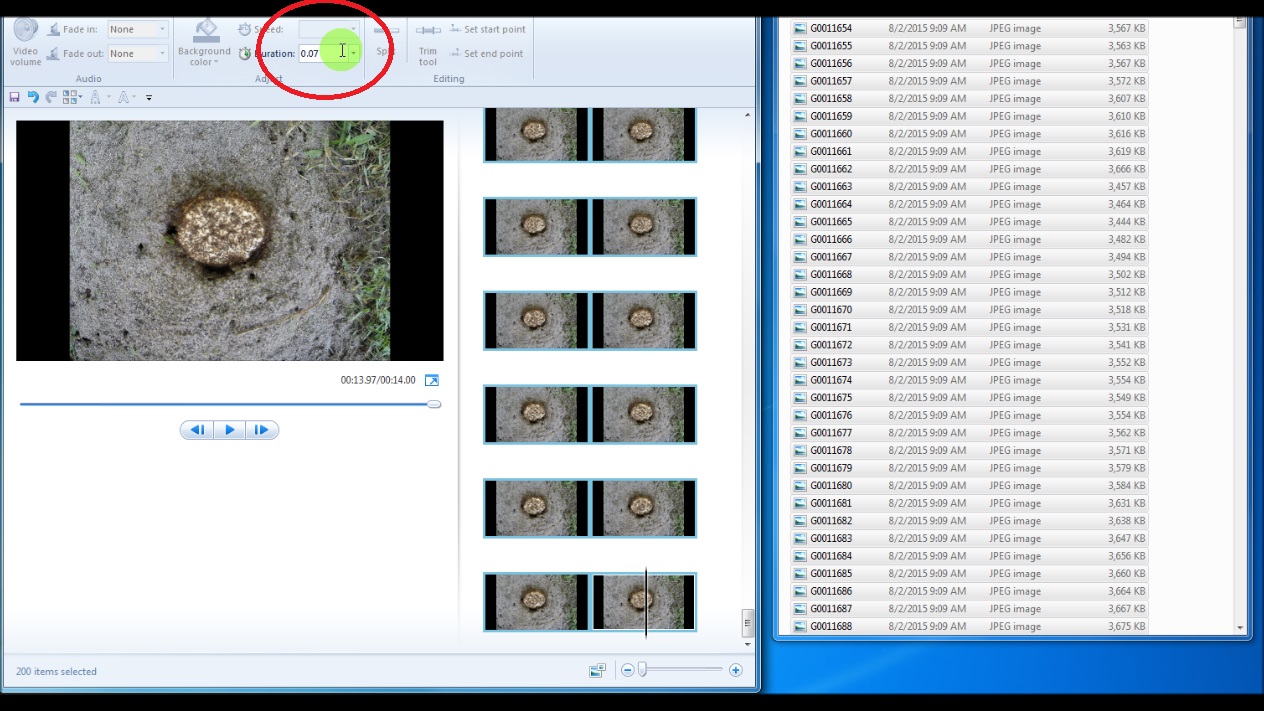
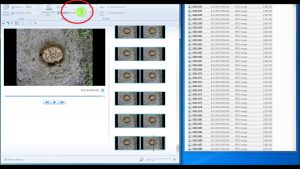
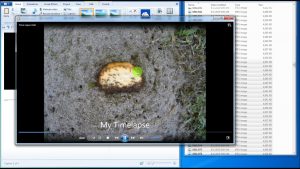
5 – Once the photos are in Windows Movie Maker, don’t click on anything, as all the images are selected currently. Also, wait for the images at the top to load. There are usually a few images that are blank, once all the images load, then these will show their thumbnails. Now choose the EDIT tab, (the edit tab will show up after you have photos or videos in the editor), change the duration of each image to your preference. This may depend on your time lapse project, I use .07 often, but have sped up or slowed down depending on what I am making a Time Lapse Movie of. Start with .07 and then you can play with it once you go through this walk-through. Then I usually scroll through the images to make sure that they are all loaded and processed before moving on.
6 – If you did click and now only have one image selected, simply go up to the first image and select it, then scroll down to the last image and hold down the shift key while selecting it. Now you should have all the images selected.
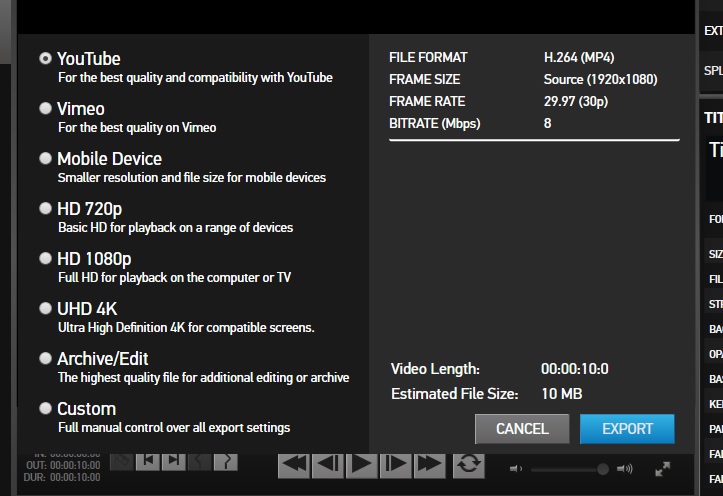
Save the Time Lapse Movie – Short Time Lapse Movie
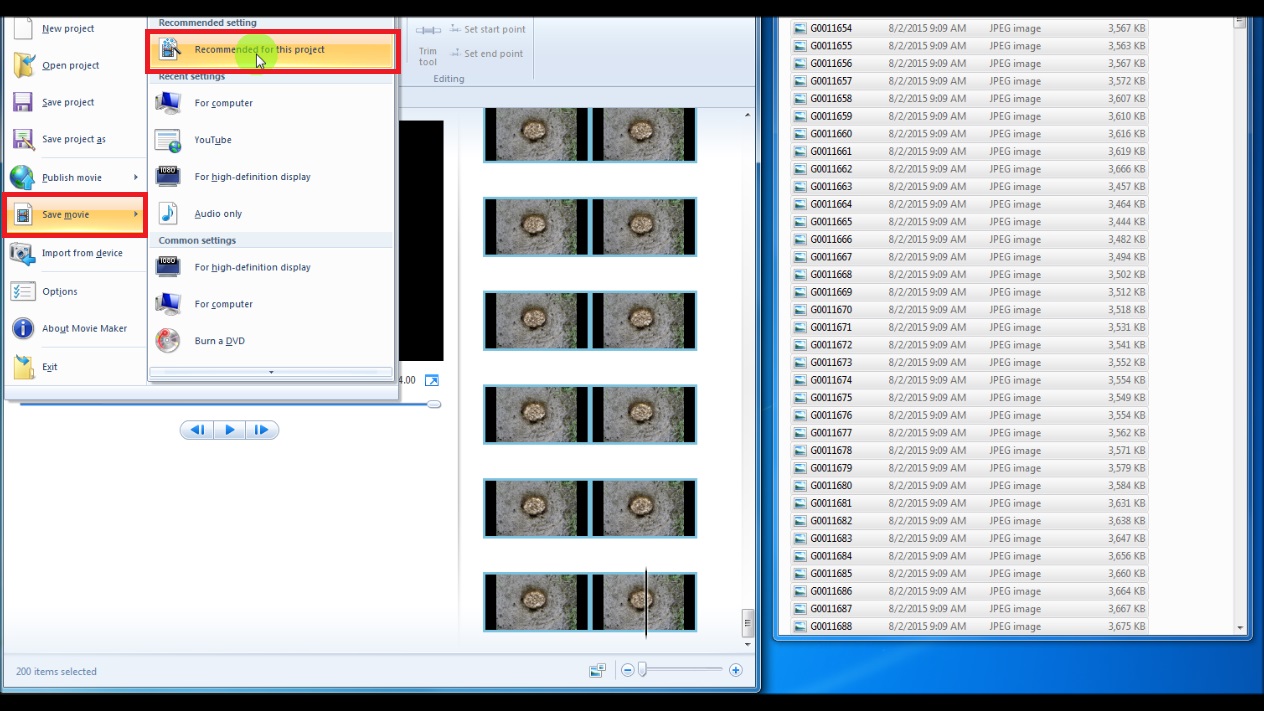
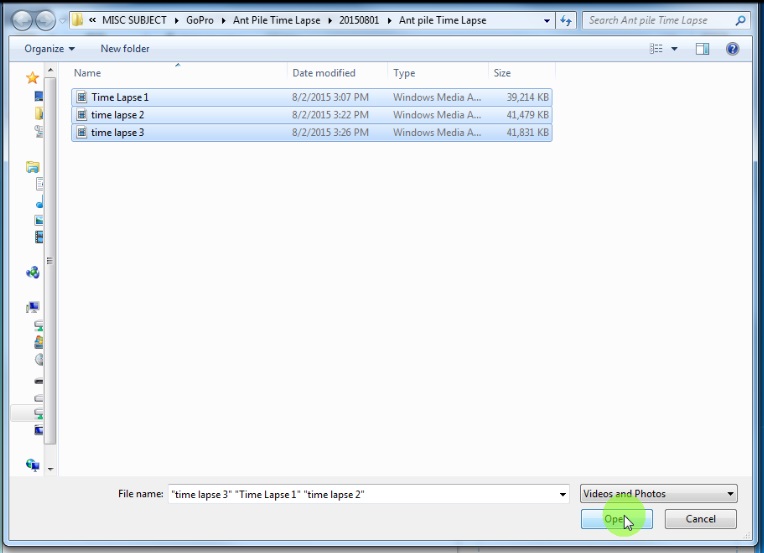
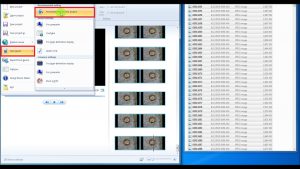
7 – Now save the movie in a folder of your choosing. Top left drop down arrow, select Save Movie —-> then (I usually choose) Recommended for this project (you can try some different settings, and I believe there are some custom settings somewhere. Now your browse window should pop up, navigate to the folder and name the file. In this scenario, I make sure that I am in the correct folder then I name the files with numbers, 1,2,3. This will come in handy in a few steps. Also choose MP4 or Windows Media File. I use Windows Media File, but you may want the MP4 setting. Movie Maker will read either.
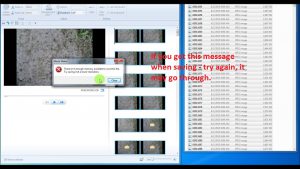
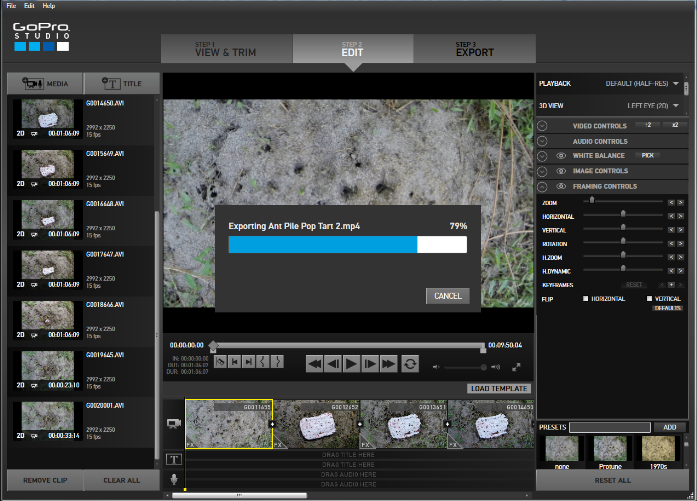
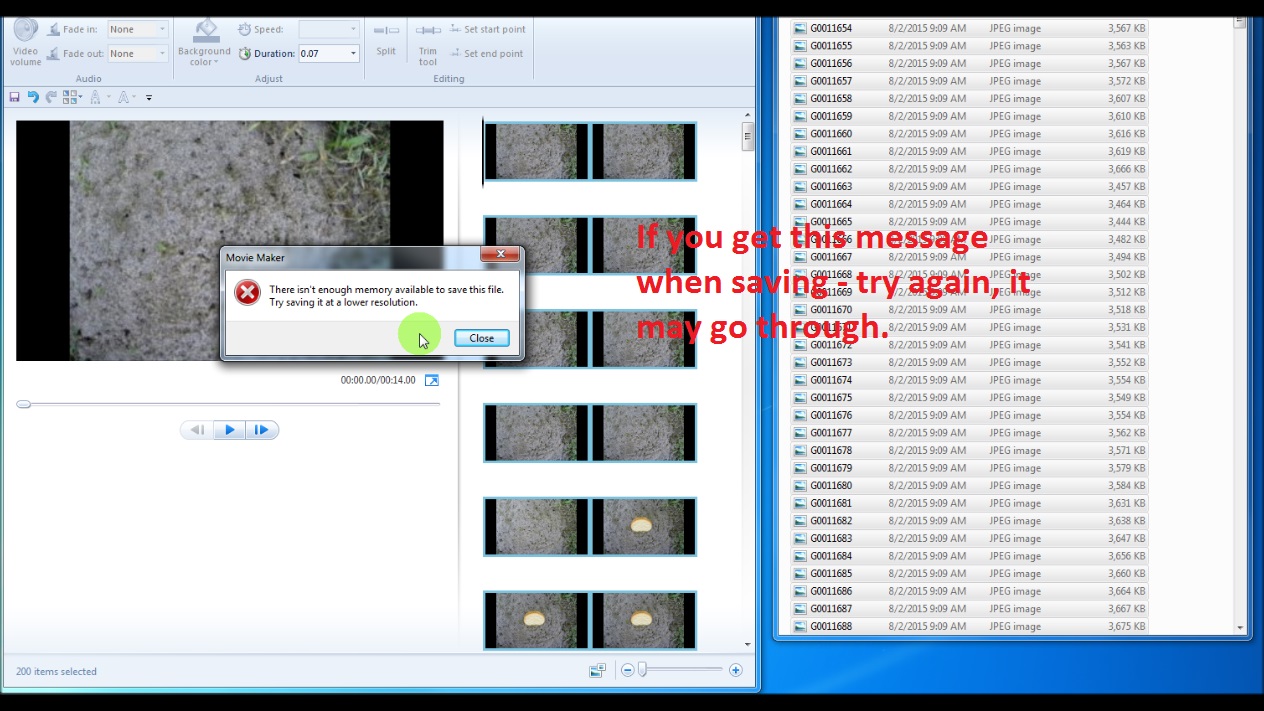
If you get an error message like this one or one that says there is not enough memory – try saving it again
——If you get an error message – try to just save it again the same way. I don’t know why, but this is what it does. I stumbled across this one day, after I had tried everything. Then I scaled down to 200 images and it seemed to cooperate after that.

Start a new Windows Movie Maker project.
8 – Now that this phase is complete, it is time to move on to the next set of 200 images. Again, upper left drop down, choose New Project. It will ask if you want to save, I usually don’t when I am in between like this, but you can if you want.

Put all the Time Lapse shorts together into one WIndows Movie Maker project
9 – Repeat the process 1-8 until you have all of your Go Pro Time Lapse images processed. Continue saving your Time Lapse movies in consecutive numbers so you can retrieve later.
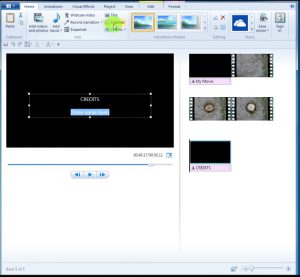
Add title, music, captions, credits, etc.
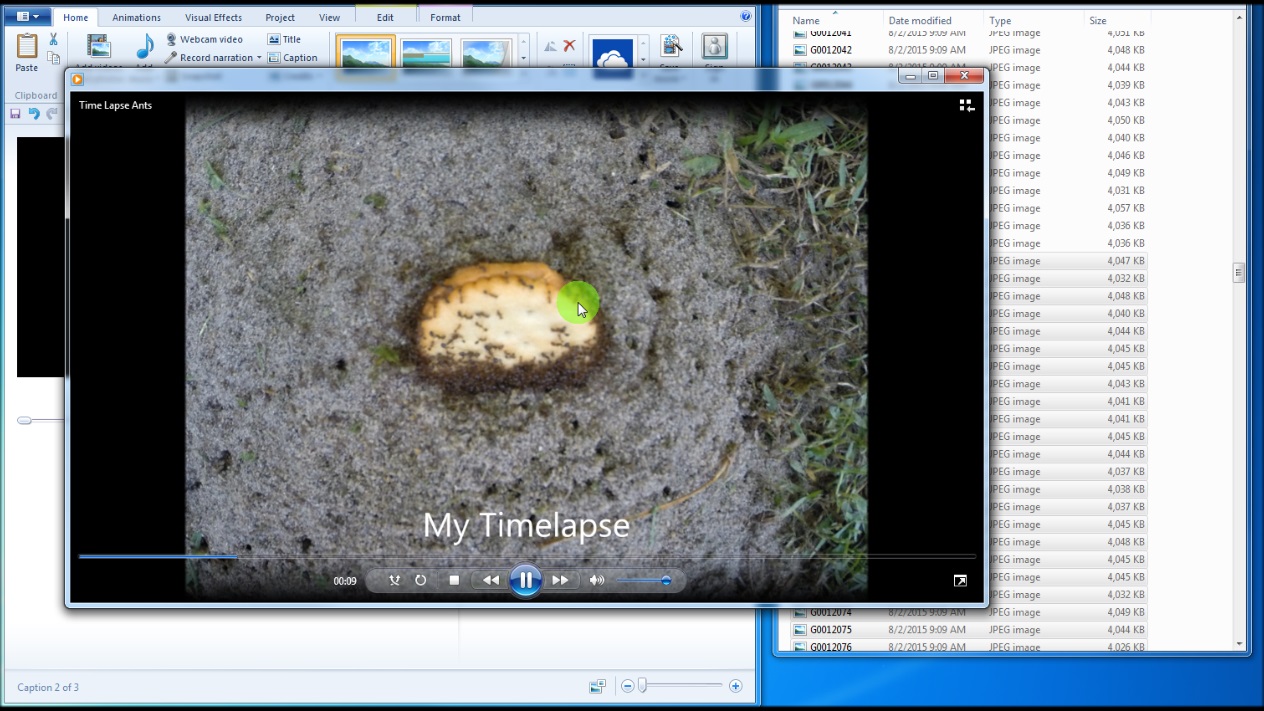
10 – Now, choose New Project again to clear the editing board. Now Add Files or refer to step 2 and pull in your newly created mini-movie Time Lapse movies. Hover your mouse over them and make sure they are in order.
11 – Add a title, add captions, add music, add credits, etc. then go through step 8 again, except this time, name the Go Pro Time Lapse movie something that represents the video instead of a number. This is the file you would upload to YouTube or Facebook.
Your Go Pro Time Lapse movie is finished. Save it.
Good Luck and comment with any suggestions or experiences you have had with processing Go Pro Time Lapse images in Windows Movie Maker.
This post was more about the sensitivity of Windows Movie Maker with the large amount of files, than a how to create a time lapse. Pay special attention to the details as I have figured out how to get past some of the more challenging ones.
A power bank may be useful in creating time lapse videos with your GoPro
This link is to a list of the best selling power banks on Amazon.com. Make sure and look at the mAh value as the higher the mAh the longer it will last.
You can use the 30PIN POWER CABLE WITH WATERPROOF BACK DOOR HOUSING FOR GOPRO HERO3+&HERO4 in conjunction with a power bank. Using a power bank will drastically increase the situations that you can extend your battery time. Getting the GoPro 30 pin connector with waterproof back door will extend your ability to leave the gopro oustide or even submerge the gopro under water.

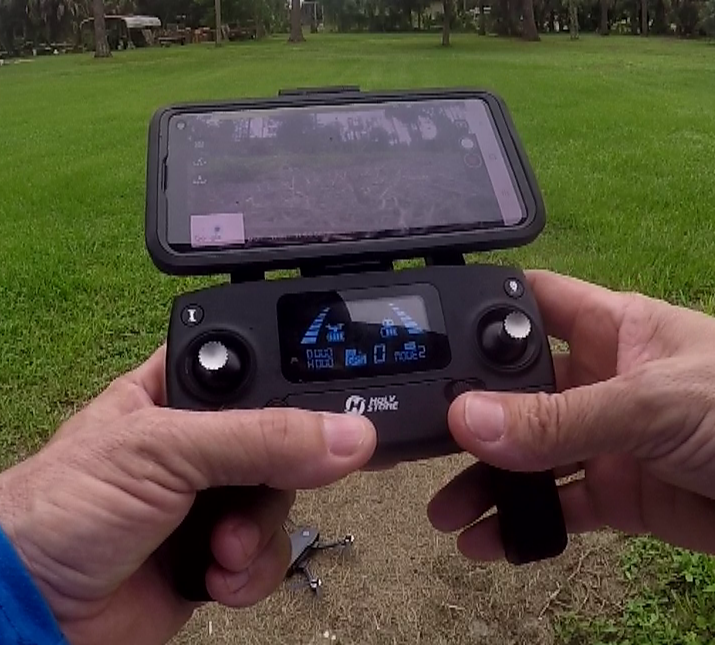
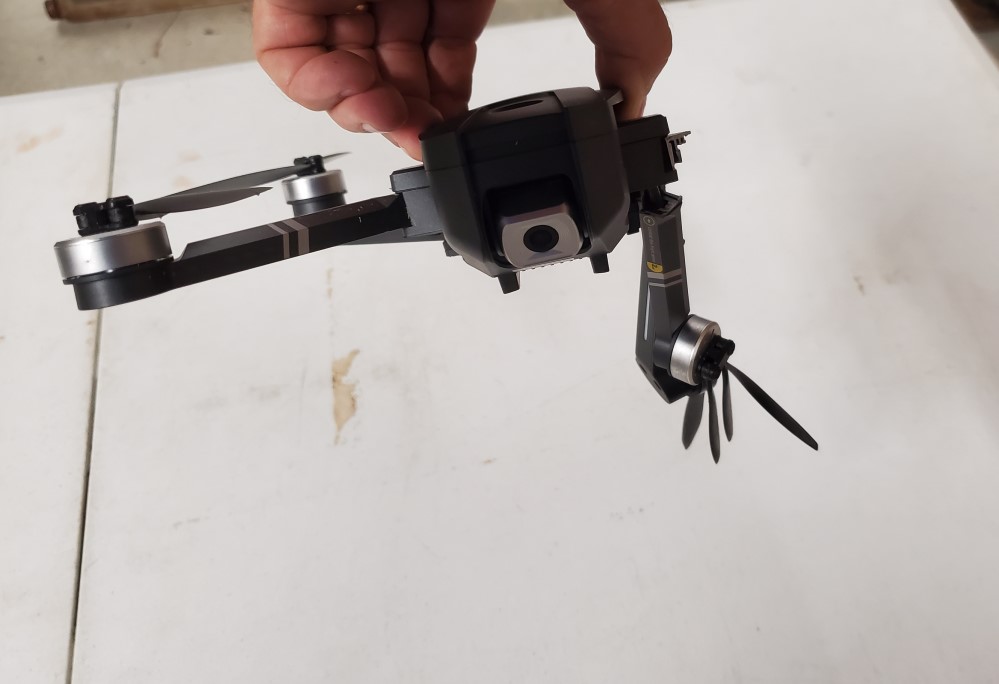 In just a split second my Holy Stone HS720-4K drone came crashing to the ground. Luckily, only 2 arms broke clean. I think I can fix it. The Holy Stone HS720-4K
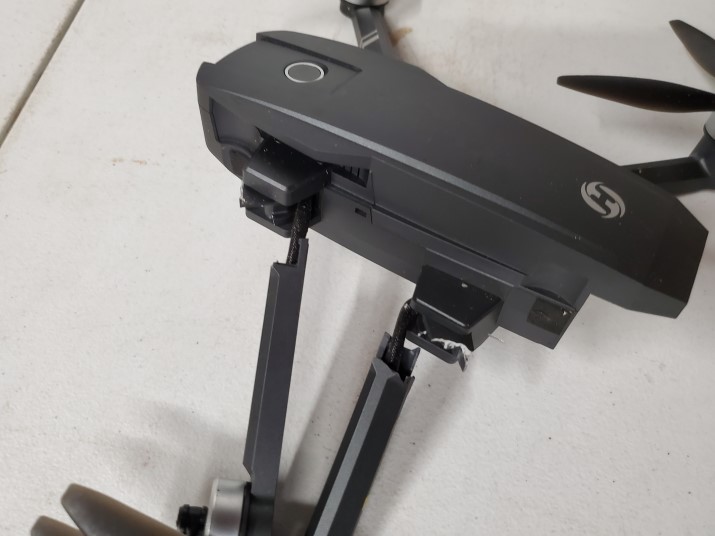
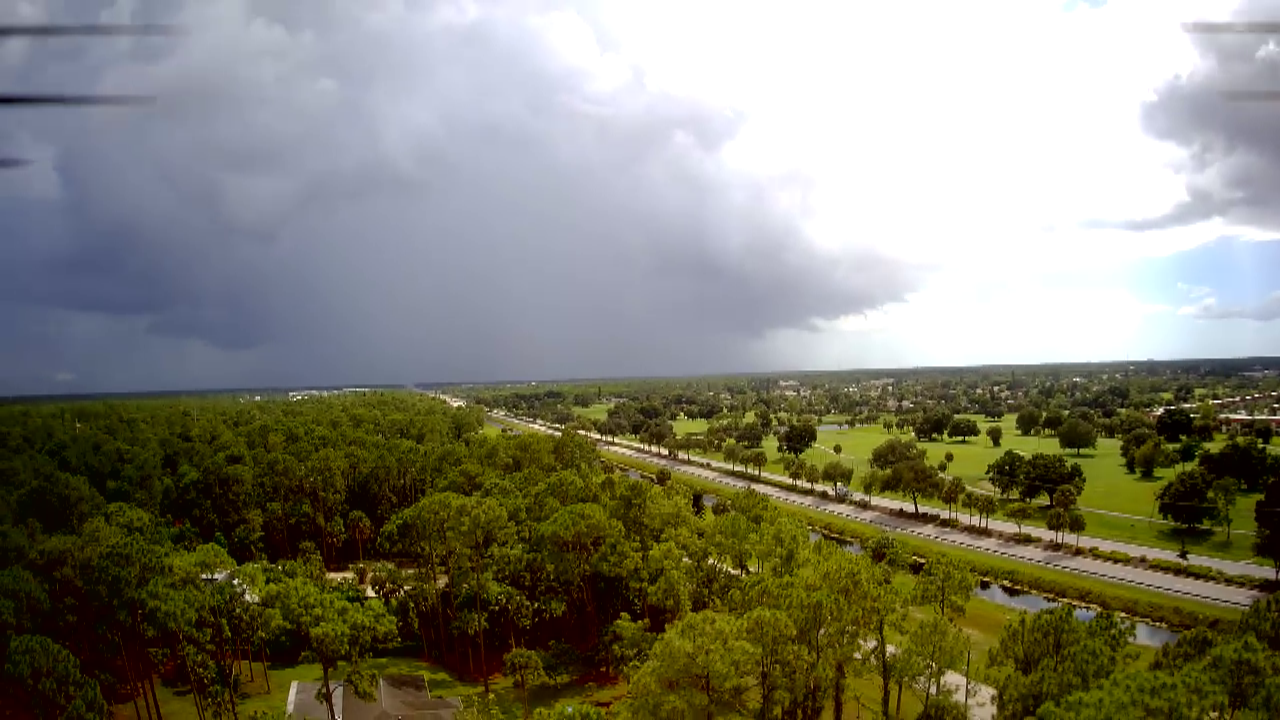
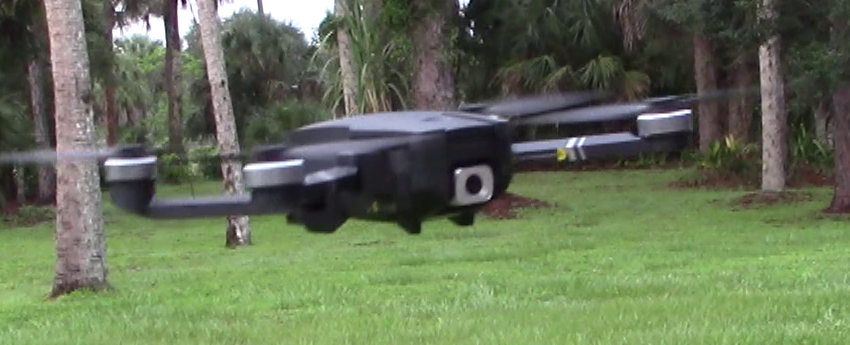 All in all, I am very happy with the Holy Stone HS720-4K. I don’t have any use for it in my job, but could see where it might come into play at some point. I believe, in order to use a drone commercially, you must be licensed by the FAA. I am not sure about that. Either way, the quadcopter drone is much more forgiving than when I tried to fly an RC airplane many years ago. The camera is also a plus. I still haven’t been able to get the 4K, but I think I know why and hopefully will be able to blog about it soon.