Automatic Chicken Waterer Parts List

Automatic Chicken Waterer

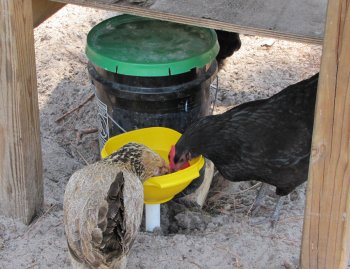
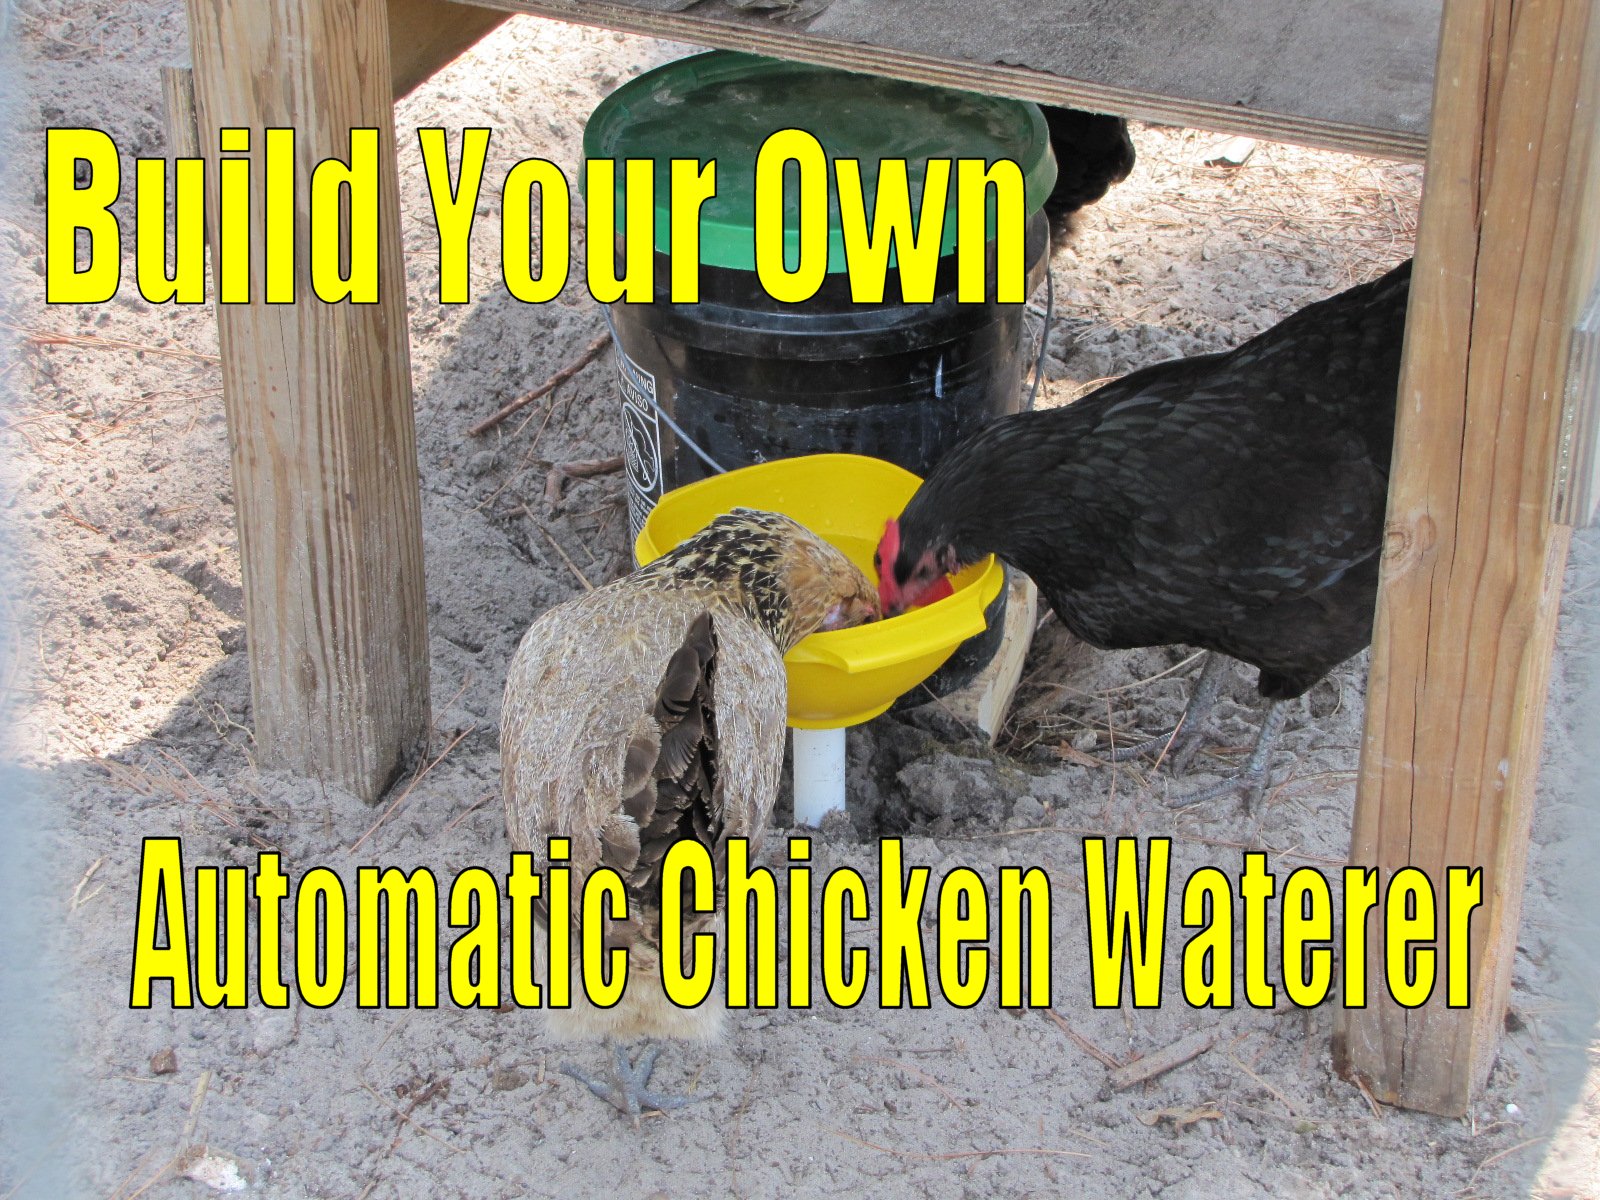
The original Automatic Chicken Waterer.

The Automatic Chicken Waterer has been doing well for me and I know that many are viewing my site for the design. Hopefully it inspires ideas into creating a similar or expanded version. The Automatic Chicken Waterer concept can be customized many different ways so there is not one right way, but the right way for YOUR situation. My design uses a 5-gallon bucket as the frame and reservoir.

Below is a parts list for the Automatic Chicken Waterer with the 5-gallon bucket for the frame and reservoir. I tried to put together a few of the options, but make sure and identify what will work for you and your specific situation. I am in South Florida and we deal with heat and sand. The winters are not cold enough to freeze the water, but the summers are hot enough to worry about water that is hot. I keep my automatic chicken waterer shaded for this purpose and the sand has to get washed out periodically by cleaning out or changing the cup.

The Automatic Chicken Waterer is made up of 3 parts. The reservoir, supply, and the cup or bowl. I will identify each of the parts within these labels. I have included links to Amazon.com via affiliate links so just hover over the link to get an idea of what they look like. Also some parts may not be priced efficiently and may be better to get at your local hardware store.

Automatic Chicken Waterer Reservoir

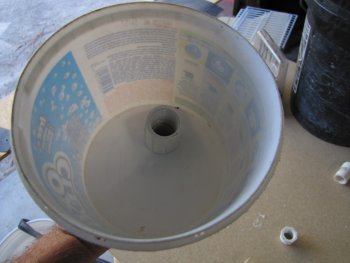
The reservoir in my design is a 5 gallon bucket. Any “tank-like” item that is big enough, will hold water, keep light out, and be able to be covered will do. You also need to be able to drill through it. I would use a black bucket for the purpose of not letting any light in. A lighter colored bucket would be good if you are able to put the reservoir in a hidden location that doesn’t get any direct sunlight. Again, you would customize it to your situation.
5 Gallon White Bucket & Lid – Durable 90 Mil All Purpose Pail – Food Grade – BPA Free Plastic –
Black bucket only – Hydrofarm HG5G 5-Gallon Black Bucket
Black bucket only – Encore Plastics 250003 Bucket Space Black 5 Gallon
Black bucket with lid – Dynamic Enviro Paintware KK053000 5-Gallon Enviro Recycled Plastic Pail Lid
Blue bucket with lid – Petco Bucket, 5 gallons, Color: Blue
Black bucket with screw on lid – Bucket Kit, One Black 5 Gallon Bucket with Black Gamma Seal Lid
Screw on lid to retrofit 5-gallon bucket – The Gamma Seal Lid, Black
Here is a heater for a 2-10 gallon aquarium in case you are in snow country – Tetra 26447 Submersible Aquarium Heater, 50-Watt


Automatic Chicken Waterer Supply

REMEMBER THIS PORTION MAY BE UNDER PRESSURE!
The supply consists of either a water hose or hard line water supply, or even a combination of both. You could run pvc from the automatic chicken waterer to a select location and then a water hose from there (so you could remove it when you want to and not worry that it is running water all the time). Then either a toilet fill valve, which is in my design, or just a way to fill it with water periodically. There are other types of float valves out there, but the toilet fill valves are straight up and down, and already have a way to hook up to a water supply line. This section will take us from hooking up to a water source (or not) to filling the reservoir.

Toilet Fill Valve – Float valve

Standard toilet fill valve – Fluidmaster 400A Anti-Siphon Toilet Tank Fill Valve

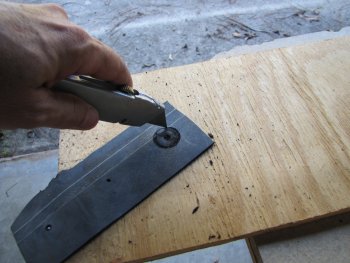
Drill Hole for Toilet Fill Valve

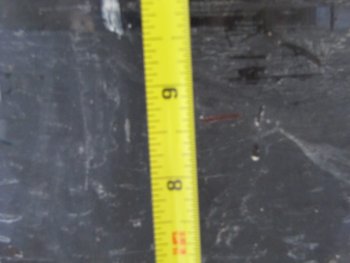
1″ paddle bit to drill the hole for the toilet supply valve and also for drilling the thru-wall for the cup – DEWALT DW1582 1-Inch by 6-Inch Spade Drill Bit


Water Supply Line

The following three items are the same, but each is a little different type. 7/8″ to connect to the toilet supply valve, then a 3/8″ compression (which typically hooks up to the supply valve on the wall behind the toilet). This is strictly to get from the toilet fill valve to regular pvc (the 7/8″ thread does not exist in pvc that I know of, there may be a brass fitting somewhere, but I have not been able to find one) then everything is pretty standard from there.
Fluidmaster PRO1T12CS Click-Seal Stainless Steel 12-Inch Toilet Supply Line
This one appears to have metal connections on both ends – Aviditi 30462AVI Stainless Steel Braided Supply Line for Toilet with Brass Steel Nuts, 3/8-Inch Compression by 12-Inch
Fluidmaster B1T12 Toilet Connector, Braided Stainless Steel – 3/8″ Female Compression Thread x 7/8″ Female Ballcock Thread, 12″ Length


Water Supply Line to PVC thread

So now we are past the toilet fill valve and getting to regular pvc – the first thing we have to do is go from compression to pipe thread. The following 3 items will get from the 3/8″ compression at the end of the toilet supply hose to 1/2″ Female pipe thread, which can then be taken 100 different directions. PVC parts are better chosen at your local hardware store where you can put the parts together and make sure you have the right sizes and parts to build what you want.
Watts LFA124 Compression Male Adapter, 3/8-Inch OD x 1/2-Inch MIP
Brasscraft 66-6-8X 3/8 OD by 1/2-Inch Female Reducing Adapter Lead-Free, Rough Brass
This achieves the same thing, but is a valve (just like the one probably in your house) – LDR 537 6101 Low Lead Shut Off Street Valve 3/8-Inch Compression x 1/2-Inch FIP, Chrome


Standard PVC Fittings to Water Supply Source

I am going to go 1/2″ pvc to the ball valve (which will give me control out at the waterer or near it) then 3/4″ from there. You can move into 3/4″ anytime by finding the right parts.

To go directly to a water hose

1/2″ male to male nipple – Banjo NIP150-SH Polypropylene Pipe Fitting, Short Nipple, Schedule 80, 1-1/2″ NPT Male, 2-1/2″ Length
1/2″ female to 3/4″ female water hose (the female end of the water hose usually comes out of the water hose valve so you would have the male end to connect to) – Anderson Metals Brass Garden Hose Fitting, Swivel, 3/4″ Female Hose ID x 1/2″ Female Pipe

To go directly to pvc piping

1/2″ male to slip pvc – LDR FP4 MA-112 PVC Male Adapter, 1-1/2-Inch Slip x Slip x MIP
2 feet of 1/2″ pvc – Charlotte Pipe Pvc Sch 40 Solid Pipe 1/2 ” X 2 ‘
1/2″ threaded ball valve – Homewerks VBV-P40-B3B Ball Valve, PVC Schedule 40, Female Thread x Female Thread, 1/2-Inch
1/2″ slip ball valve – PVC Schedule 40 Slip Ball Valve. Size: 1/2 inch
Now go from 1/2″ slip to female water hose thread – LASCO 15-1621 PVC Hose Adapter with 3/4-Inch Female Hose and 1/2-Inch PVC Pipe Glue Connection


Automatic Chicken Waterer Cup

This portion is not under pressure. For this section I am using 3/4″ pvc because the fitting is bigger and seals better on the bucket or reservoir. The 1/2″ fitting is too small, though it may work in your application. PVC parts are better chosen at your local hardware store where you can put the parts together and make sure you have the right sizes and parts to build what you want.
The cup or bowl is where the chickens or other pets would actually drink out of. The automatic chicken waterer needs to be situated so the chickens do not use it as a roost, or roost above it. I was able to salvage an old wooden table to put my automatic chicken waterer under, so this provided shade and the chickens cannot get on top of it, but can easily get in to drink as much as they want.

Thru-wall fittings

The way I have done it.
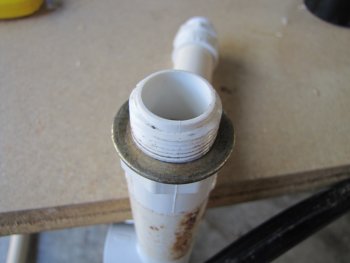
3/4″ male threads to put into the reservoir – 3/4″ slip to build cup (this same fitting will be used to fill the actual bowl) – LDR FP4 MA-34 PVC Male Adapter, 3/4-Inch Slip x Slip x MIP I believe I put the slip side in the bucket with the threads out.
Rubber gasket material – You will also use this to seal to the bowl or cup LASCO 02-1048E Rubber Sheet, 6X6-Inch and 1/16-Inch Thick I put the gasket inside the bucket so the fitting would press against it and never let the water out.
3/4″ female thread to tighten and seal to bucket – The most important thing with this is the female threads to lock and seal the pvc fitting into the reservoir so several different fittings can be used (except a cap) – LDR FP4 FA-34 Female Adapter, 3/4-Inch PVC Slip x FIP So at this point you could be slip or threads.

A way you may want to try – seems to be a little more sleek and may also work with the bowl or cup as well.
3/4″ thru-wall assembly – This should have 3/4″ female thread inside- Lifegard Aquatics 3/4-Inch Double Threaded Bulkhead

Misc. 3/4″ PVC Fittings

3/4″ pipe – Charlotte Pipe Pvc Sch 40 Solid Pipe 3/4 ” X 2 ‘
3/4″ Tee slip – LDR FP4 T-34 PVC Slip Tee, 3/4-Inch
3/4″ Tee threaded – Lasco 405-007 0.75 in. PVC Threaded Tee
3/4″ cap slip – LDR FP4 CA-34 PVC Slip Cap, 3/4-Inch
3/4″ cap threaded – Can’t find one on Amazon
3/4″ nipple 2″ – GF Piping Systems PVC Pipe Fitting, Nipple, Schedule 80, Gray, 2″ Length, 3/4″ MPT
3/4″ nipple 3″ – GF Piping Systems PVC Pipe Fitting, Nipple, Schedule 80, Gray, 3″ Length, 3/4″ MPT
3/4″ nipple 4″ – GF Piping Systems PVC Pipe Fitting, Nipple, Schedule 80, Gray, 4″ Length, 3/4″ MPT
3/4″ nipple 5″ – GF Piping Systems PVC Pipe Fitting, Nipple, Schedule 80, Gray, 5″ Length, 3/4″ MPT
3/4″ nipple 6″ – GF Piping Systems PVC Pipe Fitting, Nipple, Schedule 80, Gray, 6″ Length, 3/4″ MPT

Automatic Chicken Waterer Cup

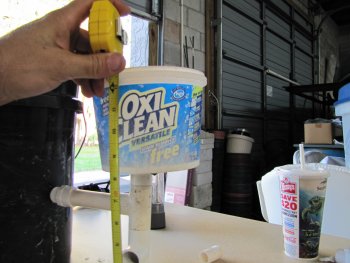
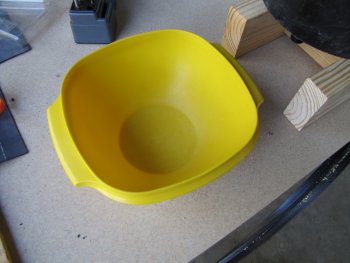
The cup can be any stronger plastic recycled item. I like to find things that will be thrown away and drill a 1″ hole through it. The cup has to be tall enough for the high water not to overflow and the low water not to run completely out. The fill valve can be adjusted so it does not have so much of a spread between the time it turns on(low water in the bowl) and the time it shuts off(full)
These should work good – Glad Food Storage Containers, Tall Entree, 3 Count
You can also use this with the watering nipples already in place – BriteTap Chicken Waterer The description says to just drill a 5/8″ hole – here is a 5/8″ bit – Bosch Daredevil DSBS1007 5/8-Inch by 4-Inch Stubby Spade Bit

Automatic Chicken Waterer Parts List Short Version

Reservoir – I used a black 5-gallon bucket with a drywall bucket lid (it just snaps on)
Water supply – Toilet fill valve, 1-inch paddle or spade bit to drill hole, toilet supply line 7/8″ x 3/8″ compression, 3/8″ male compression x 1/2″ female pipe thread fitting, 1/2″ pvc piping to 1/2″ ball valve, to my water supply or you can fit it to the hose.
Cup or Bowl – 3/4″ male thread x 3/4″ slip + custom rubber gasket + 3/4″ female x 3/4″ slip (to go through bucket), 3/4″ piping to 3/4″ tee slip, down to cap to stabilize bowl, up to 3/4″ slip x 3/4″ male threads through bowl + custom rubber gasket + 3/4″ female x 3/4″ slip + 3/4″ pipe up to a Tee to easier remove bowl or cup for cleaning or replacement (See T-handle Post), The cup or bowl is tall enough so the spread in the fill valve can fill and empty, and big enough around so the chickens can get in and drink around the T-handle. I have used Tupperware, Gladware, and recycled drink containers that I cut the bottom off of.


Automatic Chicken Waterer – 7th Idea on Drinking Cup

Now that some time has passed while using the homemade automatic chicken waterer, I have since thought that maybe a pre-fabricated water delivery would be a little more ideal. The original design utilized items that were available, and could be reused or repurposed. This works great, but does still get dirty. Mostly from sand and stuff that gets in it and settles at the bottom. So an item I found on Amazon.com would serve this purpose. The only thing that I could see being a problem is that the sun would get inside and create algae. This really should not hurt the chickens, but does not look good at all. I mean, I wouldn’t drink out of it if there was algae visible. This would keep the dirt and poop out of the water though.

The BriteTap Chicken Waterer can be used in conjunction with my design. Click on the image or the link and it will take you to the amazon product page for purchase. Just substitute the BriteTap Chicken Waterer with the “cup” in my design, and you’ll have a clean, serviceable, chicken waterer that will last a long time. Make sure and design the position so the chickens cannot roost on top of the reservoir (or the water delivery device).

I will find out how big the hole has to be, but if you are set up to drill the hole for the toilet fill valve, then the tap for the BriteTap Chicken Waterer should be similar. After reading some of the “answered questions” on Amazon, it does come with a plastic nut that secures the unit to any reservoir. Most of the responses are from people that used a cooler as their reservoir. I guess it all depends on how much water your chickens drink. My chickens drink a lot of water. So having the automatic chicken waterer allows for fresh water to be supplied and they never run out.

In South Florida, it gets real hot in the summertime. This season is from late May through September.  So I usually worry about the water getting hot, and getting algae build-up, so protection from the sun is best. Also, the sun will destroy plastic over time, so trying to position the watering station to be in the shade as much as you can is best. Also, design your situation so that the unit is protected from the chickens and the elements. This will help the watering station last longer, and less maintenance time. All in all, once the reservoir is put together, the water delivery system can be changed out periodically as your experience grows and your needs are more refined.

In the winter time, the weather is very nice, and freezing is not something that we typically worry about. The sun is still a factor, because direct sunlight will heat up the water too much. Freezing does occur, and the shock is more the problem than the cold itself. I would think that an aquarium heater would keep the reservoir from freezing. The supply line, might be a different story though. It may benefit to have a line that can be drained during this period, if this is a threat. Then the bucket or reservoir can be filled by hand while stored in a place that won’t freeze.

A water hose fitting can also be in the design to have it more on a mobile status during the design phase.

Looking for Automatic Chicken Waterer Parts List?

Automatic Chicken Waterer – Building it

Looking for Automatic Chicken Waterer Parts List?

Automatic Chicken Waterer

Build your own automatic chicken waterer

The automatic chicken waterer is a great addition to any chicken coop. This DIY project can give you time and save your effort when taking care of your chickens. Works on water pressure alone, and does not require any power. Once it is set up, it is generally maintenance free for months. The automatic chicken waterer can be built to serve many different applications, even watering other birds or animals. The possibilities are vast. This video is a step by step walkthrough in building an automatic chicken waterer for yourself. It is not hard. If you cannot get the parts, or have trouble drilling and such, I can sell you a basic kit. You can message me on Google Plus!

Automatic Chicken Waterer Parts List

1 – 5 gallon bucket with tight fitting lid
2 – 1 regular toilet tank fill valve
3 – Toilet fill valve supply line
4 – PVC fittings for the delivery pipe
5 – An extra seal for a toilet tank fill valve for the deliver piping.
6 – 1″ drill bit – either paddle bit or hole saw bit

This Chicken Waterer is Great!

Once you see the basic structure of the automatic chicken waterer, you can see how the applications start to come to mind. In the future, I will be creating some more videos and take it farther. The drinking bowl, and some more ideas I have on different ways to deliver the water. Along with the nipples, that can be purchased here – Automatic Chicken Waterer nipples at Avian Aquamiser.

Now you can get started on this project. Once the automatic chicken waterer is built you can rest a little easier knowing that your chickens are well watered, even when your not home. Going out of town is not so bad now, because you know that they are, at least, getting water.

THE DRINKING BOWL IS NEXT – COMING SOON!!!!

Don’t forget to subscribe to my YouTube channel above. Thank you.

Escape from Poultry Prison – Extreme Chicken Fence

Golden Chicken found a hole in the fence


This golden chicken was getting out almost every day, and we could not figure out why. Then we finally saw her go right through the fence. We had used some fencing that was 5″ or so and the wire was not set in place. So at various locations the holes in the fence could be bigger. We just happened across her going right through. She is the only chicken out of the bunch that was doing this.

Small square plastic Chicken Fence liner


This fence liner works well. It is a very light duty screen, 1″ x 1″ or so. All that is needed is a deterrant. The other fence stands up almost by itself, so now just filling in the holes. This is probably used more for temporary fencing, but works well in this application as a secondary barrier.Construction Fence to secure Chicken Fence


This bright orange construction fence works very well also. The only problem is that it can be seen for a very long distance. Wanting to keep the chicken area discreet for neighbors, passers by, and also animals, may be a challenge using this fence supplement. It works very well though, and is easy to apply. A couple of wire ties here and there and it is installed.


Chicken Fence – installing chicken fence

Chicken Fence – Installing more chicken fence


Build an Automatic Bird Watering Station – Automatic Chicken Waterer – Water Your Birds – 3

In the last segment we measured the fill valve float to get our height. This measurement can change depending on where you have the fill valve set to. If you have smaller birds you may want it lower than higher. Larger birds would be higher. There is also a “too high”, because then they cannot comfortably reach it.

Measure the Bucket for Height

Measure and make a mark on the bucket where the center of the float is going to be. This is the control line.

This line represents the top of the water, no matter what container you are using for a cup. Water is the ultimate leveling system. This is where you can see exactly how high you want your watering cup to sit. You can adjust it somewhat in the field, by digging into the ground, or setting it up on bricks or wood.
Drill the seal hole

Be careful, the plastic can tear or break. This was the first cup I tried. I like to recycle anything that has another purpose. Also, the design allows to switch this part out and “use” another one, or a better one. This container was good, until it filled with water. It proved to be too flimsy and tipped over. The cup is better when it is not as wide, but tall enough.
Cut out the Gasket
Cut out a few gaskets. I was going to double these up, but there is no need. One layer will do. I am using a piece of a pond liner. I used my paddle bit to mark a hole, then cut with a razor knife. The size after that can vary, but just a 3″ x 3″ square is fine.
Bushing to take up some space


Put a bushing over the threads going into the bucket or the cup. The plastic is so thin, the fitting on the other side has to seat all the way down, and they just don’t go down that far. There is not a lot of pressure so it just has to press against it.
Sealing inside the containers
The fitting on the inside of the container is a female thread fitting that is also pvc. A brass fitting would work also. The connection to the bucket reservior is a more permanent seal. The seal on the cup is temporary, because it remains “servicable” or even “replacable”.


Line up the Cup system


Next we have to line up the cup system and see where it falls in with the control line. You can see the 12″ mark at the top of the cup. The 8 1/2″  mark is the bottom of the cup. This won’t even let water come in over our seal fitting. We are going to have to lower the cup system.

Tupperware fit the bill


Now that we are on the cup, after I water tested the new Automatic Chicken Watering system, I found the OxyClean container just fell over. I know part of it was that I did not center the hole, but it really just fell over. So I hunted for a new container, and I came up with this tupperware bowl. It was the correct size, height, and strength. The tupperware bowl has not been used in a while (so we could part with it) and is very strong. When I drilled the hole it wanted to break up a little (it is probably 20 years old or more), but did fine as far as the size, so the seal worked out fine.

On to the next round!!!!

Next article for Putting it All Together

Looking for Automatic Chicken Waterer Parts List?

Poultry Prison 2: Chicken Coop Fence – How to keep your chickens out of the Garden


How to keep your chickens from pooping on the driveway.

How to keep your chickens from digging holes all over the yard.

How to keep your chickens from digging holes in your neighbors yard.

How to keep your chickens out of the garden.

How to keep your chickens inside the chicken coop fence.

Back after completion before second chicken fence
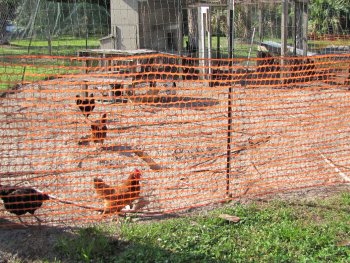
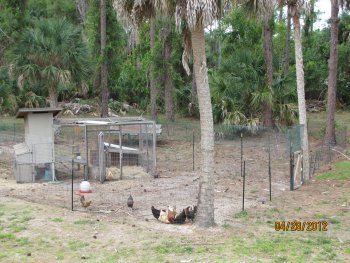
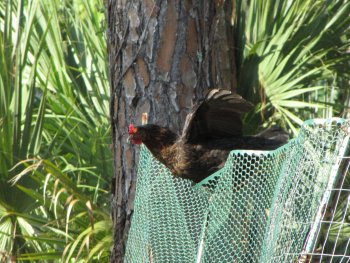
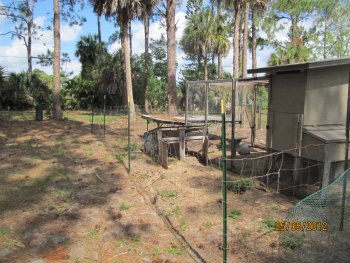
This is the next chapter of “Poultry Prison”. In the previous post, I discussed the idea of adding a small fence (3′) on top of a larger fence (4′). The test project worked and we have had no escapees. Our chickens don’t seem to mind. The final chicken fence height is 7′.

Back side after second chicken fence

 
The first go round was a test with what materials we had, in order to see if the idea even worked. It did, so we extended the fenced area so the entire coop was inside. This is ideal as it is a second barrier for them at night. We do keep them cooped up at night. We usually put them in when it is still daylight, but they will go in as soon as the sun goes down.
Front side with taller chicken fence

We are more protecting them against predators than keeping them caged up. Chickens cannot see at night, so they are easy pickings for any poultry loving predator.
Front more taller chicken fence

 
This seems to be working for the moment. The entry is the only thing now to complete. It is still at a 4′ height, and a temporary fence above it that we have to duck under to enter. You can see the little bit of shade we put in just left of the cabbage palm.


Arial shot of the entire chicken yard


Now it is complete. We will expand as the budget allows. Always looking for extra materials someone else is discarding. They use the shade we put together as a shelter when the hawks start coming around. They will disappear when the hawk circles above.

Poultry Prison: Chicken Fence Height – How to keep your chickens’ whereabouts under control

How to keep your chickens from pooping on the driveway.
How to keep your chickens from digging holes all over the yard.

How to keep your chickens from digging holes in your neighbors yard.

How to keep your chickens out of the garden.

Using Chicken Fence Height to keep your chickens under control.

We have had chickens for almost two years now. The chickens we own now, we raised from chicks we purchased from the feed store. We really like having plenty of eggs, and being able to give eggs away by the dozens to people we know. Our eggs are all different colors, but are all the same once they are cracked open. Right now we have 13 hens. 2 of the hens are bantam hens. The other hens are full size.

Eggs of all different colorsHello! I could use a little privacy! Who turned on the lights?

We have one Bantam Rooster. This guy is mean. He does not like when you get the eggs out of the cage, or change the water, or anything, for that matter.

Today we set out to stop the chickens from littering the back of our house with Land Mines. For those of you who don’t know what a land mine is, check out these photos.

Chicken Land Mine - It is not pretty.Chicken Land Mine - Another one and we can't keep this up.

This is the 3 foot fence. Did not even slow them down.

We put up a fence around the coop in order to discourage them from going everywhere. I mean, they were going into the street, the neighbors yards, even up into our stairs and porch areas. We were waiting for them to come in the house, if we left the door open on a cool day. The fenced in area was put in so they would have plenty of room to roam. That did not last long and they were crawling under, flying over, and even going through in some cases. So I mended the fence everywhere I could, and put up more barriers, with no success.


Short fence is on the right adn the taller fence you can see is enclosed to the coop run.
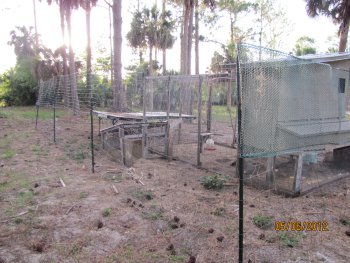
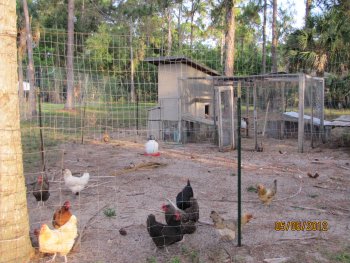
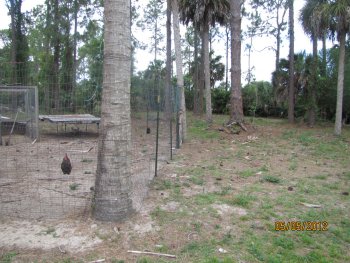
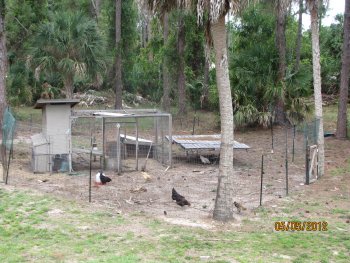
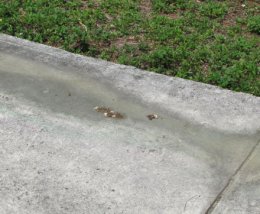
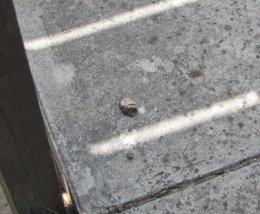
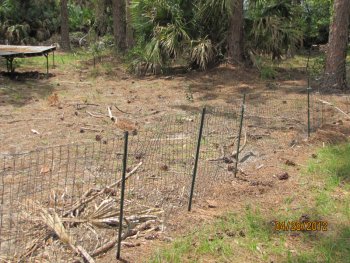
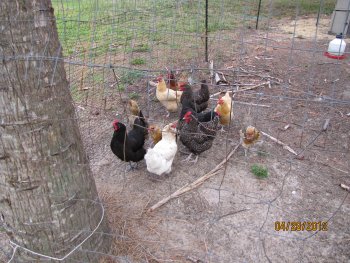
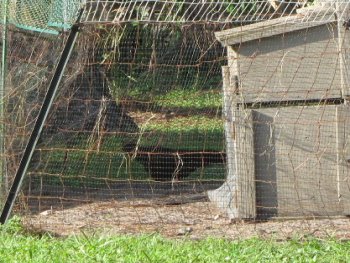
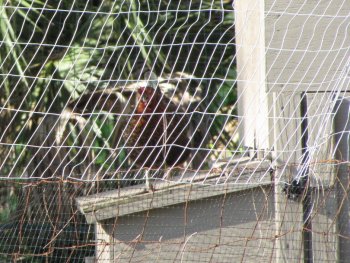
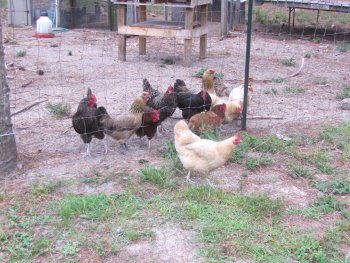
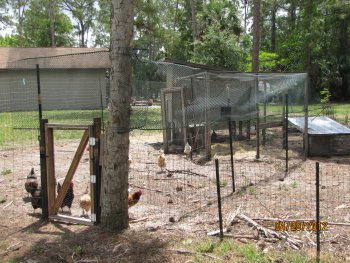
After much time, I was able to get some pre-owned 4 foot sturdy fence, and I found some beefy 6 foot temporary fence posts at the hardware store. So using the trees and these new found fence posts, I put the 4 foot fence up. The photos you see are our first go at it. If this works, I will expand it to encompass more space for them to roam. I extended the 6′ fence posts with the other (salvaged) fence posts so about 7′ or 8′ is actually out of the ground. Some places I used some 3′ rabbit fence on top of the 4′ fence, and other places I used the plastic chicken wire on top. The rabbit fence holds up better, but it does not matter as long as they don’t fly over it. We were not as concerned with all the pot holes they leave in our yard (everywhere), as we were with the land mines on the concrete walks.

Overview of the coop, run, and yard. Extended to keep all flying acrobats inside. aka Chicken Prison Naples, FL

This photo is an overview of the entire prison. We only call it that, because we used to let them roam free. We would let them, but we live in an area that is only half rural. We do have neighbors, and they are all city folk. We can’t have our chickens leaving gifts for the neighbors.


All But One.
They always seem to be hungry!

Escape from Poultry Prison – More Extreme Chicken Fence

Black Star Chicken scoping out landing on nesting box


This Black Star chicken was getting out almost every day, sometimes several times after putting her back in. We were seeing her out, then we could not find her, because she was back in. Then we finally saw her go right through the fence going back in the fenced yard. She went between the screen we put over the bigger 5″ fence and the upper rabbit fencing. This one chicken has dug lots of holes in the yard. These holes can really take you for a ride when mowing, and then will trip you when you walk. NO GOOD.

Black Star Chicken on Nesting Box

Now the chicken is on the nesting box looking for the next landing site.


Black Star Chicken landing on tall fence


After the nesting box she lands on the tall fence before leaping to the ground.


 This video shows the black star nonchalantly moving the direction of escape. Each step she is making it look like she is supposed to be there.

Chicken Fence – installing chicken fence

Chicken Fence Height – Installing more chicken fence

Chicken Fence – Chicken Coop Fence Escapee

Automatic Chicken Waterer – How to Build an Automatic Poultry Waterer – Homemade Chicken Watering System

Automatic Chicken Watering System


This is a small project that can have lasting results with your chicken chores. The automatic chicken watering system is a homemade device that will extend the watering of your poultry indefinitely. All parts can be collected from home or purchased at any hardware store. Parts can be salvaged from other projects and collected over time.

Please click over to the second page where it starts at the beginning.


To be continued…..

Here is a link to the beginning article.

Homemade Automatic Chicken Waterer – 2

Looking for Automatic Chicken Waterer Parts List?