Entry Level Drone – Video Capturing Quadcopter Drone

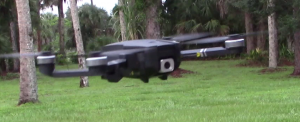
Drone Holy Stone in flightThe HS720 by Holy Stone is a great starter drone. This drone is very well built and seems on the heavier side as opposed to the other ones I have seen. Not nearly as expensive as a “Professional” rated drone like the DJI Mavic 2 Pro or the Yuneec H520 Multicamera Drone. This drone has many of the features a professional drone has, but may not be as precise. One of the features that is very forgiving to the pilot is the RTH or Return to Home function. This is the function that lets the pilot relax and by pressing 1 button the drone will return to where it took off. The HS720 also has an automatic RTH function when it gets low on power. There are many settings that can be customized within the flight application on your smartphone.

Holy Stone Search Page

So after connecting to the drone’s WiFi signal, the camera is then visible through the smartphone app. The phone is placed on the remote or transmitter and can be piloted by viewing the camera. Old schoolers, like me, will still look at the drone to see where it is flying. After going through the instructions and initially setting up the drone, 2 buttons put the drone in the air. Then it is a question of “where to we go now?” I like to go above all the trees and look around. The camera is also movable up and down from the remote, and side to side by turning the drone. Once you get used to flying it, it’s just like riding a bike. Except with around 50 more functions and settings.
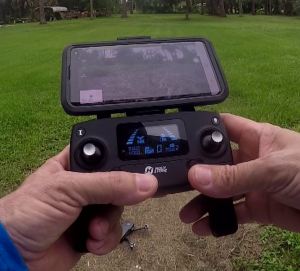
Drone remote with Smartphone attachedThe HS720 drone also has “follow me” and “point of interest” functions.

The “follow me” function basically follows the remote around. Seemed like it wanted to stay around 20 feet behind me, but may get confused after a couple of flights. I believe learning how to calibrate the drone is a must. I think that when it gets bumped around a bit, it needs to be recalibrated.

The “point of interest” is a little different. This function is also called “orbit”. Find a point of interest and place the drone 15 feet or so out from the point of interest, and the drone will orbit around this point. Now this is a customizable distance. So the camera then focuses on this point of interest and just keeps going around and around until you turn off the function. Then it just hovers where you turned off the function waiting for your command.

Arial View Drone CameraDefinitely need some space to fly a drone. Buildings and trees around is not a good mix, especially for new pilots. What happens is the drone gets turned around and then you get confused and start making it go this way and that way and bump into something. It will just crash at that point.

Either way, this is a good entry level drone. The kit that I got had 1 battery and some extra blades, and a nice case. There are some other kits that have 2 and 3 batteries. The battery is said to last 26 minutes. This is plenty of time, but if you have a task ahead, you may want to get extra batteries.

They are saying the camera is 4K and there is a setting for 4K (3840 x 2160). I was only able to get 1280 x 720 resolution. Still decent resolution. The instructions say the video is stored on the TF card and in order to view the phone has to be connected to the drone’s wifi. I haven’t tried, but maybe if I plug in my phone to the computer in order to download the video while the drone is turned on and my phone is connected to its WiFi it will be available. I’ll have to put that on my list.

How I Re-Hung my Huge Staghorn Fern

Propagating Staghorn Fern – Post Link

I have had this staghorn fern for a long time. It recently fell and plunged to the ground. That did not hurt it much, but it will do much better if it is hung up, or even on the side of a tree, just not on the ground. I had already tried to rework it by finding the existing wire basket and tying wire onto that. Well, that didn’t last long, so it was now time to do something a little more permanent.

Staghorn Fern Laying on the ground

Staghorn Fern Laying on the ground

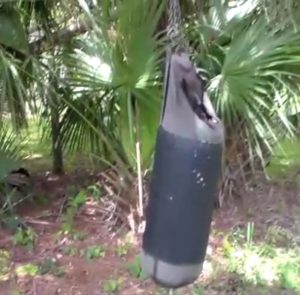
So I finally found what to do with this oversized Staghorn Fern. I had an old punching bag someone gave to me that needs to go in the garbage. So I pitched the punching bag and used the hangers to re-hang the staghorn fern.

Punching bag hanger for Staghorn Ferns

Punching bag hanger

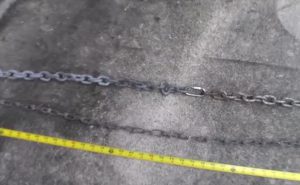
I looked around and found some old chain pieces and hooked them together. Then, I found a swingset chain to make the X that I had in my mind. 7′ of chain was what I needed and that is what I was able to come up with. If I didn’t have the punching bag setup, the chain would have to be around 9′ – 10′. A larger S hook would accept the 4 rings of chain to make the X.

7ft of chains to wrap Staghorn Fern

7ft of chains to wrap Staghorn Fern

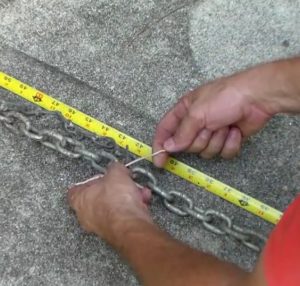
The hanger on the punching bag was too easy. Formed an X right away with the 4 S hooks. So I went with it. Tied the chains together in the center of them to eventually form the X.

Tying Chains together

Tying Chains together

Once I did that, I laid out the X underneath the hooks. I originally had the punching bag on the south side of this tree. So before I did anything, I went ahead and moved the setup to the north side of the tree. I have had success with a piece of advice given to me long ago. Staghorn ferns like to be on the north side.

Lay chain under S hooks

Lay chain under S hooks

Now for the big moment. I got the Staghorn fern and placed it on the X underneath where I was going to hang it. This way I didn’t have to move it again.

Setting the Staghorn Fern on X

Setting the Staghorn Fern on X

Ready to hang it. I just laced the chains up to the top while going around and between some of the shoots.

Hanging the Staghorn Fern

Hanging the Staghorn Fern

Yes, it was very heavy. I should have had help, but it is too late to cry about that now. Just a thought if you are going to do this, get a hand with it.

Staghorn Fern Re-hung

Staghorn Fern Re-hung

Now it is all hung and just beautiful. The staghorn fern will grow around the chains and that is when it will not fall out ever again. I would think that those chains will last 50 years or more. The original wire basket hanger lasted over 20 years.

The wire basket inside the staghorn fern

The wire basket inside the staghorn fern

I will post on how to start a staghorn (from another staghorn) at some other point. The Staghorn fern in this wire basket is one I started and you can see it has already grown around its container. This staghorn fern is probably 4 or 5 years old now.

Here is a link to a 20′ chain from Amazon.com

10′ of chain

50 pound S-hooks

Use this for the top loop, to hook all of the chains to.

More S-hooks – Stronger than 50 pounds

Go Pro Time Lapse – How to Process in Windows Movie Maker

1 - 4 : Add your Go Pro Time Lapse files to Windows Movie Maker.

1 – 4 : Add your Go Pro Time Lapse files to Windows Movie Maker.

1 – Once you have Windows Movie Maker open, find where all your Go Pro images are that you are wanting to process into a time lapse movie.

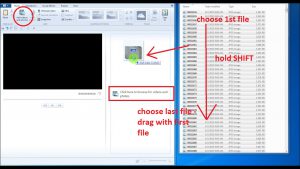
2 – Get your photos or images into the Movie Maker editor. Click ADD PHOTOS, or click in the square to the right of the preview where it says “Click here to browse for videos and photos”, or simply drag and drop your images into the movie maker editor. I always choose all that I want to do at one time, click the first one, then Hold <shift> and click the last one, then by clicking on the first one again to drag into the editor. I always try to click on the first one when dragging to make sure and keep them in order. I have had them get out of order before, and I believe that was the cause. The other two methods I do think this same practice applies.

———This would be a good time to make sure your Time Lapse images are in order. Just hover over the Time Lapse images and see what the file names are. If they are from your Go Pro, the Time Lapse images should be in consecutive order with their respective file names. If they are not, you can “cut and paste” just don’t do it quick.

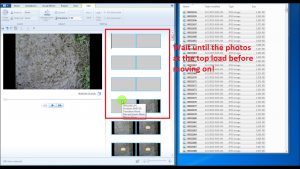
Let the Time Lapse images load before you go any further.

Once the images are added – Let them load before moving any further.

3 – I only take 200 images at a time and make a movie with them. At 720 medium, the images are 4MB each and that is 800MB of data.

4 – If there are labels on your images, refer to this post to remove. There are two methods.

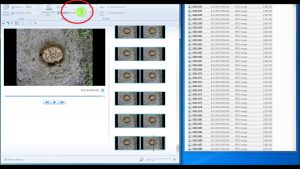
Change the duration of each image.

Change the duration of each image. This will create a FPS.

5 – Once the photos are in Windows Movie Maker, don’t click on anything, as all the images are selected currently. Also, wait for the images at the top to load. There are usually a few images that are blank, once all the images load, then these will show their thumbnails. Now choose the EDIT tab, (the edit tab will show up after you have photos or videos in the editor), change the duration of each image to your preference. This may depend on your time lapse project, I use .07 often, but have sped up or slowed down depending on what I am making a Time Lapse Movie of. Start with .07 and then you can play with it once you go through this walk-through. Then I usually scroll through the images to make sure that they are all loaded and processed before moving on.

6 – If you did click and now only have one image selected, simply go up to the first image and select it, then scroll down to the last image and hold down the shift key while selecting it. Now you should have all the images selected.

Save the Time Lapse Movie

Save the Time Lapse Movie – Short Time Lapse Movie

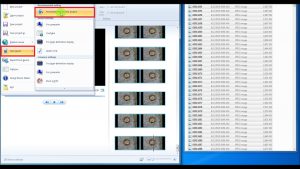
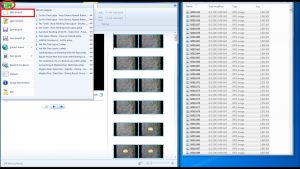
7 – Now save the movie in a folder of your choosing. Top left drop down arrow, select Save Movie —-> then (I usually choose) Recommended for this project (you can try some different settings, and I believe there are some custom settings somewhere. Now your browse window should pop up, navigate to the folder and name the file. In this scenario, I make sure that I am in the correct folder then I name the files with numbers, 1,2,3. This will come in handy in a few steps. Also choose MP4 or Windows Media File. I use Windows Media File, but you may want the MP4 setting. Movie Maker will read either.

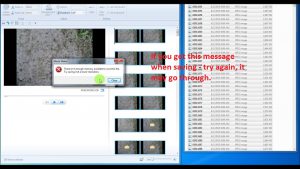
Save it again if you get an error message

If you get an error message like this one or one that says there is not enough memory – try saving it again

——If you get an error message – try to just save it again the same way. I don’t know why, but this is what it does. I stumbled across this one day, after I had tried everything. Then I scaled down to 200 images and it seemed to cooperate after that.

Start a New Windows Movie Maker Project

Start a new Windows Movie Maker project.

8 – Now that this phase is complete, it is time to move on to the next set of 200 images. Again, upper left drop down, choose New Project. It will ask if you want to save, I usually don’t when I am in between like this, but you can if you want.

Put all the Time Lapse shorts into one project

Put all the Time Lapse shorts together into one WIndows Movie Maker project

9 – Repeat the process 1-8 until you have all of your Go Pro Time Lapse images processed. Continue saving your Time Lapse movies in consecutive numbers so you can retrieve later.

Make a Go Pro Time Lapse movie

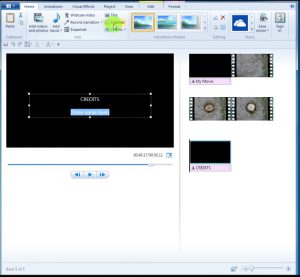
Add title, music, captions, credits, etc.

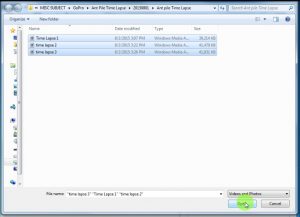
10 – Now, choose New Project again to clear the editing board. Now Add Files or refer to step 2 and pull in your newly created mini-movie Time Lapse movies. Hover your mouse over them and make sure they are in order.

11 – Add a title, add captions, add music, add credits, etc. then go through step 8 again, except this time, name the Go Pro Time Lapse movie something that represents the video instead of a number. This is the file you would upload to YouTube or Facebook.

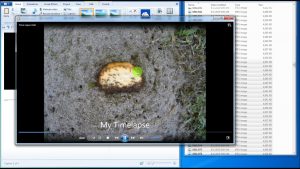
Your Go Pro Time Lapse Movie is finished - Save it.

Your Go Pro Time Lapse movie is finished. Save it.

Good Luck and comment with any suggestions or experiences you have had with processing Go Pro Time Lapse images in Windows Movie Maker.


This post was more about the sensitivity of Windows Movie Maker with the large amount of files, than a how to create a time lapse. Pay special attention to the details as I have figured out how to get past some of the more challenging ones.

A power bank may be useful in creating time lapse videos with your GoPro

Top 20 Best Selling Power Banks on Amazon.com

This link is to a list of the best selling power banks on Amazon.com. Make sure and look at the mAh value as the higher the mAh the longer it will last.

You can use the 30PIN POWER CABLE WITH WATERPROOF BACK DOOR HOUSING FOR GOPRO HERO3+&HERO4 in conjunction with a power bank. Using a power bank will drastically increase the situations that you can extend your battery time. Getting the GoPro 30 pin connector with waterproof back door will extend your ability to leave the gopro oustide or even submerge the gopro under water.

How to Clean a Coffee Maker

If it seems like your coffee maker is taking an awful long time to finish, you may need to clean it. It’s not dirty, the ports where the steaming hot water go through are clogged with minerals from your water. A simple process with some vinegar will do an amazing job of speeding up the coffee making process. I was amazed at how quick the coffee finishes now when I clean out my coffee maker with vinegar.

How to Clean a Coffee Pot

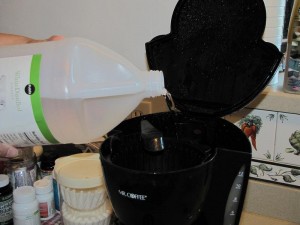
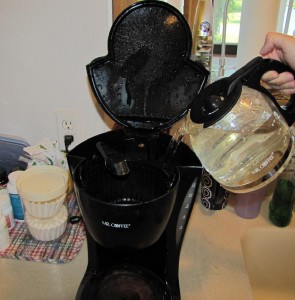
Pour the vinegar in the water holding area. You want to mix half vinegar and half water. Make a full pot.

Is your coffee maker slow?

Is your coffee maker taking forever to make the coffee? You may need to clean your coffee maker. This post will show you how to clean a coffee maker. It is not difficult to clean a coffee maker, it will just take some time. All you need is some vinegar, and some patience. Coffee is almost like air, especially in the morning. It just feels right.

Now the first thing to do is get finished with the coffee that is already in the pot. Rinse it out like you are getting it ready to sit for the day. Then get out the vinegar.

Pour the vinegar in the water holding area. The coffee maker in the photos is a 12 cup coffee maker. So we will use 6 cups or half of the coffee maker capacity.

How to Clean a Coffee maker

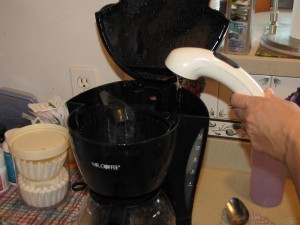
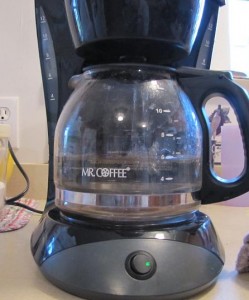
Fill it the rest of the way with water. Half vinegar and half water. Make a full pot.


Now fill it the rest of the way with water. If you want to use bottled or distilled water, it may be a good idea since the normal water you use may be heavy in minerals (which is what is clogging up your coffee maker in the first place). I don’t, and it seems to work fine for a while.


How to Clean a Coffee maker

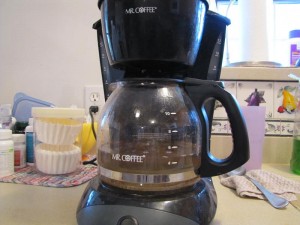
A little cloudy, but hopefully that will go away.


It may look a little cloudy, but there is still some coffee from this morning in there too. It will still be cloudy, because it is cleaning it out. Once this is percolated all the way through, turn the coffee maker off. Then you want to either pour the vinegar and water mixture out or pour it into another container. This vinegar and water mixture can now be re-used to do some cleaning.

How to clean a coffee maker

Add clean water now!

1 – Pour it into the bottom of the dishwasher before you turn it on later. It will help clean out the dishwasher and your dishes from hard water stains.

2 – Use it to clean the shower or bath tub area. This is where hard water and soap leaves residue. The vinegar and water mixture will help.

3 – Vinegar is a mild acid, so it will help in other cleaning jobs as well.

How to clean a coffee maker

Looking a lot cleaner. Rinse out with fresh water.

At this point you can either run vinegar and water through it again, or go ahead and start the rinsing process.

Rinse the pot out one time, then fill it back up to as many cups as it will hold with fresh water and then fill up the water holding area. Again, you can use bottled  or distilled water or just the tap. Again, let it percolate all the way through the pot.

Now rinse it again. You can do half a pot, or a full pot. Just for another preventive measure to get the vinegar smell out. At this point, there is no reason to fear ingesting it, because it is so diluted that it is now just the smell.