I recently purchased another cordless blower. A DEWALT DCE100B 20V MAX Compact Jobsite Blower. This is a battery operated blower. It is of a small size, but definitely not of small power. This cordless blower is of the 20V MAX variety. I am slowly collecting the 20v MAX Lithium tools as I am moving away from the 18v NiCad tools. I had been happy with the DeWALT brand, so I am going to stay with DeWALT in the future. It is a slow process as there are many tools in the 20v MAX family. Slowly, but surely, the 18v NiCad is getting phased out from even purchasing them at the store. I am sure many people are like me and have a multitude of the 18v NiCad cordless tools and batteries.
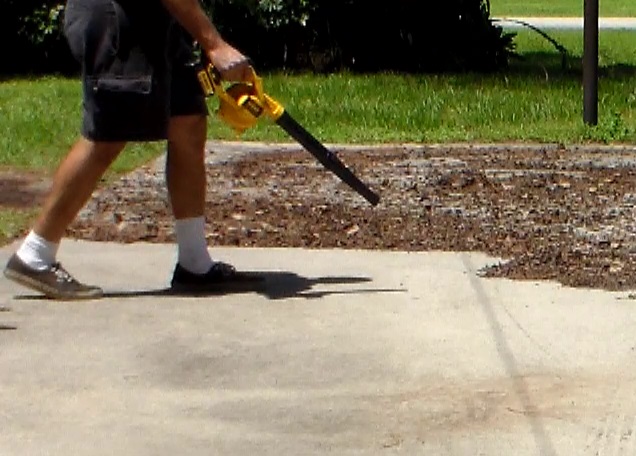
Blowing off driveway
This cordless blower package that I purchased does not come with a battery and charger. It is a tool only package. I already have several batteries and chargers, so it was not a problem.
I tested this cordless blower out on my driveway. It seems to have a lot of power, but not a lot of punch. It handled the smaller debris with no problem, but did not want to move the larger debris as well.
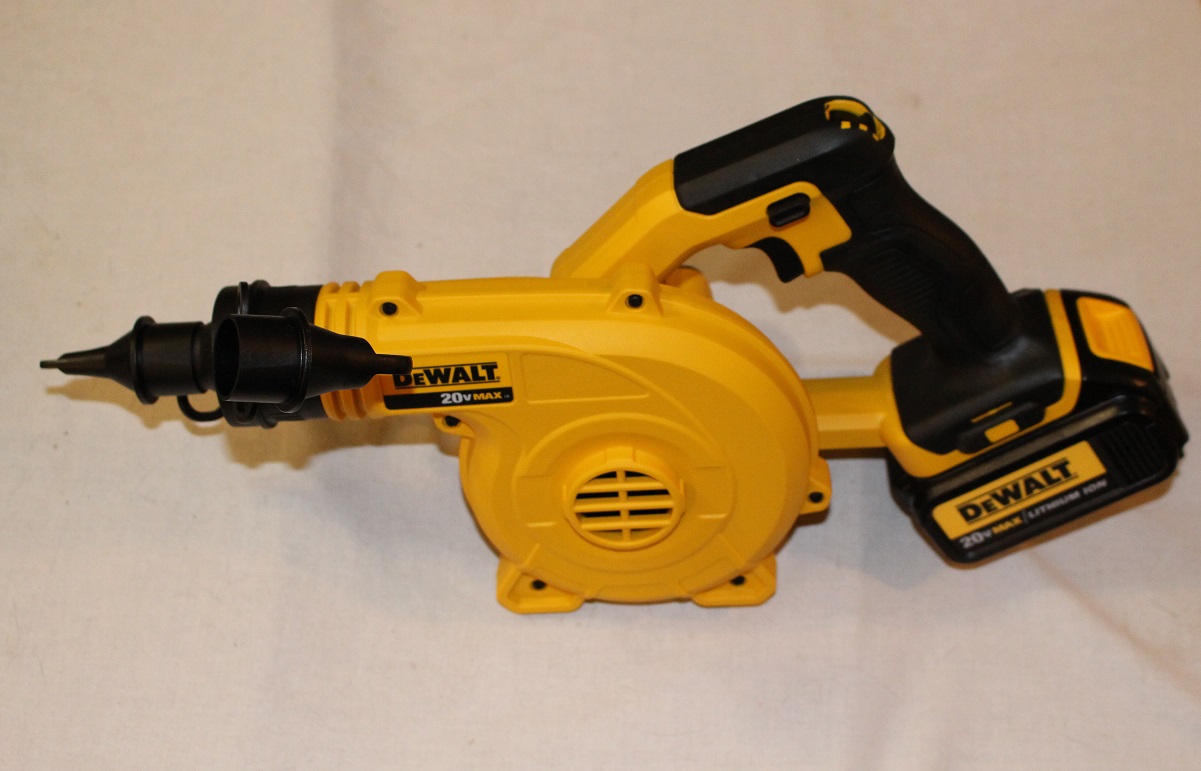
Cordless Blower Inflator
After using this cordless blower, I would not purchase this cordless blower as a yard or leaf blower. This cordless blower is for small areas and small debris. Like the title says “Compact Jobsite Blower”. It is definitely compact. It would be great for a jobsite where power is an issue. Also, the slower speed would not make such a mess. Blowing sand from a concrete floor is within reason. Blowing out a gutter possibly as well. I didn’t say it can’t do the job. It will just take longer than the larger tube blowers. The fastest speed will definitely move material. The small tube on the blower doesn’t give it the area to move lots of stuff.
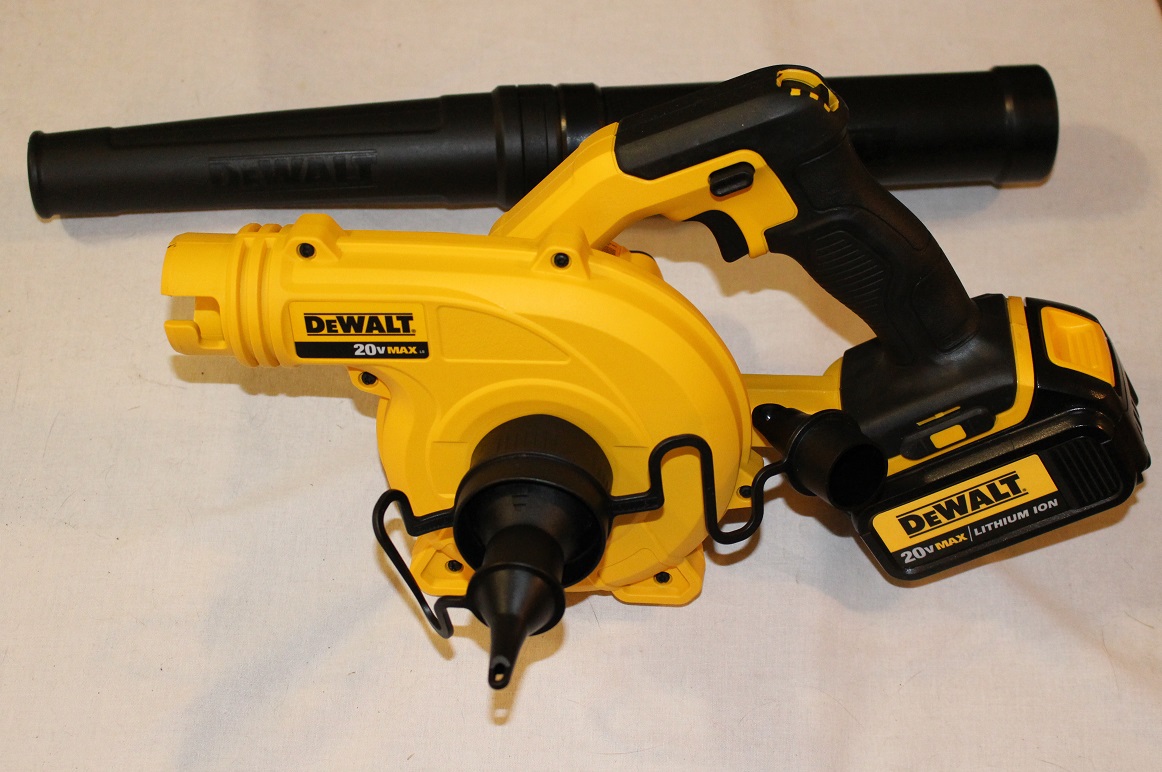
Cordless Blower Deflator
The entire cordless blower would fit in a 5 gallon bucket. It is compact. This is a good thing because it will also fit in a truck tool box, or behind the seat of a truck.
Added Benefit of the DeWALT Compact Jobsite Blower DCE100B
An added benefit of this cordless blower is the inflator/deflator attachment. This is great for blowing up a pool or beach inflatable. Also would be good for blowing up an air mattress while camping. Putting the attachment on the nozzle will inflate and moving the attachment to the intake on the cordless blower turns it into a deflator. The 3 speeds will come in handy for this task as well. This would be another point towards purchasing this cordless blower.
This is a quality tool — for the right situation! I love my Dewalt tools. They are well built and even feel solid. This is no exception. However, pay attention to the word “compact” and the CFM.
I bought this because a description elsewhere claimed 135mph air flow. But pay attention to the CFM (air flow in cubic feet per minute). This tool, at 100 CFM, is for small areas and jobs. It would be perfect for cleaning up a shop, keeping your garage clean, or to quickly freshen up the patio and furniture before a BBQ. With the 3 speed switch near your thumb, you can even set it low enough to blow off those hard wood floors — probably not the best idea, but low speeds would be nice for cleaning up the workbench.
If you’re looking for regular outside use, such as cleaning up leaves, look to the larger DCBL720P1 model which has a rating of 400 CFM
Don’t know how I got along without this for so long. It’s perfect for many situations – especially blowing up air mattresses and water toys. Perfect for tighter work and cleaning off my miter saw and table saw after use. Good for lawn clippings too. I also have the larger version for the driveway. Love this thing!
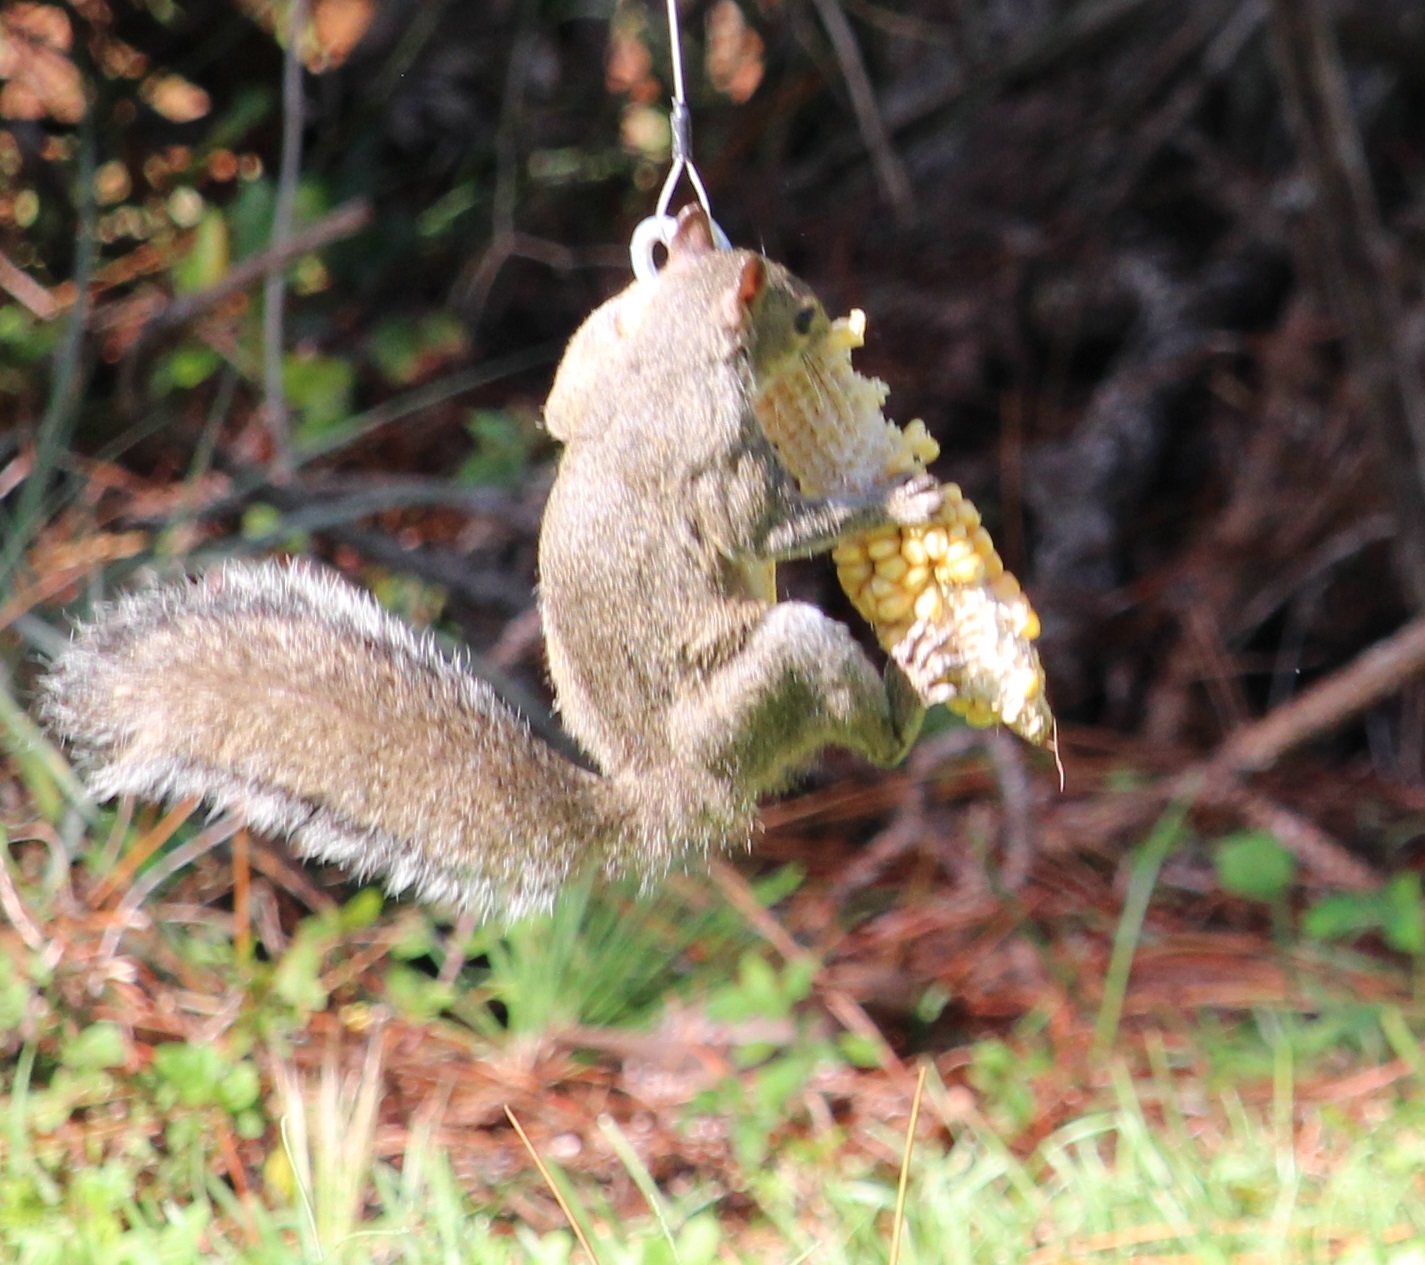
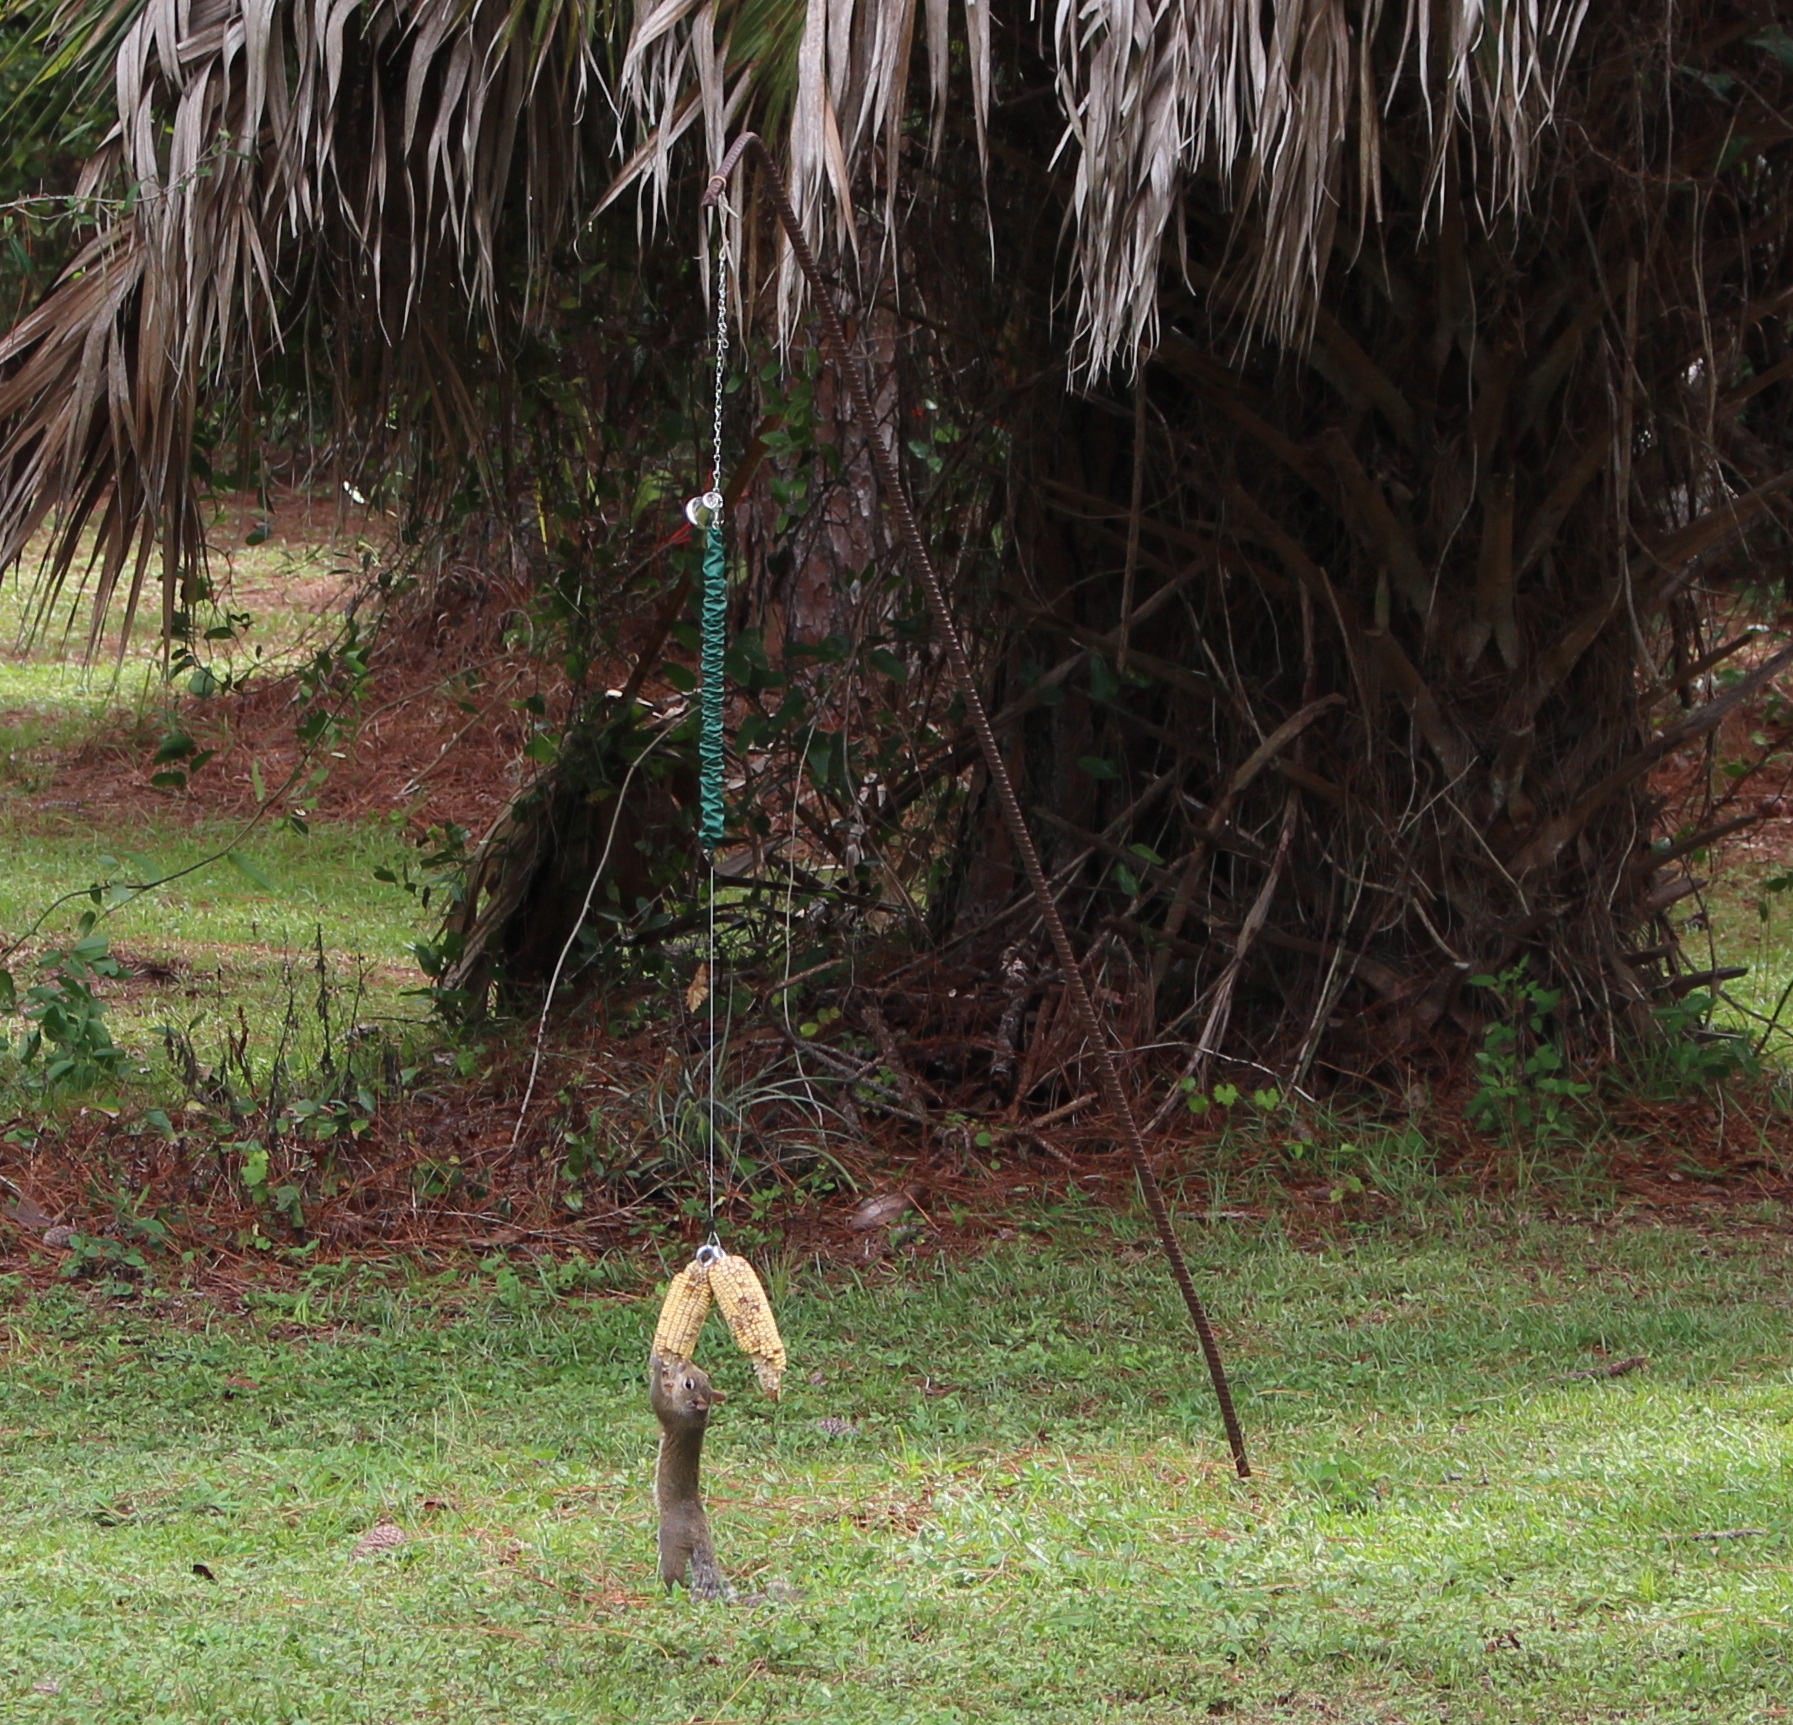
This squirrel feeder called Squngee is hilarious to watch. After the squirrels find it, they just keep at it until there is nothing left. After setting the Squngee up in a location that is away from the bird feeder, the squirrels will eventually find it. It is better than trying to scare away the squirrels, because if you have ever tried to scare away squirrels, they are very hard to get rid of. Hanging a Squngee is an alternative method that requires feeding the squirrels. The Squngee also keeps them busy and allows more time to pass to allow birds to visit the bird feeders.
Squirrel found Squngee
I have spent many hours devising ways to keep squirrels from the bird feeder, but they just don’t care. The squirrels just keep coming back time after time.
I have tried spraying the squirrels with a water hose until they were soaking wet and barking at me. I remember one time the squirrel huffed away and I really felt like I had hurt its feelings. I have tried running at them making noise, scaring them into a panicked scatter, only to have them return in a few moments. I have set up a plastic owl. I devised a releasing bird feeder, just to see how far I could go and they would always come back until the bird food was gone. I felt like Donald Duck when he was getting fed up with the chipmunks, and was devising evil schemes to eliminate them. The Chipmunks always won.
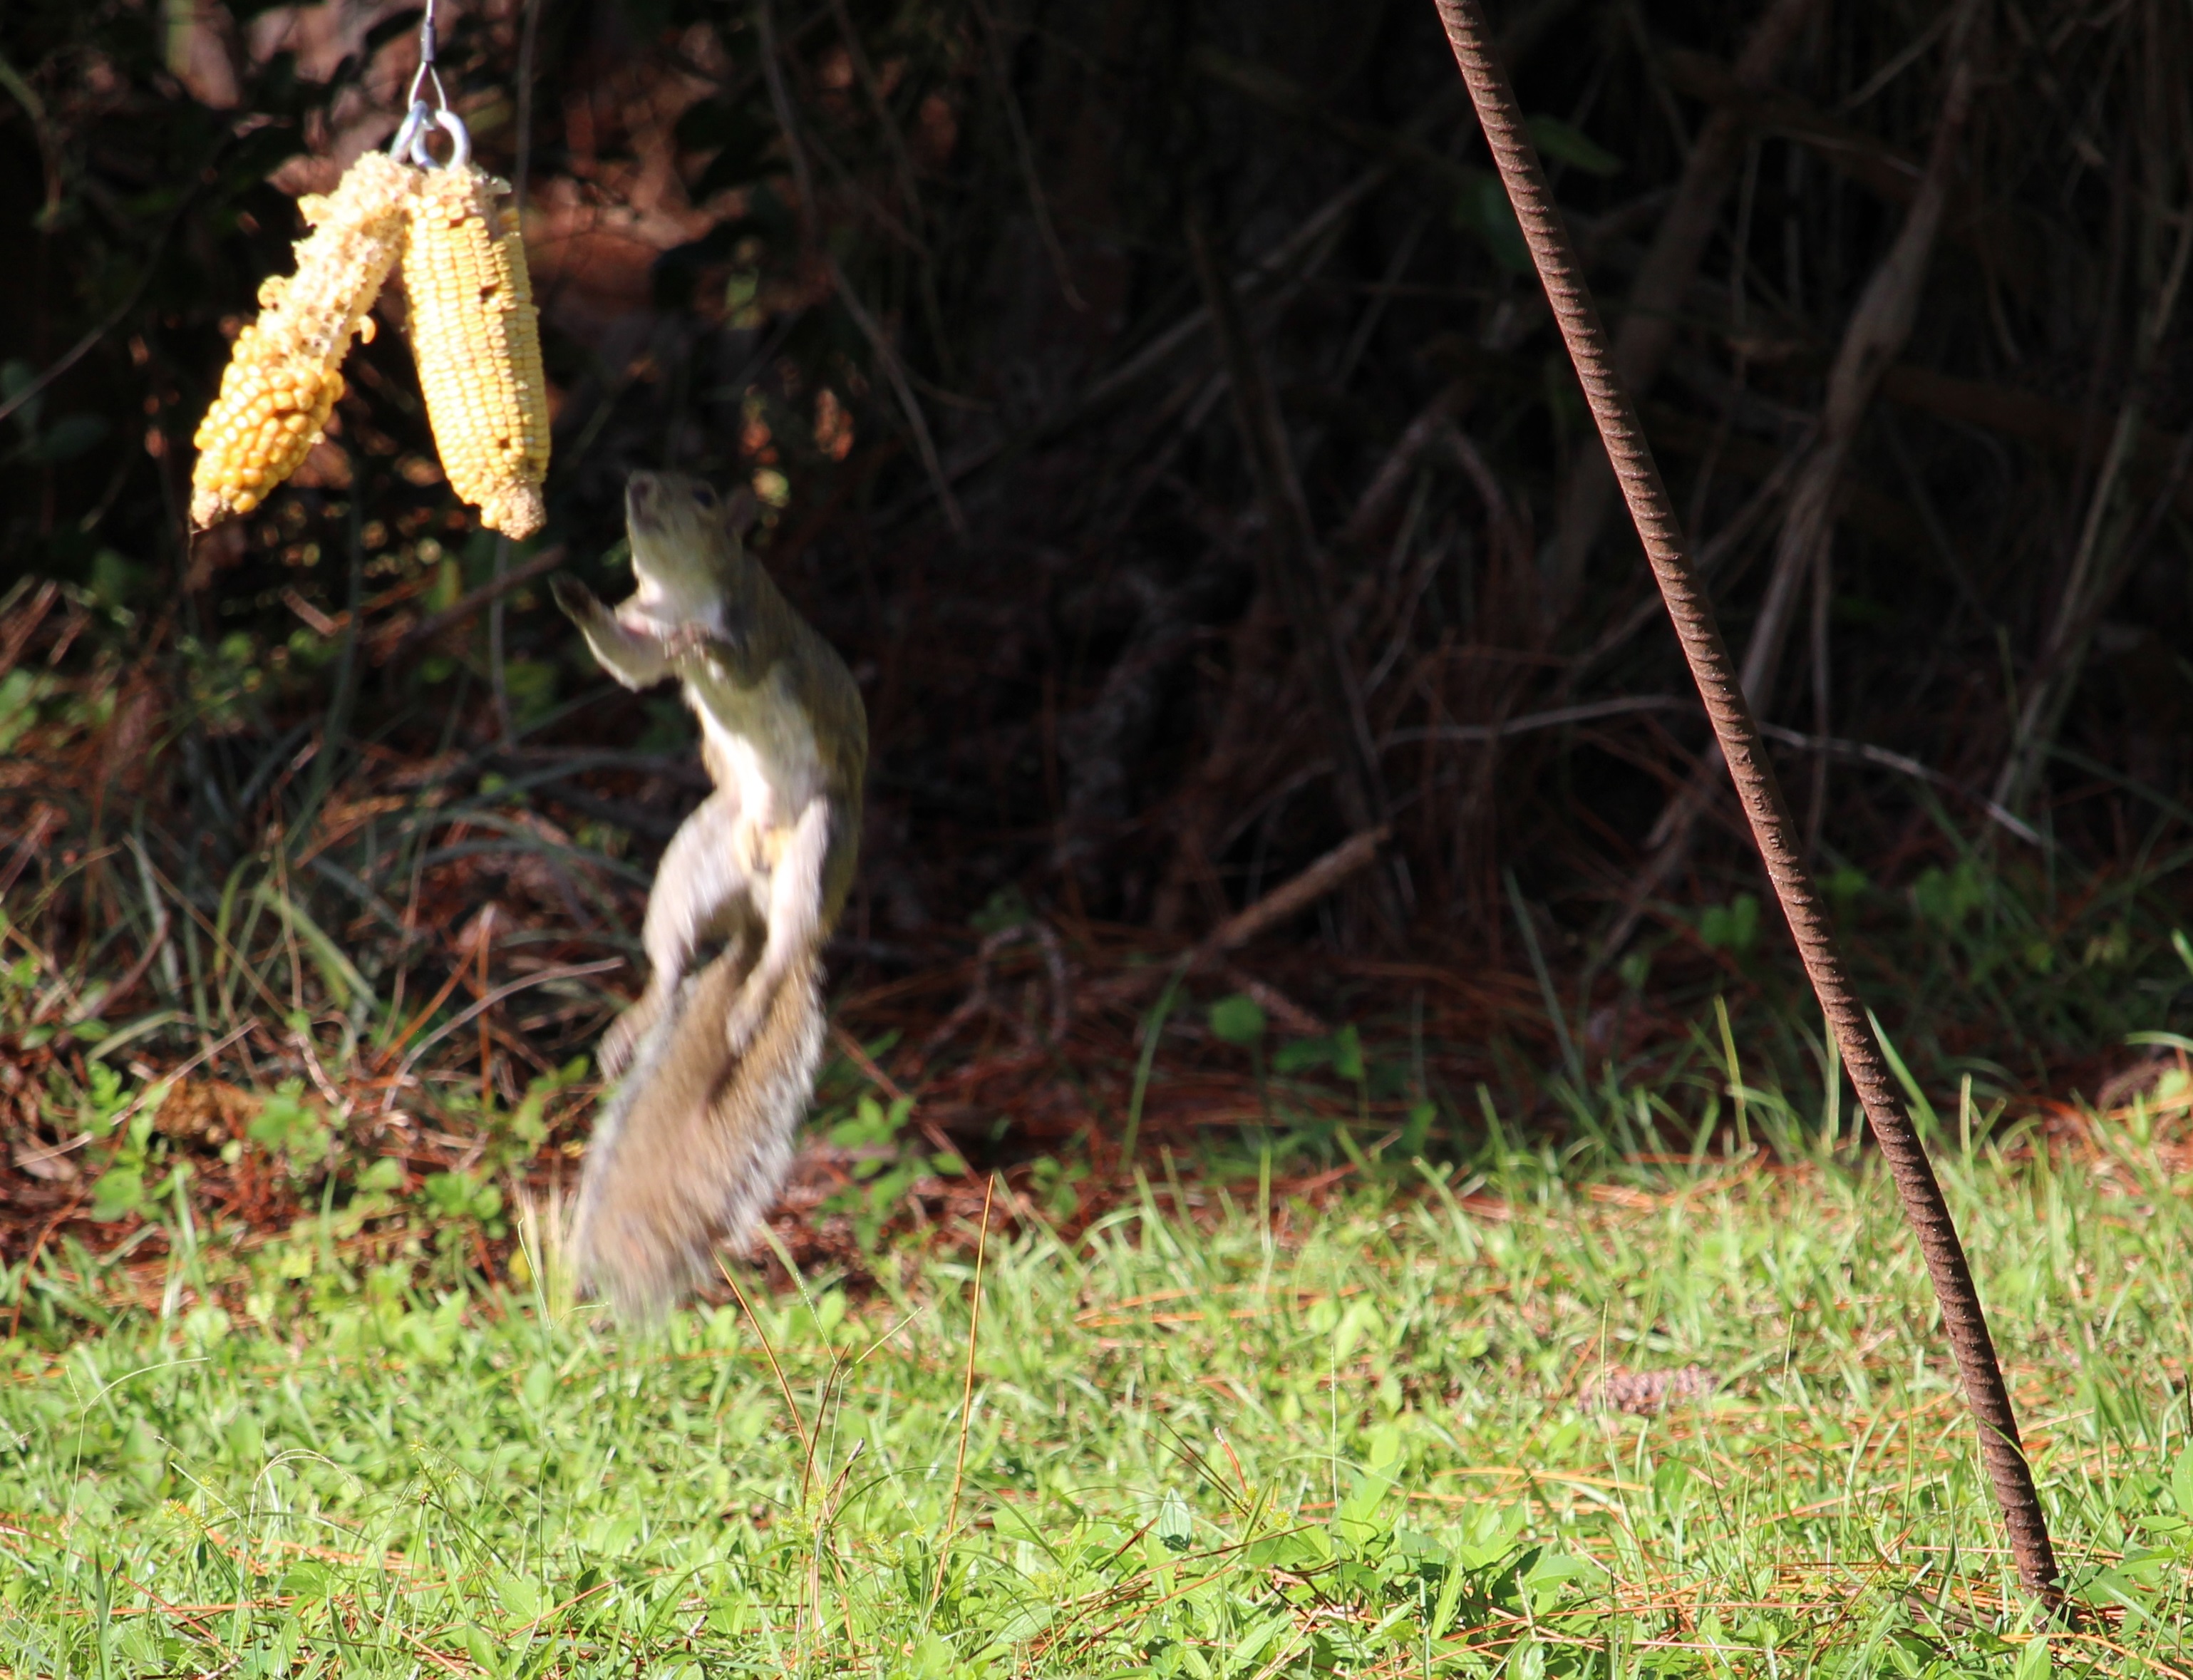
Squirrel in mid-jump after moving Squngee up to 2 feet
Find some corn cob squirrel food at the hardware or feed stores, or even amazon.com. The Squngee has lag bolt eye screws that hold the corn cobs really well. The squirrels love the corn so they will find it. Once they know the corn is there and no one is going to harass them, they will keep coming back for more.
Squirrel food
Testing the distance the Squngee needs to be from the bird feeder will take some trial and error. It may be beneficial to let the bird feeder empty, then supply the Squngee with corn cobs. Let the squirrels find the Squngee and get used to it before you put bird food back in the bird feeder. This way the squirrels will know
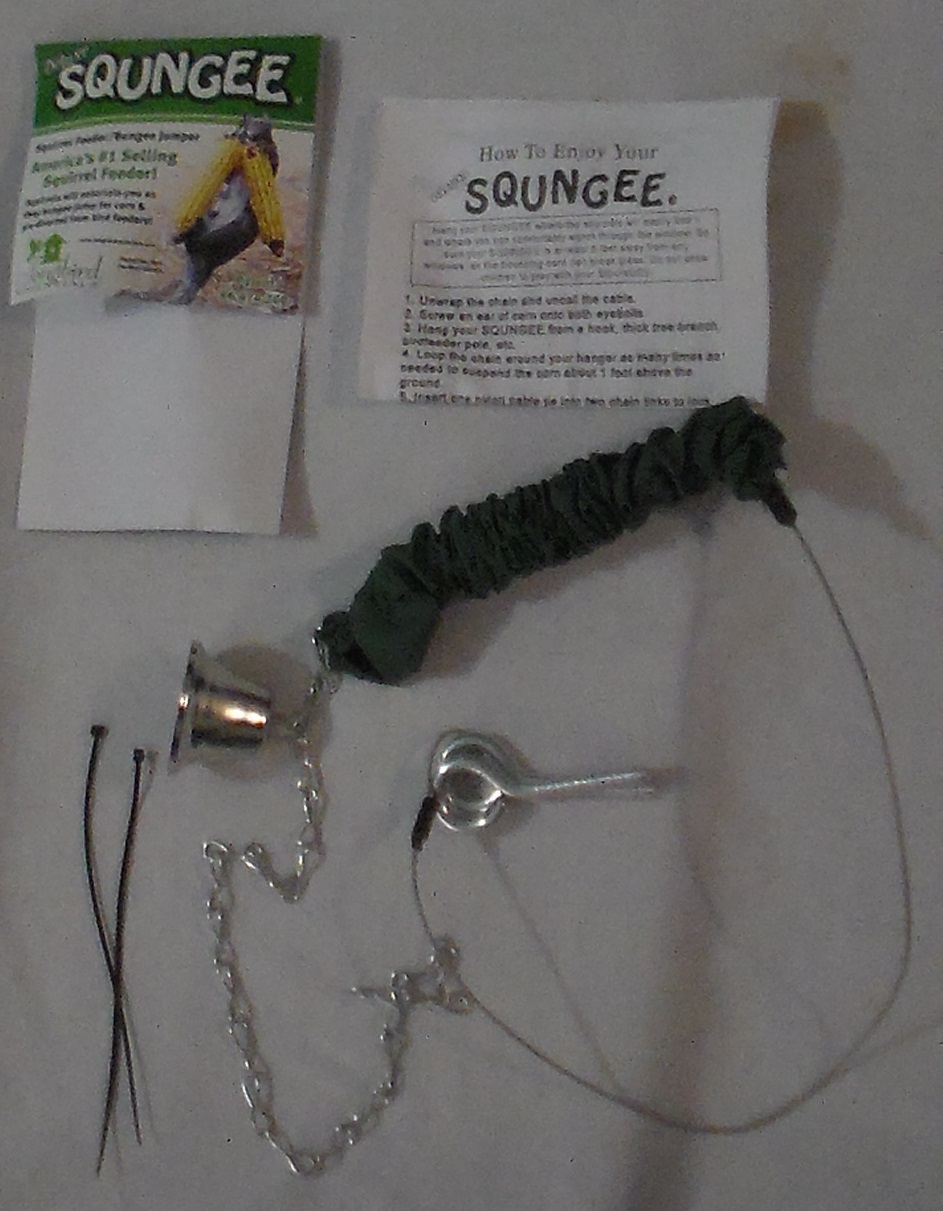
Squngee Contents
The Squngee is very easy to set up. Screwing the corn cobs on the lag bolts is very easy as well. It is a process to get it to work the way you want. You are either feeding the squirrels, or trying to deter the squirrels from the bird feeder, or both.
One method of propagating staghorn fern is cutting and separating. Staghorn fern propagation is one way to get more staghorn ferns, other than buying more. Staghorn ferns will take off if they are placed in the right location. I have seen massive staghorn ferns around and always love them. I know that it takes a long time for the staghorn ferns to get that big, so I am always knowing this when I see them.
I am going to walk through propagating my staghorn fern by cutting a section out. I will then mount my staghorn fern cutting onto a board. Mounting staghorn fern cuttings are not too difficult and can be accomplished several ways. 3 ways of mounting staghorn ferns are by attaching to a board, attaching to a tree or pole, placing in a hanging basket. This post will focus on propagating staghorn fern by cutting and then mounting staghorn fern on a board.
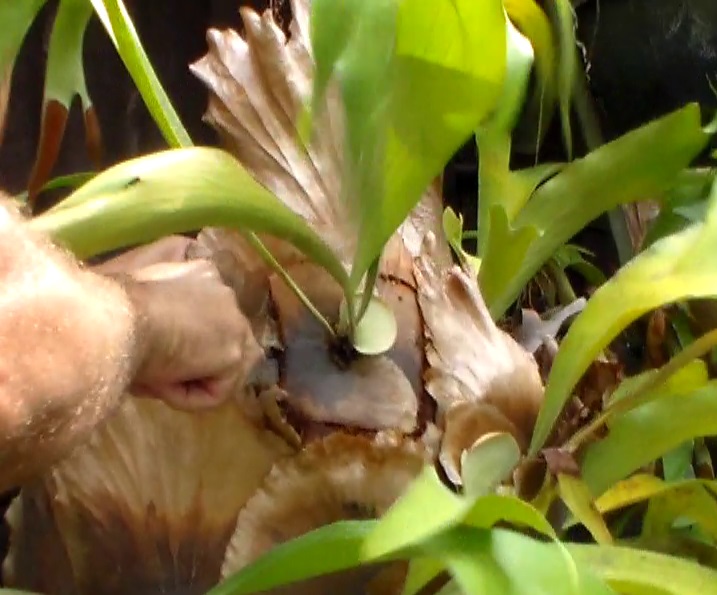
Cutting out the right section
The first thing to do is identify where on your staghorn fern are you going to cut. Find a section of staghorn “leaves” that you can single out without damaging another shoot of leaves. Then if the flat leaf that creates the “ball” is small and lively green color, it is a good choice. I believe finding that type of situation on your staghorn fern will help your new cutting grow better.
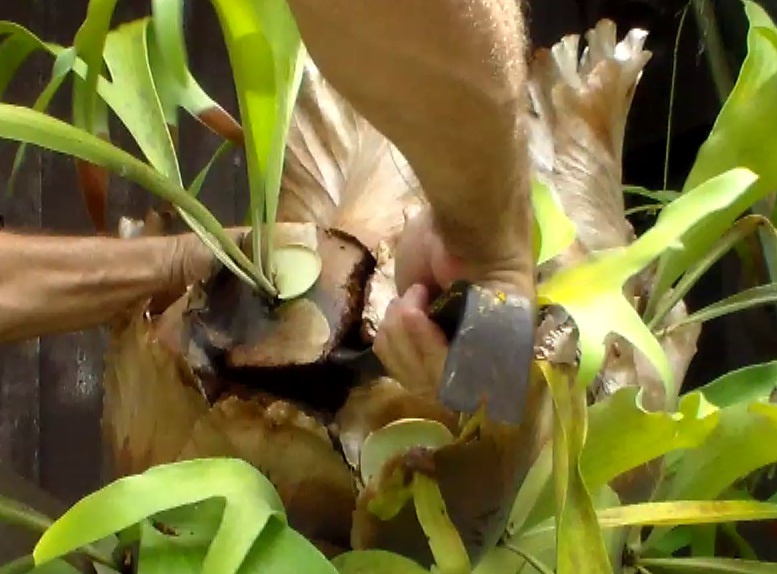
Prying out staghorn fern cutting
Once you have identified your cutting area, take a sharp knife or utility knife and cut out the template. I stayed about 2 or 3 inches outside of the shoot of leaves on my staghorn fern. I didn’t want to damage the shoots next to my cutting area. Then take a longer knife and keep “slicing” and “sawing” until you know you are 2 or 3 inches in. Sometimes angling your cut inward will help to get it out easier. If you angle your cut inward, then make sure you are out far enough to “miss” the roots. You want to make sure and capture the roots with the least amount or no damage to them.
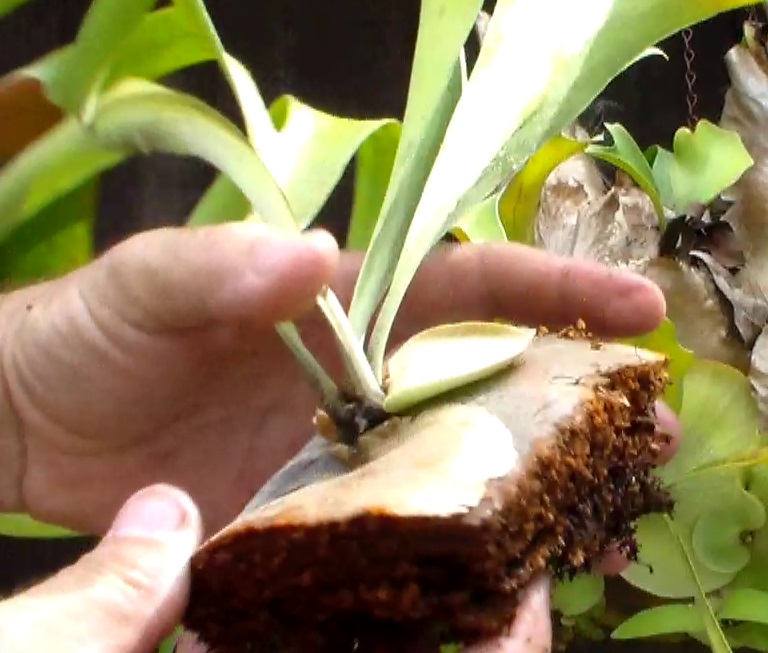
Staghorn fern cutting in hand
Now that you have your staghorn fern section cut out, it is time to extract this from the main staghorn fern. The staghorn fern is really a big ball of layers of old leaves that are now providing moisture and decay that the ferns love to grow in. So it really should “peel” away. Sometimes it will come out easy, but most of the time it won’t. The knife doesn’t really have any strength for prying, so a flat bar or some kind of pry bar will help. Just be careful not to damage other staghorn fern shoots while prying the new cutting out. Once it gives then you should be able to take it out by hand. You will know you went deep enough when the new staghorn fern cutting pulls away and is mostly flat on the bottom. This is the hardest part of propagating staghorn fern. The rest is downhill.
Staghorn fern mounting items
In staghorn fern mounting, you need to decide if you know the right place to put it. If you don’t, you may want to stick with board mounting, or hanging basket. This way, you can move the staghorn fern if you feel it is not doing well.
Staghorn Fern Mounting to a Board
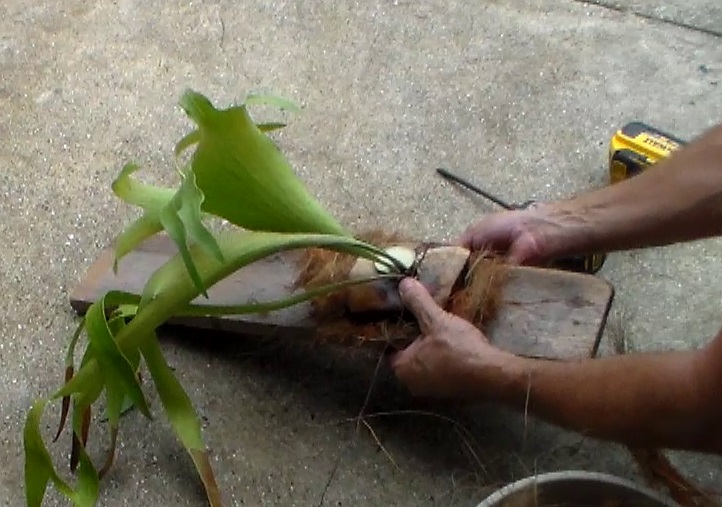
I used a piece of Cedar fascia that I had laying around. It is aged and somewhat weathered. This is what I will use in mounting my staghorn fern cutting. I would not use PT lumber to mount your staghorn fern cutting. Cypress is another good one. I am not sure about pine, might not want to use Pine. Aged and dry wood should be good. I usually put a one or two fasteners where I want the staghorn fern cutting to sit. This will help hold the staghorn fern cutting up and keep it in one place. After I install the fasteners to be left about an inch or so up, I put some organic material under the staghorn fern cutting. This organic material will help hold moisture. I used some “monkey hair” from a cabbage palm. Sphagnum moss is a good organic material to use, and you can buy it online, or at a home store. Then I “push” the staghorn fern cutting onto the screws. I also make sure that my fasteners are just outside of the staghorn fern cutting’s roots. Then I take a piece of copper wire and wrap it around the board. You can also use fishing line. This may eventually get cut off. It just depends on how fast the staghorn fern cutting covers it up.
Mounting staghorn fern cutting
If you want to hide your staghorn fern mounting method better, you can drill holes in the board. Then run the wire or fishing line through the holes and then around the staghorn fern cutting.
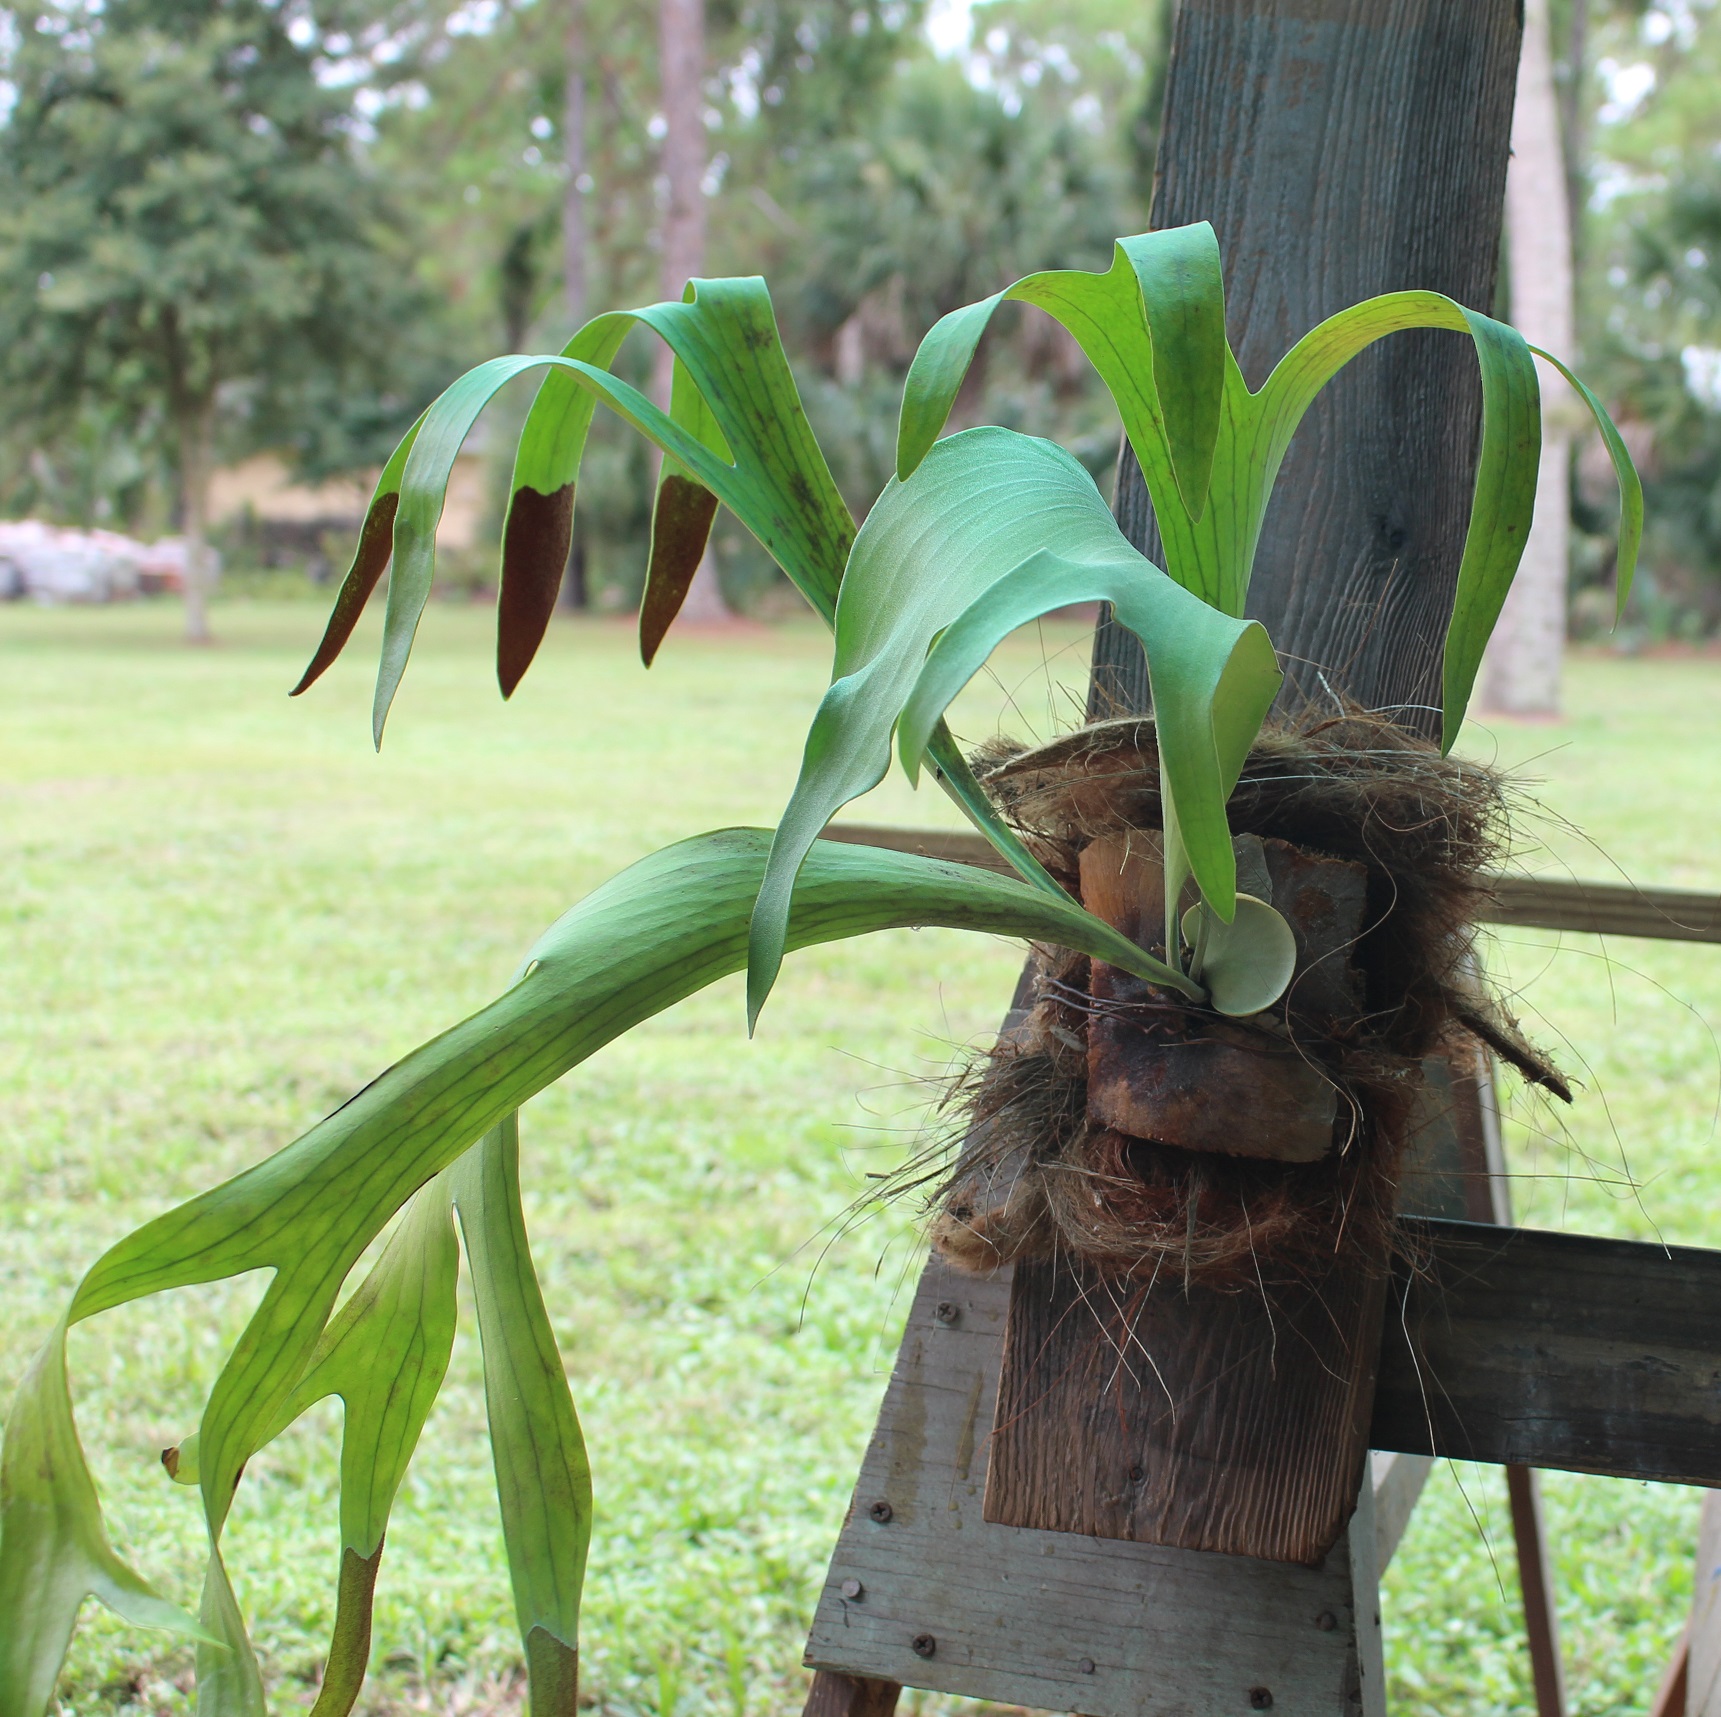
Using a board to mount the staghorn fern will allow you to move it around if needed. Also, the board can be fastened to something else without disturbing the staghorn fern cutting.
Staghorn fern mounted on board
Someone once told me “Staghorn ferns like the north sun!” I believe this to mean, place your staghorn ferns on the north side of trees or buildings. This is definitely true in South Florida, but I am not sure about North Florida.
Where is Naples? Well, that depends on which Naples you are talking about. Did you know that there is a Naples in 11 different states in the U.S.? Also, Naples is a city in Italy. That is 12 different places named Naples. The Naples, Italy reference is more popular than Naples, FL, but probably not as quaint. Naples, FL is where I spend most of my time. There is a lot to do in Naples, FL. Naples is close to the Everglades National Park, which is a vast area of natural beauty. Also, world class beaches run the distance from Gordon’s Pass on the south side, all the way up to Bonita Beach in the north.
Naples, FL Weather
Many people like to come in the winter months, due to the beautiful weather. The cooler weather runs from November through April usually. It is not always cooler, it is really just “not hot”. Once October rolls around, you can start to get a sense of fall coming in. October can still be hot, but is a lot more bearable. Some of the first cold fronts “may” come through in October and keep coming through once a week to once every couple of weeks. The real “cooler” weather usually starts in December and January. Fronts can keep coming through April, and every once in a while Naples will have a late March or early April cold spell. This throws everything off, because it seems like the cold fronts are over. By the end of April, the Summer sun starts blazing and by May you know Summer is already here. June starts hurricane season, which lasts through November. The Summers are very hot and humid. The term “Snowbird” comes clear in the Summer as Naples, FL is empty. Snowbirds are people that have a home up North somewhere, and then spend the winter months here in Florida. So once November rolls around, the population grows a lot.
I just got my DeWALT Cordless Blower DCBL720P1. It came with a 5AH battery versus a 4AH battery that came with my drill and driver set (and the 3AH batteries that came with the extra 2-battery pack that I bought). I have experimented with some other cordless blowers and this one seems to be pretty powerful for a long enough time to get something done. Using the DeWALT 20V MAX batteries is a plus, because I am currently converting my DeWALT cordless tool arsenal from the old 18V NiCad to this new 20V Lithium battery. Over the last 10-15 years I have collected many of DeWALT’s line of cordless tools. Some in duplicate and triplicate.
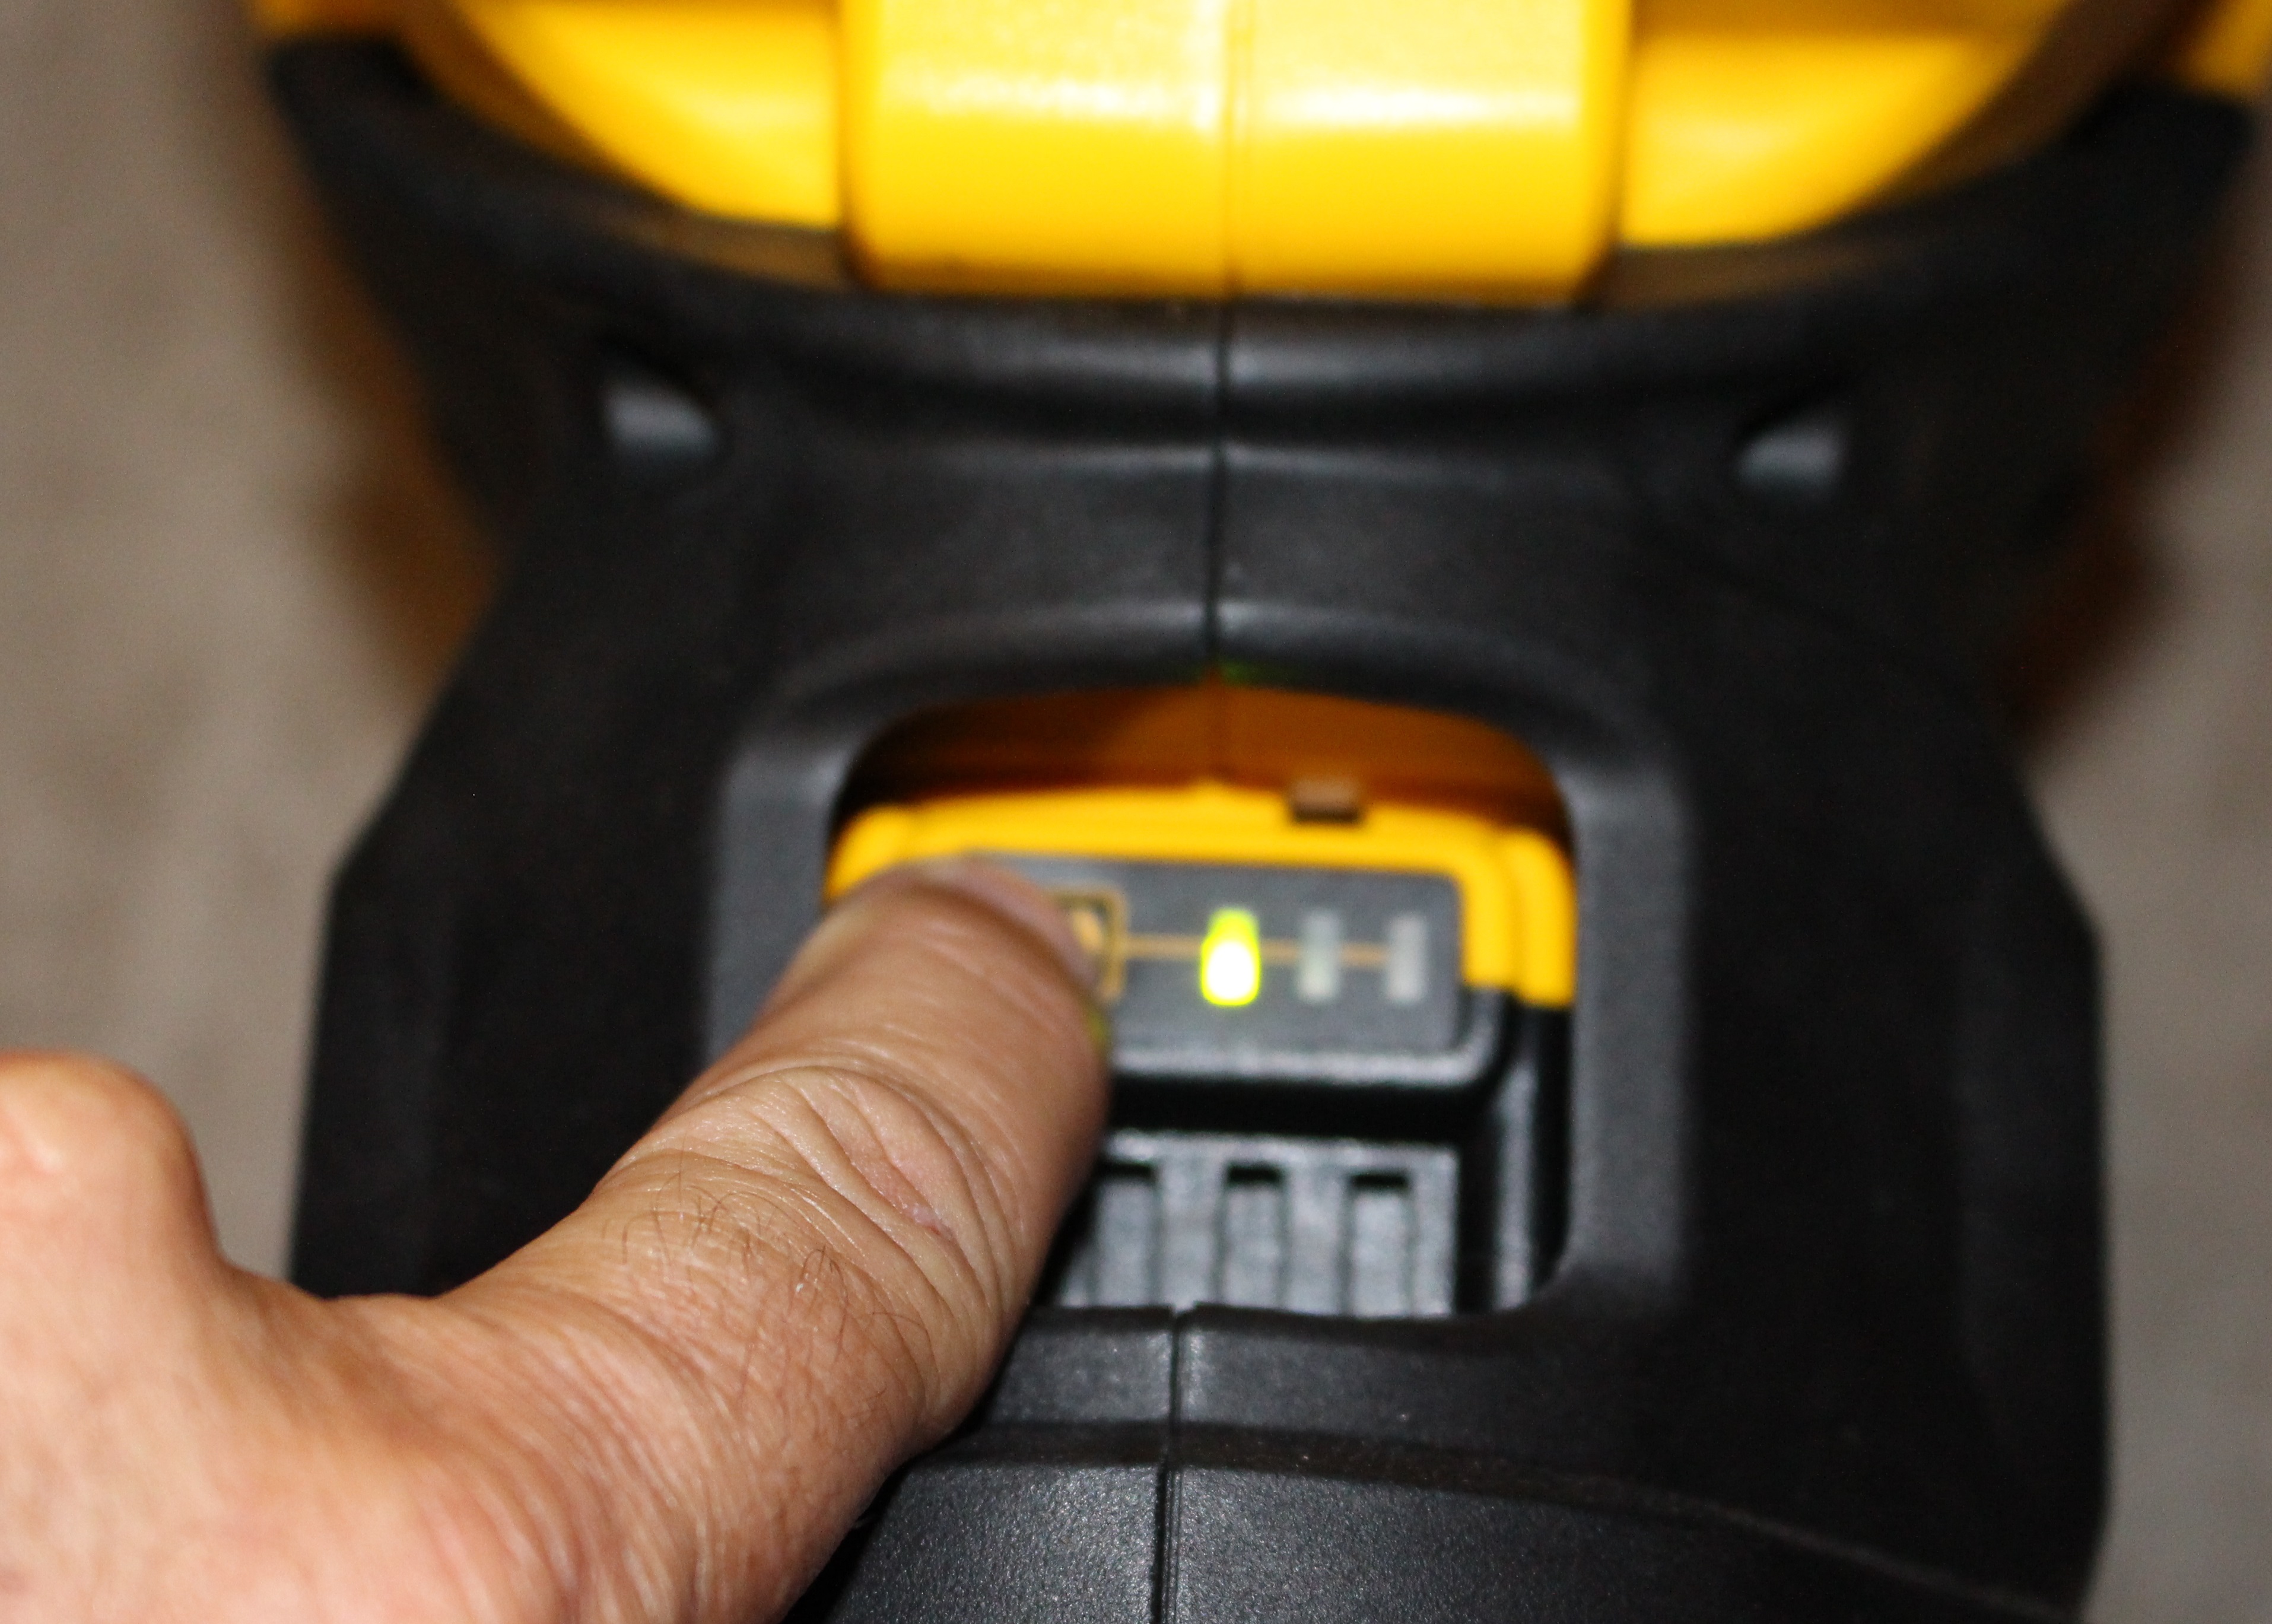
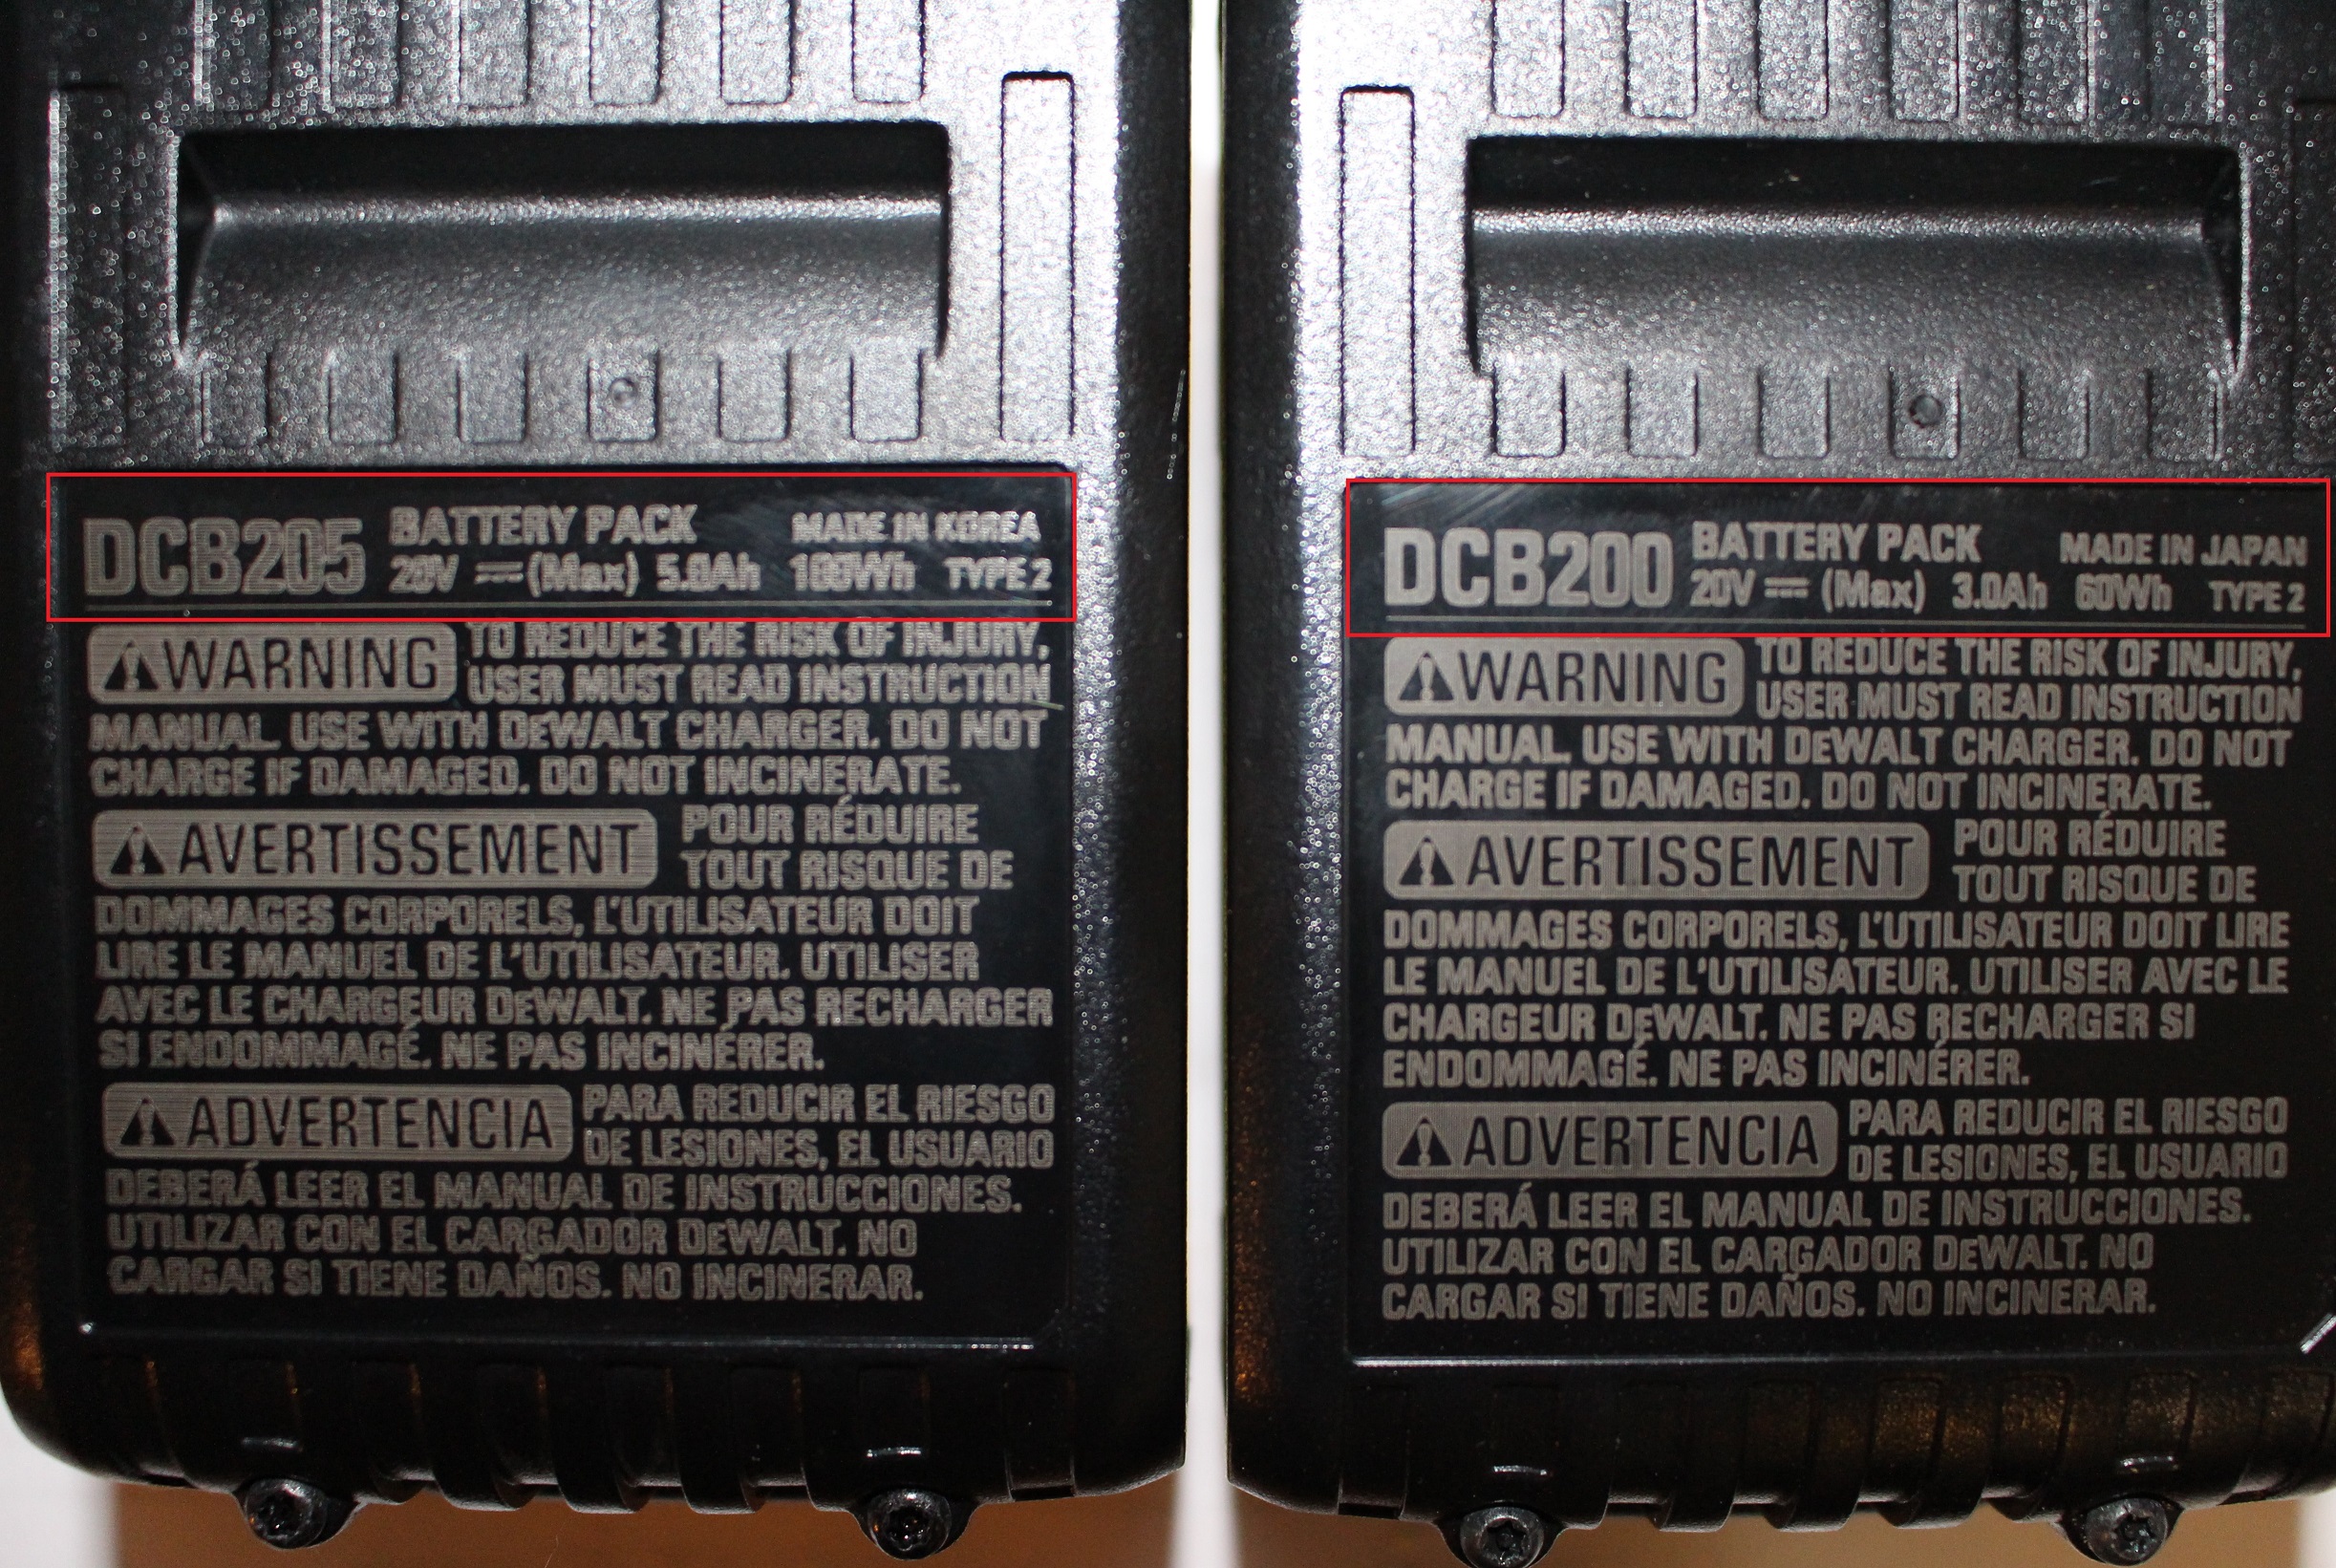
Cordless Blower Battery Guage
The new 20V lithium batteries come with a power button that has 3 lights on it. This way you can see how much your battery has in it, before you get started. I did not realize that there were different sized batteries. The photo on the left shows where to look. I had bought some extra batteries for my drill/driver set around Christmas time and now I know why they were priced the way they were. I will look every time now.
Cordless Blower Came with 5Ah Battery
I primarily used an electric blower before I got this DeWALT Cordless Blower. This meant plugging in and dragging the extension cord around. I had gotten away from the gas blowers, because I would always let it sit for too long between uses and the carbs would always gum up. Also, if it would tip over, fuel would ruin whatever it spilled onto. This was bad. So the switch to electric has been good. Always have power, and if there was no electricity, we would bring a generator along for those few occasions.
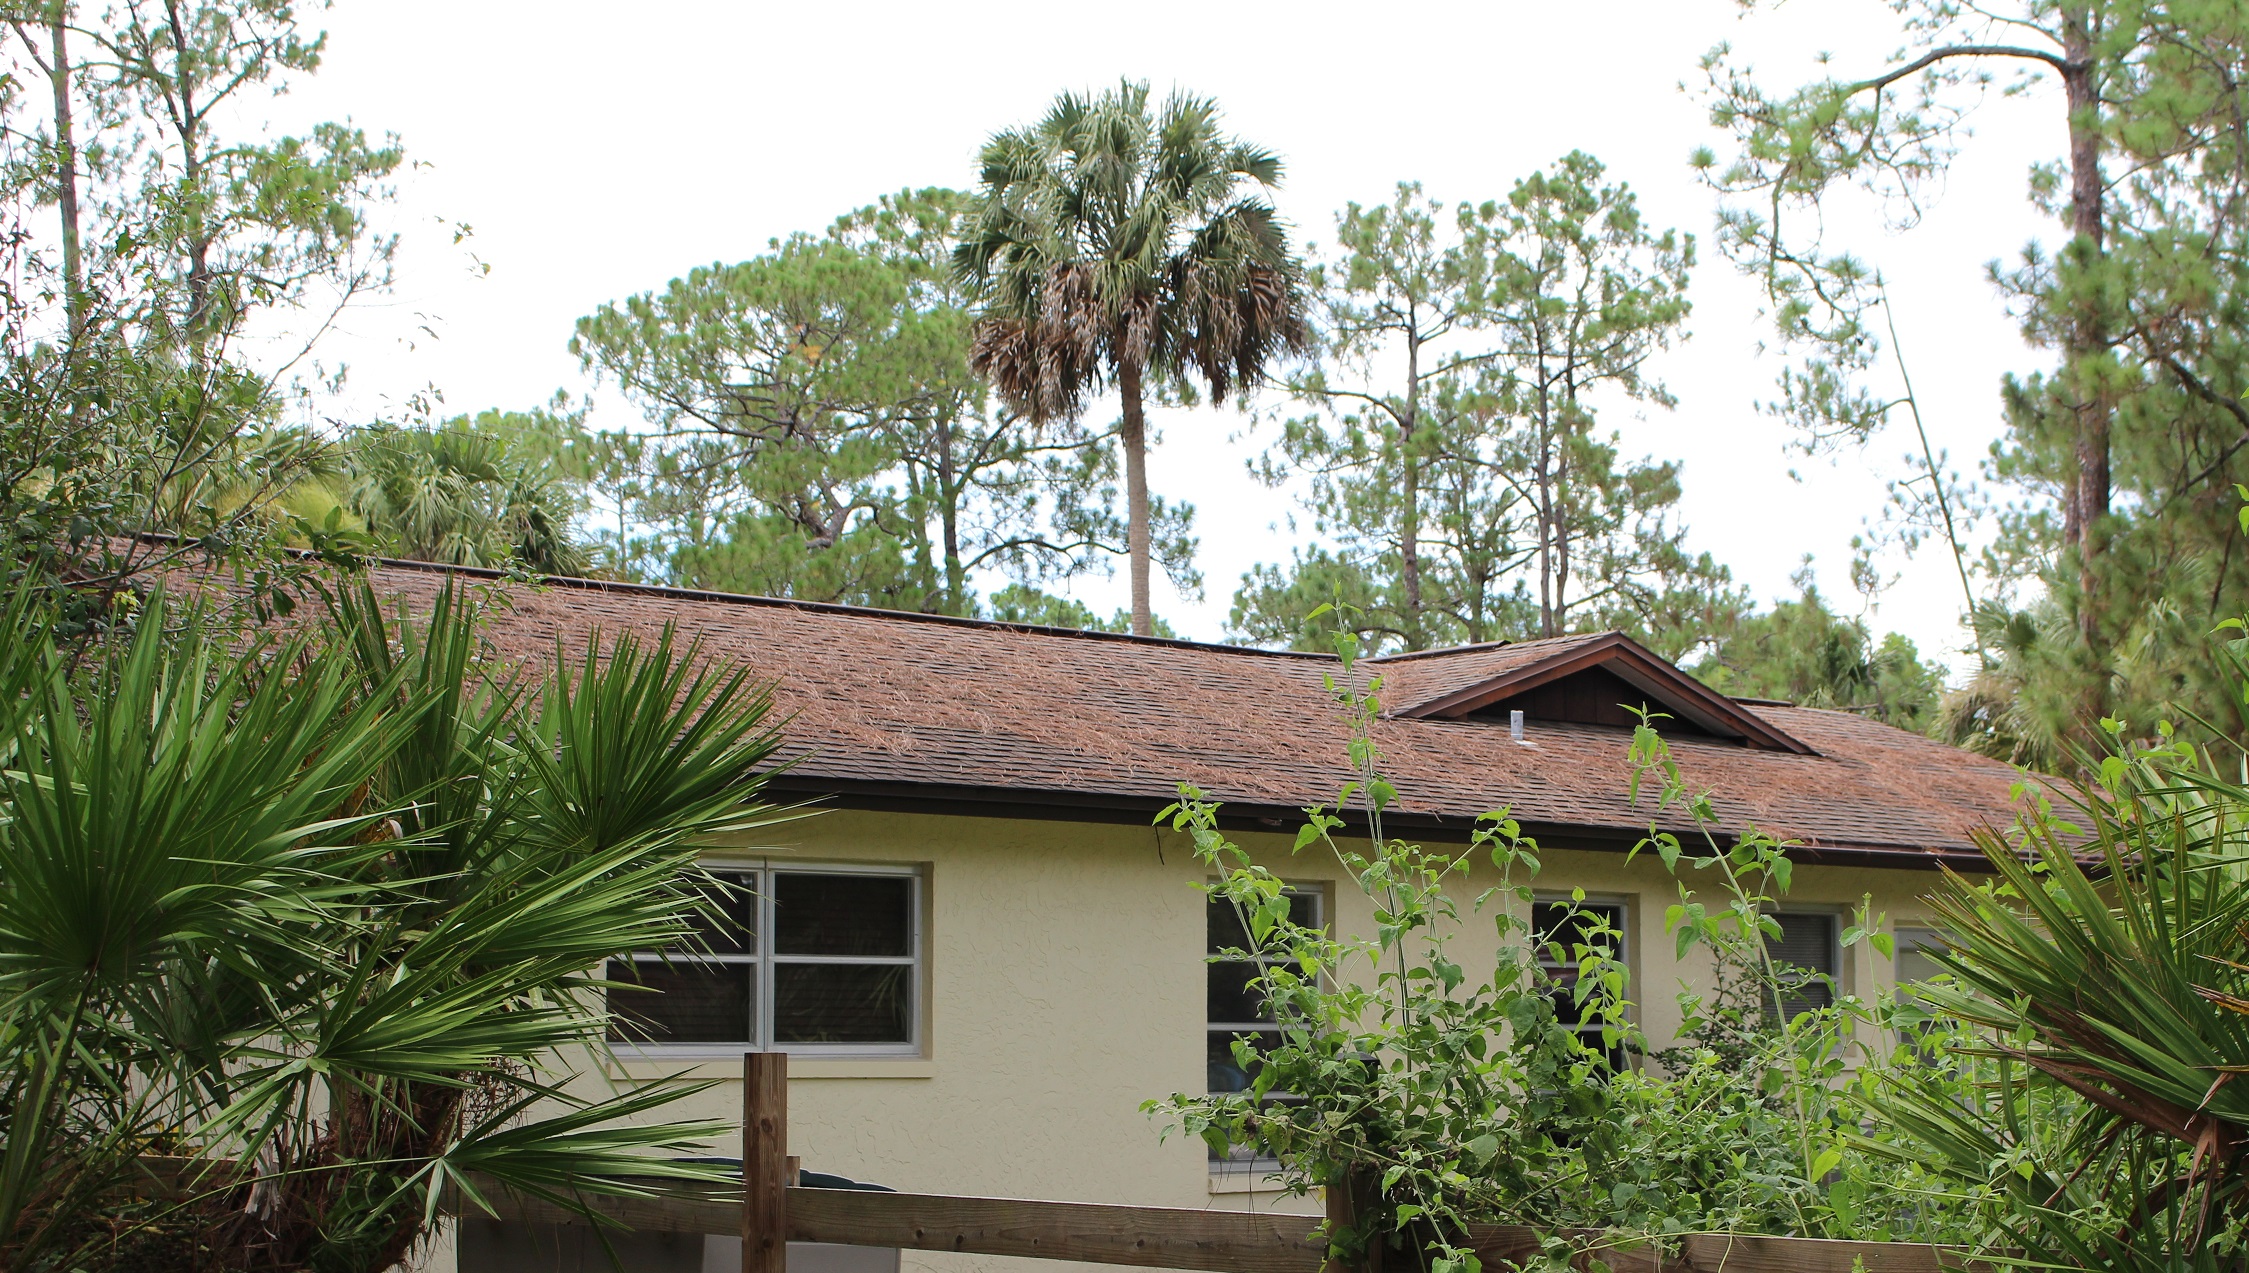
Pine Needles – Cordless Blower
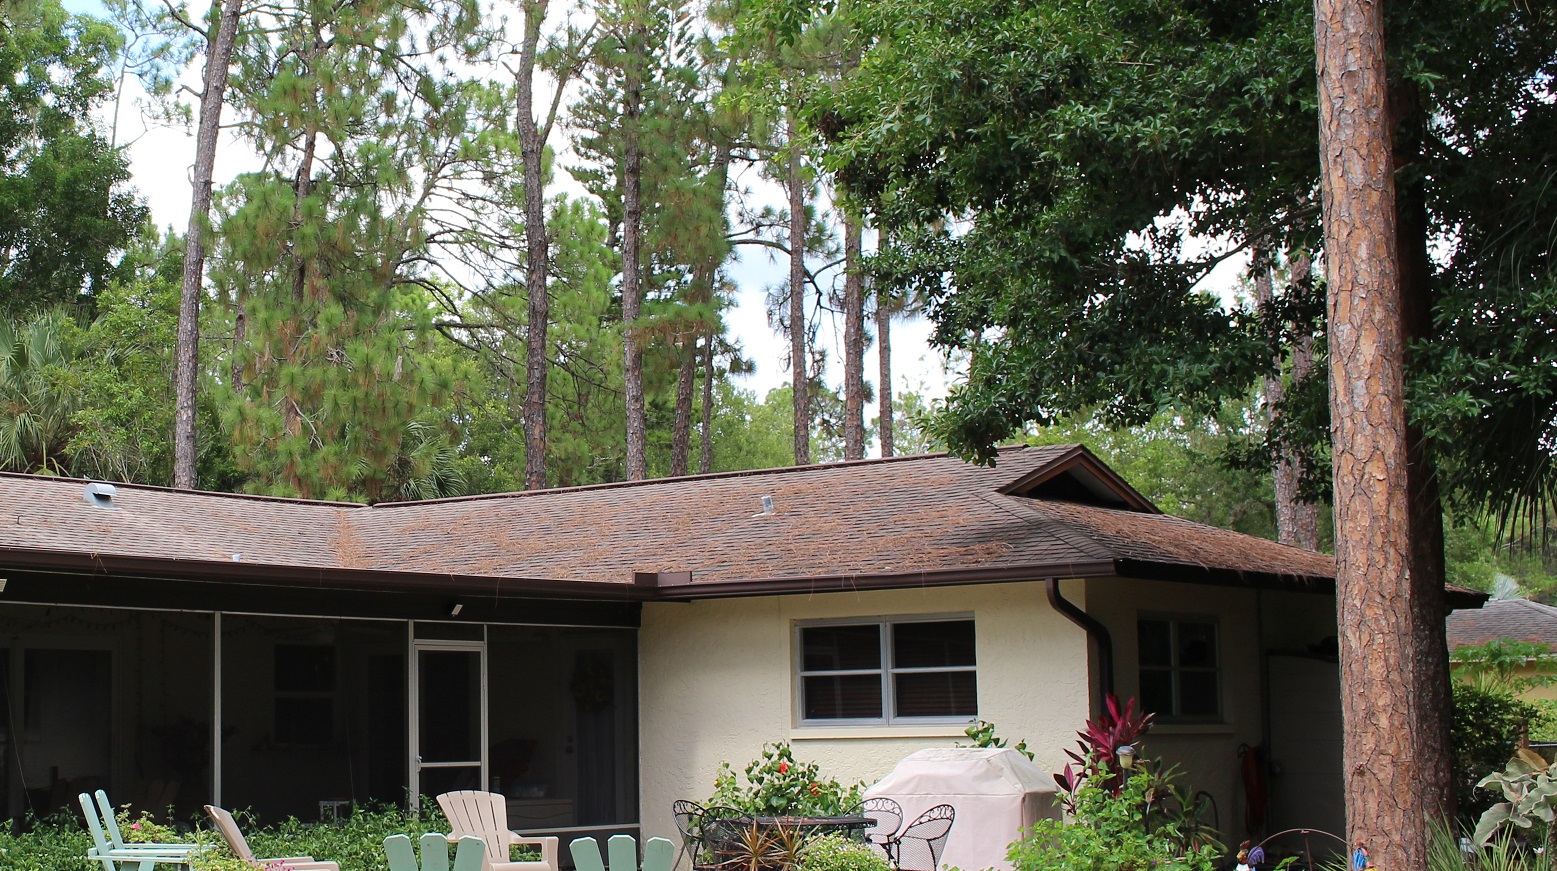
This new DeWALT Cordless Blower is very powerful. I was very surprised how it compares side by side to an electric blower. The gas blowers probably have a little more kick, but this cordless blower was powerful enough to blow pine needles off of a roof, then blow an entire driveway, and still had one full light on the power meter. Now that is impressive. I am also impressed by the consistent power that it has throughout the battery life. The cordless blowers that I have used in the past seemed to give less and less power until finally dying.
Pine Needles on Roof
Now that the cordless technology has some lasting power, there are many other tools that have become cordless besides the standard drill/driver package. If your using some of these items then you know. If your not, you may want to try some of these newer tools. You will be surprised at how much power they have for a long period of time. There are other brands of cordless blowers and tools, but DeWALT seems to be the one that I gravitate towards. I think a supplier I dealt with sold them and once we had so many, it was hard to switch brands.
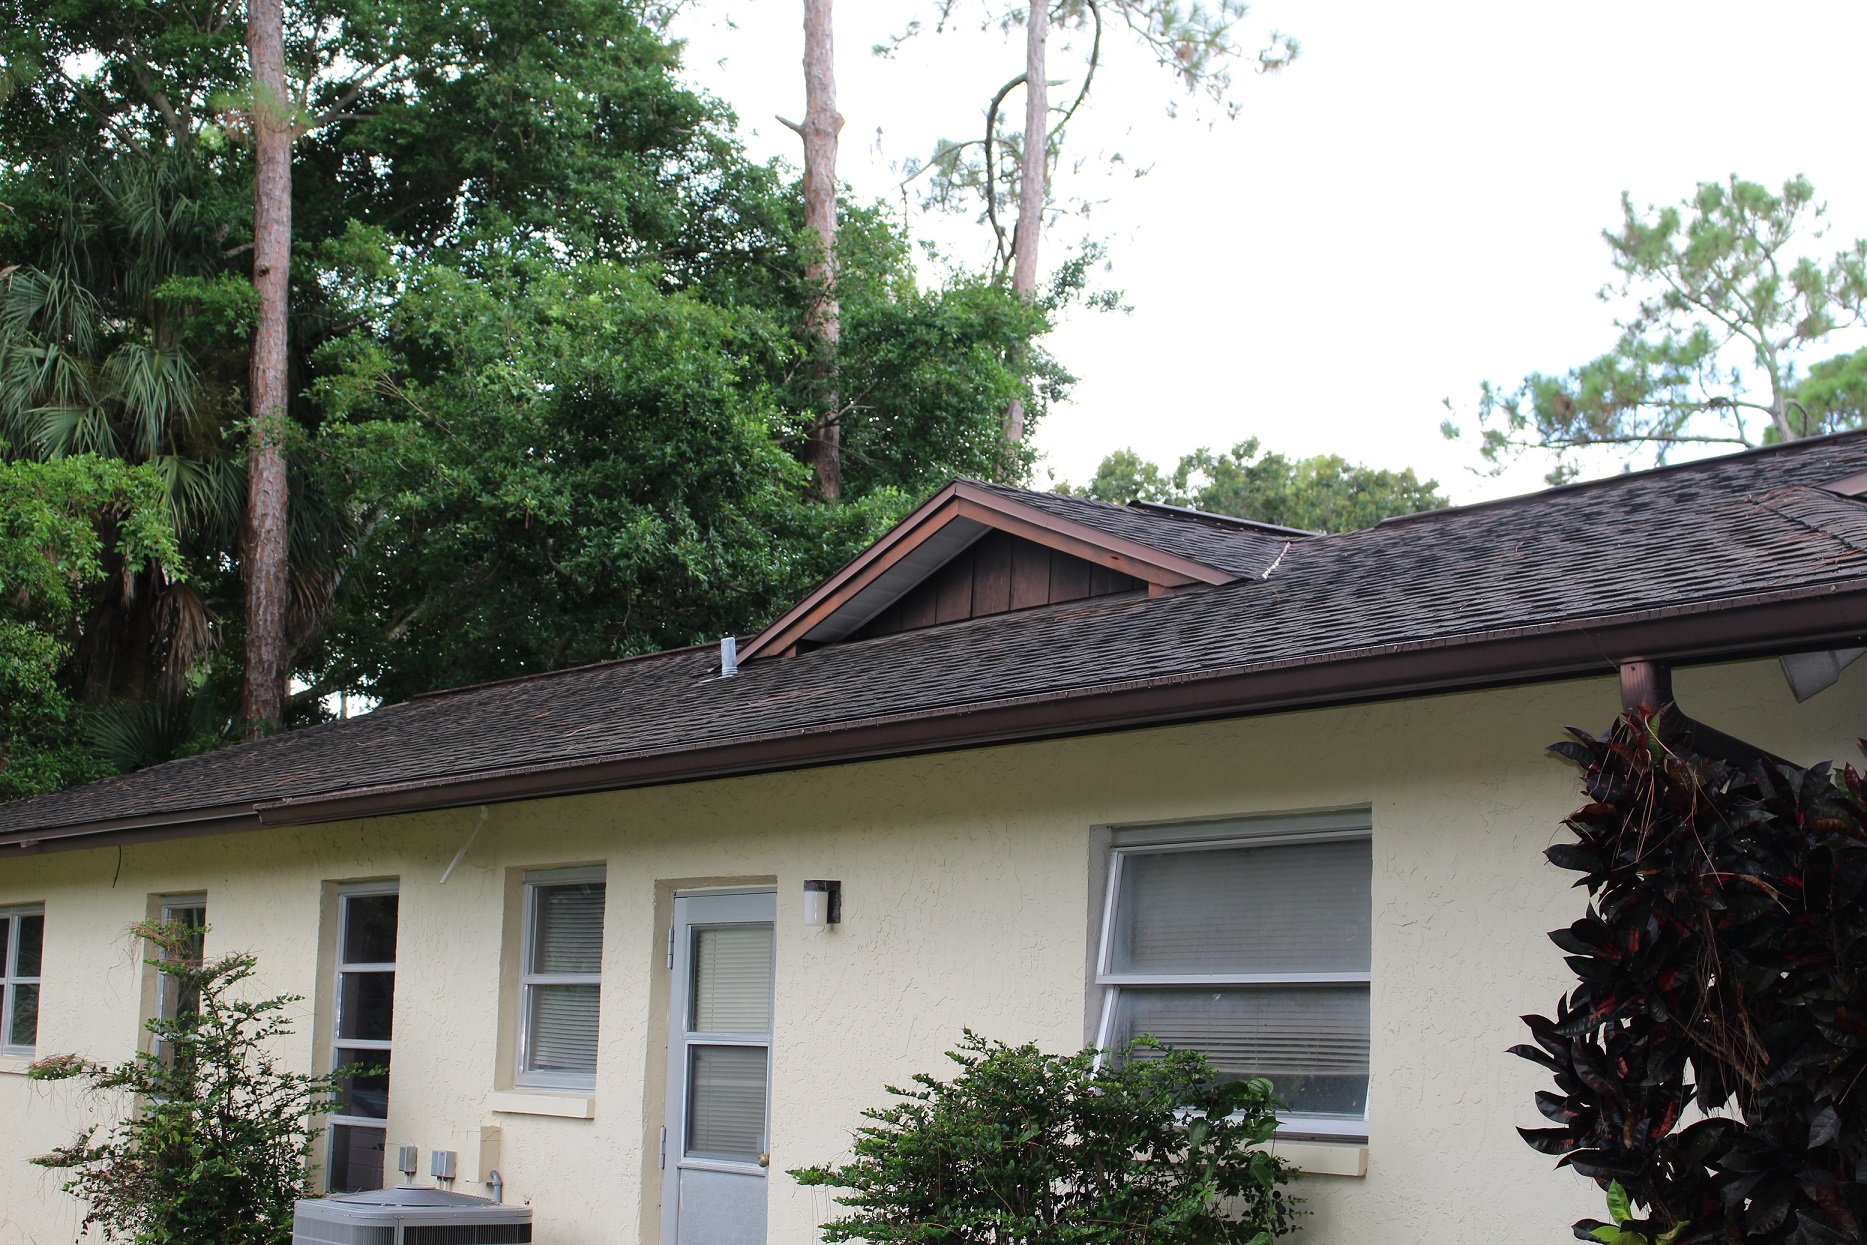
Cordless Blower Cleans debris from roof
Then once we were deep in, then it is just a matter of buying new batteries from time to time. Trying to switch over to a new brand of cordless tools is no economical feat. You don’t even realize how many you have until it is too late. Then it’s like, “I can’t buy something different, I want to be able to use it with my other tools!”
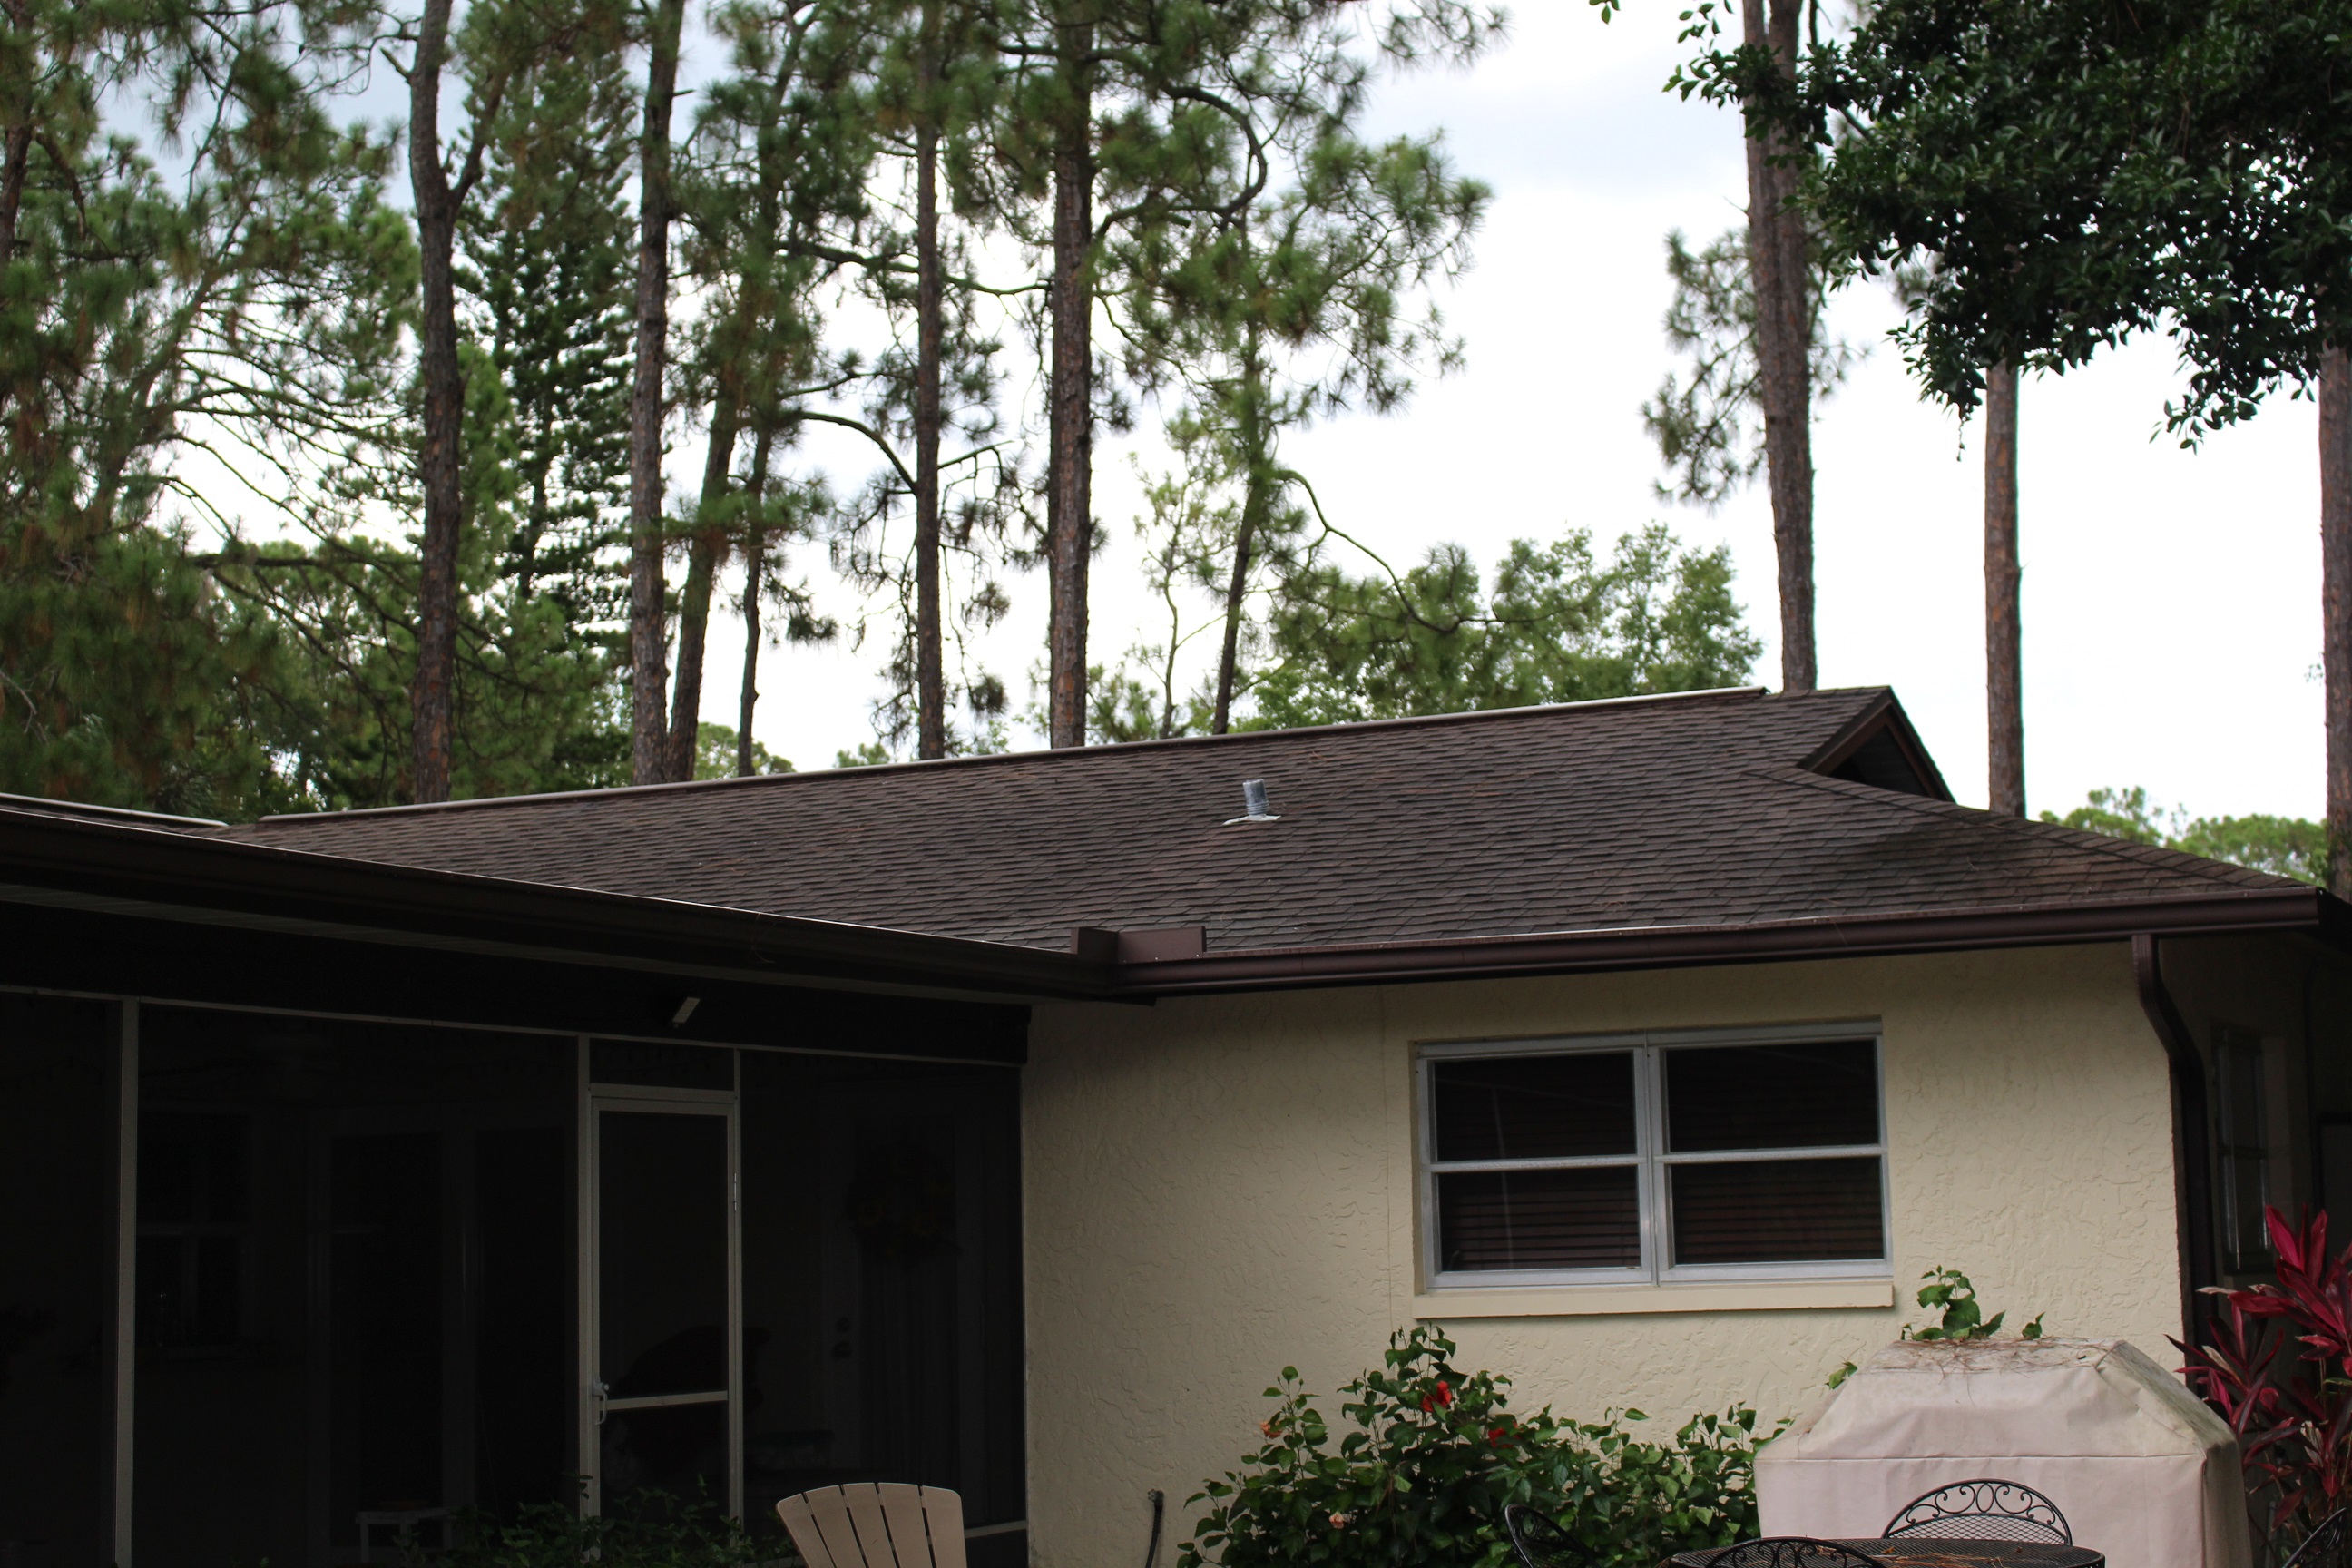
Cordless Blower gets rid of Pine Needles
I am now going to see how long these new lithium batteries last. The old NiCad batteries lasted quite a while, so I am hoping these will last a lot longer. That is one of the main reasons I steer away from these types of things, is because it seems more costly in the long run. I guess efficiency is hard to put a price on. They say efficiency is making something you are already doing better, not doing something you never do fast.
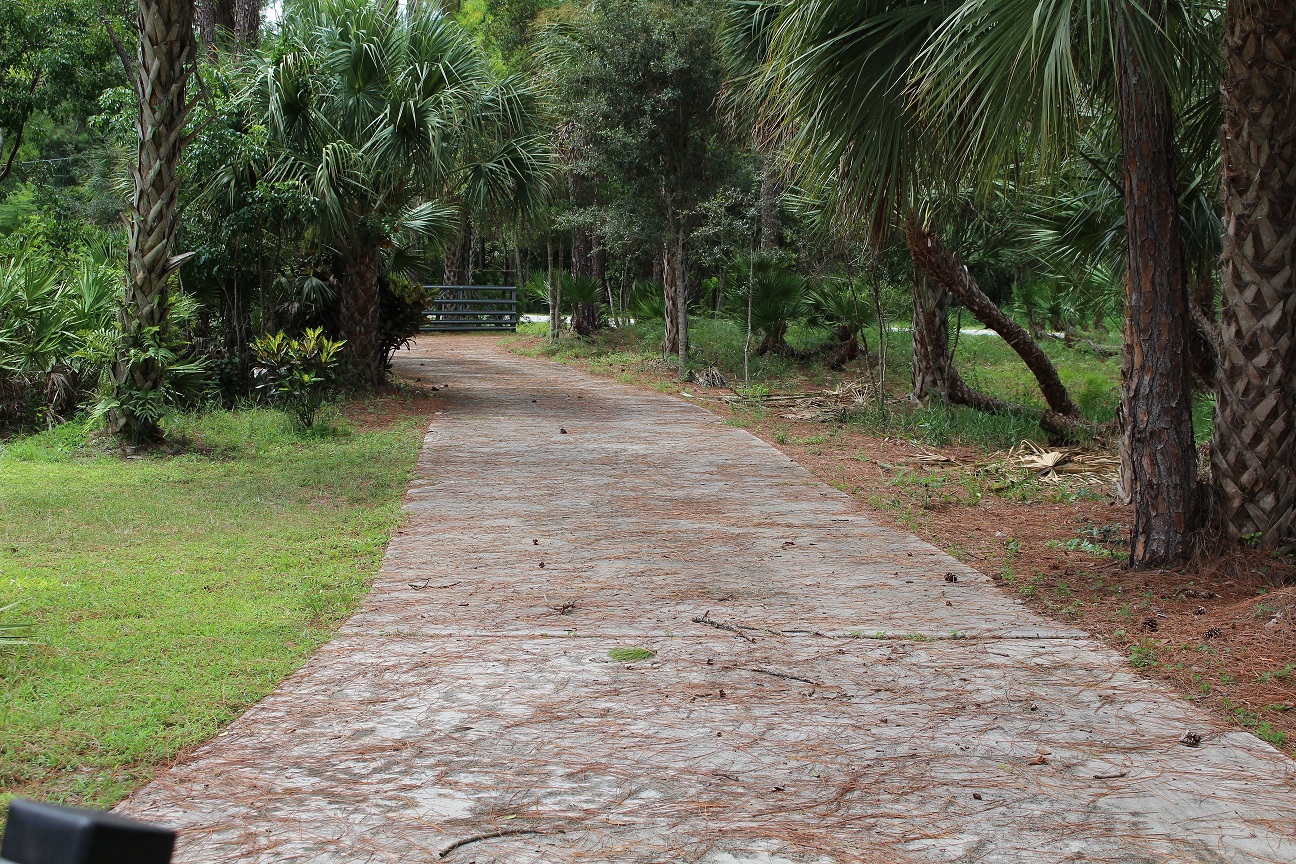
Driveway covered in Pine Needles
I paid $200 for the DEWALT DCBL720P1 20V MAX 5.0 Ah Lithium Ion XR Brushless Blower from one of the big home stores. It came with a charger and the 5Ah Lithium battery as well. So, if you factor the extra power battery and charger into the mix, then it is not any more than an XR Drill/Driver without a battery.
I have a KAPAXEN 30 Pin Power Supply Connector with waterproof backdoor for my GoPro 3+ and GoPro 4 that I use all the time. I have the one that is through the back and waterproof. The The USB connection is not completely waterproof, but can be protected to be outside. I have just not tried to put it under water. I have had it out in the rain with an extension cord cover and it worked great. I do time lapse photography with my GoPros and it will sometimes be plugged in for several days at a time and outside in the weather.
Same GoPro 30 Pin Connector without the back door. This will still come into play but may need to be modified to be waterproof. Click on either image to see it at Amazon.com
This link is to a list of the best selling power banks on Amazon.com. Make sure and look at the mAh value as the higher the mAh the longer it will last.
You can use the 30PIN POWER CABLE WITH WATERPROOF BACK DOOR HOUSING FOR GOPRO HERO3+&HERO4 in conjunction with a power bank. Using a power bank will drastically increase the situations that you can extend your battery time. Getting the GoPro 30 pin connector with waterproof back door will extend your ability to leave the gopro oustide or even submerge the gopro under water.
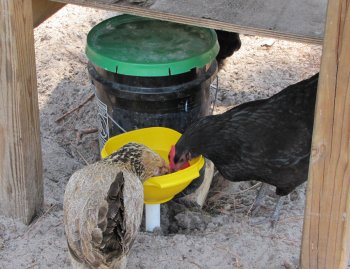
The Automatic Chicken Waterer has been doing well for me and I know that many are viewing my site for the design. Hopefully it inspires ideas into creating a similar or expanded version. The Automatic Chicken Waterer concept can be customized many different ways so there is not one right way, but the right way for YOUR situation. My design uses a 5-gallon bucket as the frame and reservoir.
Below is a parts list for the Automatic Chicken Waterer with the 5-gallon bucket for the frame and reservoir. I tried to put together a few of the options, but make sure and identify what will work for you and your specific situation. I am in South Florida and we deal with heat and sand. The winters are not cold enough to freeze the water, but the summers are hot enough to worry about water that is hot. I keep my automatic chicken waterer shaded for this purpose and the sand has to get washed out periodically by cleaning out or changing the cup.
The Automatic Chicken Waterer is made up of 3 parts. The reservoir, supply, and the cup or bowl. I will identify each of the parts within these labels. I have included links to Amazon.com via affiliate links so just hover over the link to get an idea of what they look like. Also some parts may not be priced efficiently and may be better to get at your local hardware store.
REMEMBER THIS PORTION MAY BE UNDER PRESSURE!
The supply consists of either a water hose or hard line water supply, or even a combination of both. You could run pvc from the automatic chicken waterer to a select location and then a water hose from there (so you could remove it when you want to and not worry that it is running water all the time). Then either a toilet fill valve, which is in my design, or just a way to fill it with water periodically. There are other types of float valves out there, but the toilet fill valves are straight up and down, and already have a way to hook up to a water supply line. This section will take us from hooking up to a water source (or not) to filling the reservoir.
I am going to go 1/2″ pvc to the ball valve (which will give me control out at the waterer or near it) then 3/4″ from there. You can move into 3/4″ anytime by finding the right parts.
This portion is not under pressure. For this section I am using 3/4″ pvc because the fitting is bigger and seals better on the bucket or reservoir. The 1/2″ fitting is too small, though it may work in your application. PVC parts are better chosen at your local hardware store where you can put the parts together and make sure you have the right sizes and parts to build what you want.
The cup or bowl is where the chickens or other pets would actually drink out of. The automatic chicken waterer needs to be situated so the chickens do not use it as a roost, or roost above it. I was able to salvage an old wooden table to put my automatic chicken waterer under, so this provided shade and the chickens cannot get on top of it, but can easily get in to drink as much as they want.
Thru-wall fittings
The way I have done it.
3/4″ male threads to put into the reservoir – 3/4″ slip to build cup (this same fitting will be used to fill the actual bowl) – LDR FP4 MA-34 PVC Male Adapter, 3/4-Inch Slip x Slip x MIP I believe I put the slip side in the bucket with the threads out.
Rubber gasket material – You will also use this to seal to the bowl or cup LASCO 02-1048E Rubber Sheet, 6X6-Inch and 1/16-Inch Thick I put the gasket inside the bucket so the fitting would press against it and never let the water out.
3/4″ female thread to tighten and seal to bucket – The most important thing with this is the female threads to lock and seal the pvc fitting into the reservoir so several different fittings can be used (except a cap) – LDR FP4 FA-34 Female Adapter, 3/4-Inch PVC Slip x FIP So at this point you could be slip or threads.
A way you may want to try – seems to be a little more sleek and may also work with the bowl or cup as well.
3/4″ thru-wall assembly – This should have 3/4″ female thread inside- Lifegard Aquatics 3/4-Inch Double Threaded Bulkhead
The cup can be any stronger plastic recycled item. I like to find things that will be thrown away and drill a 1″ hole through it. The cup has to be tall enough for the high water not to overflow and the low water not to run completely out. The fill valve can be adjusted so it does not have so much of a spread between the time it turns on(low water in the bowl) and the time it shuts off(full)
These should work good – Glad Food Storage Containers, Tall Entree, 3 Count
You can also use this with the watering nipples already in place – BriteTap Chicken Waterer The description says to just drill a 5/8″ hole – here is a 5/8″ bit – Bosch Daredevil DSBS1007 5/8-Inch by 4-Inch Stubby Spade Bit
Automatic Chicken Waterer Parts List Short Version
Reservoir – I used a black 5-gallon bucket with a drywall bucket lid (it just snaps on) Water supply – Toilet fill valve, 1-inch paddle or spade bit to drill hole, toilet supply line 7/8″ x 3/8″ compression, 3/8″ male compression x 1/2″ female pipe thread fitting, 1/2″ pvc piping to 1/2″ ball valve, to my water supply or you can fit it to the hose. Cup or Bowl – 3/4″ male thread x 3/4″ slip + custom rubber gasket + 3/4″ female x 3/4″ slip (to go through bucket), 3/4″ piping to 3/4″ tee slip, down to cap to stabilize bowl, up to 3/4″ slip x 3/4″ male threads through bowl + custom rubber gasket + 3/4″ female x 3/4″ slip + 3/4″ pipe up to a Tee to easier remove bowl or cup for cleaning or replacement (See T-handle Post), The cup or bowl is tall enough so the spread in the fill valve can fill and empty, and big enough around so the chickens can get in and drink around the T-handle. I have used Tupperware, Gladware, and recycled drink containers that I cut the bottom off of.
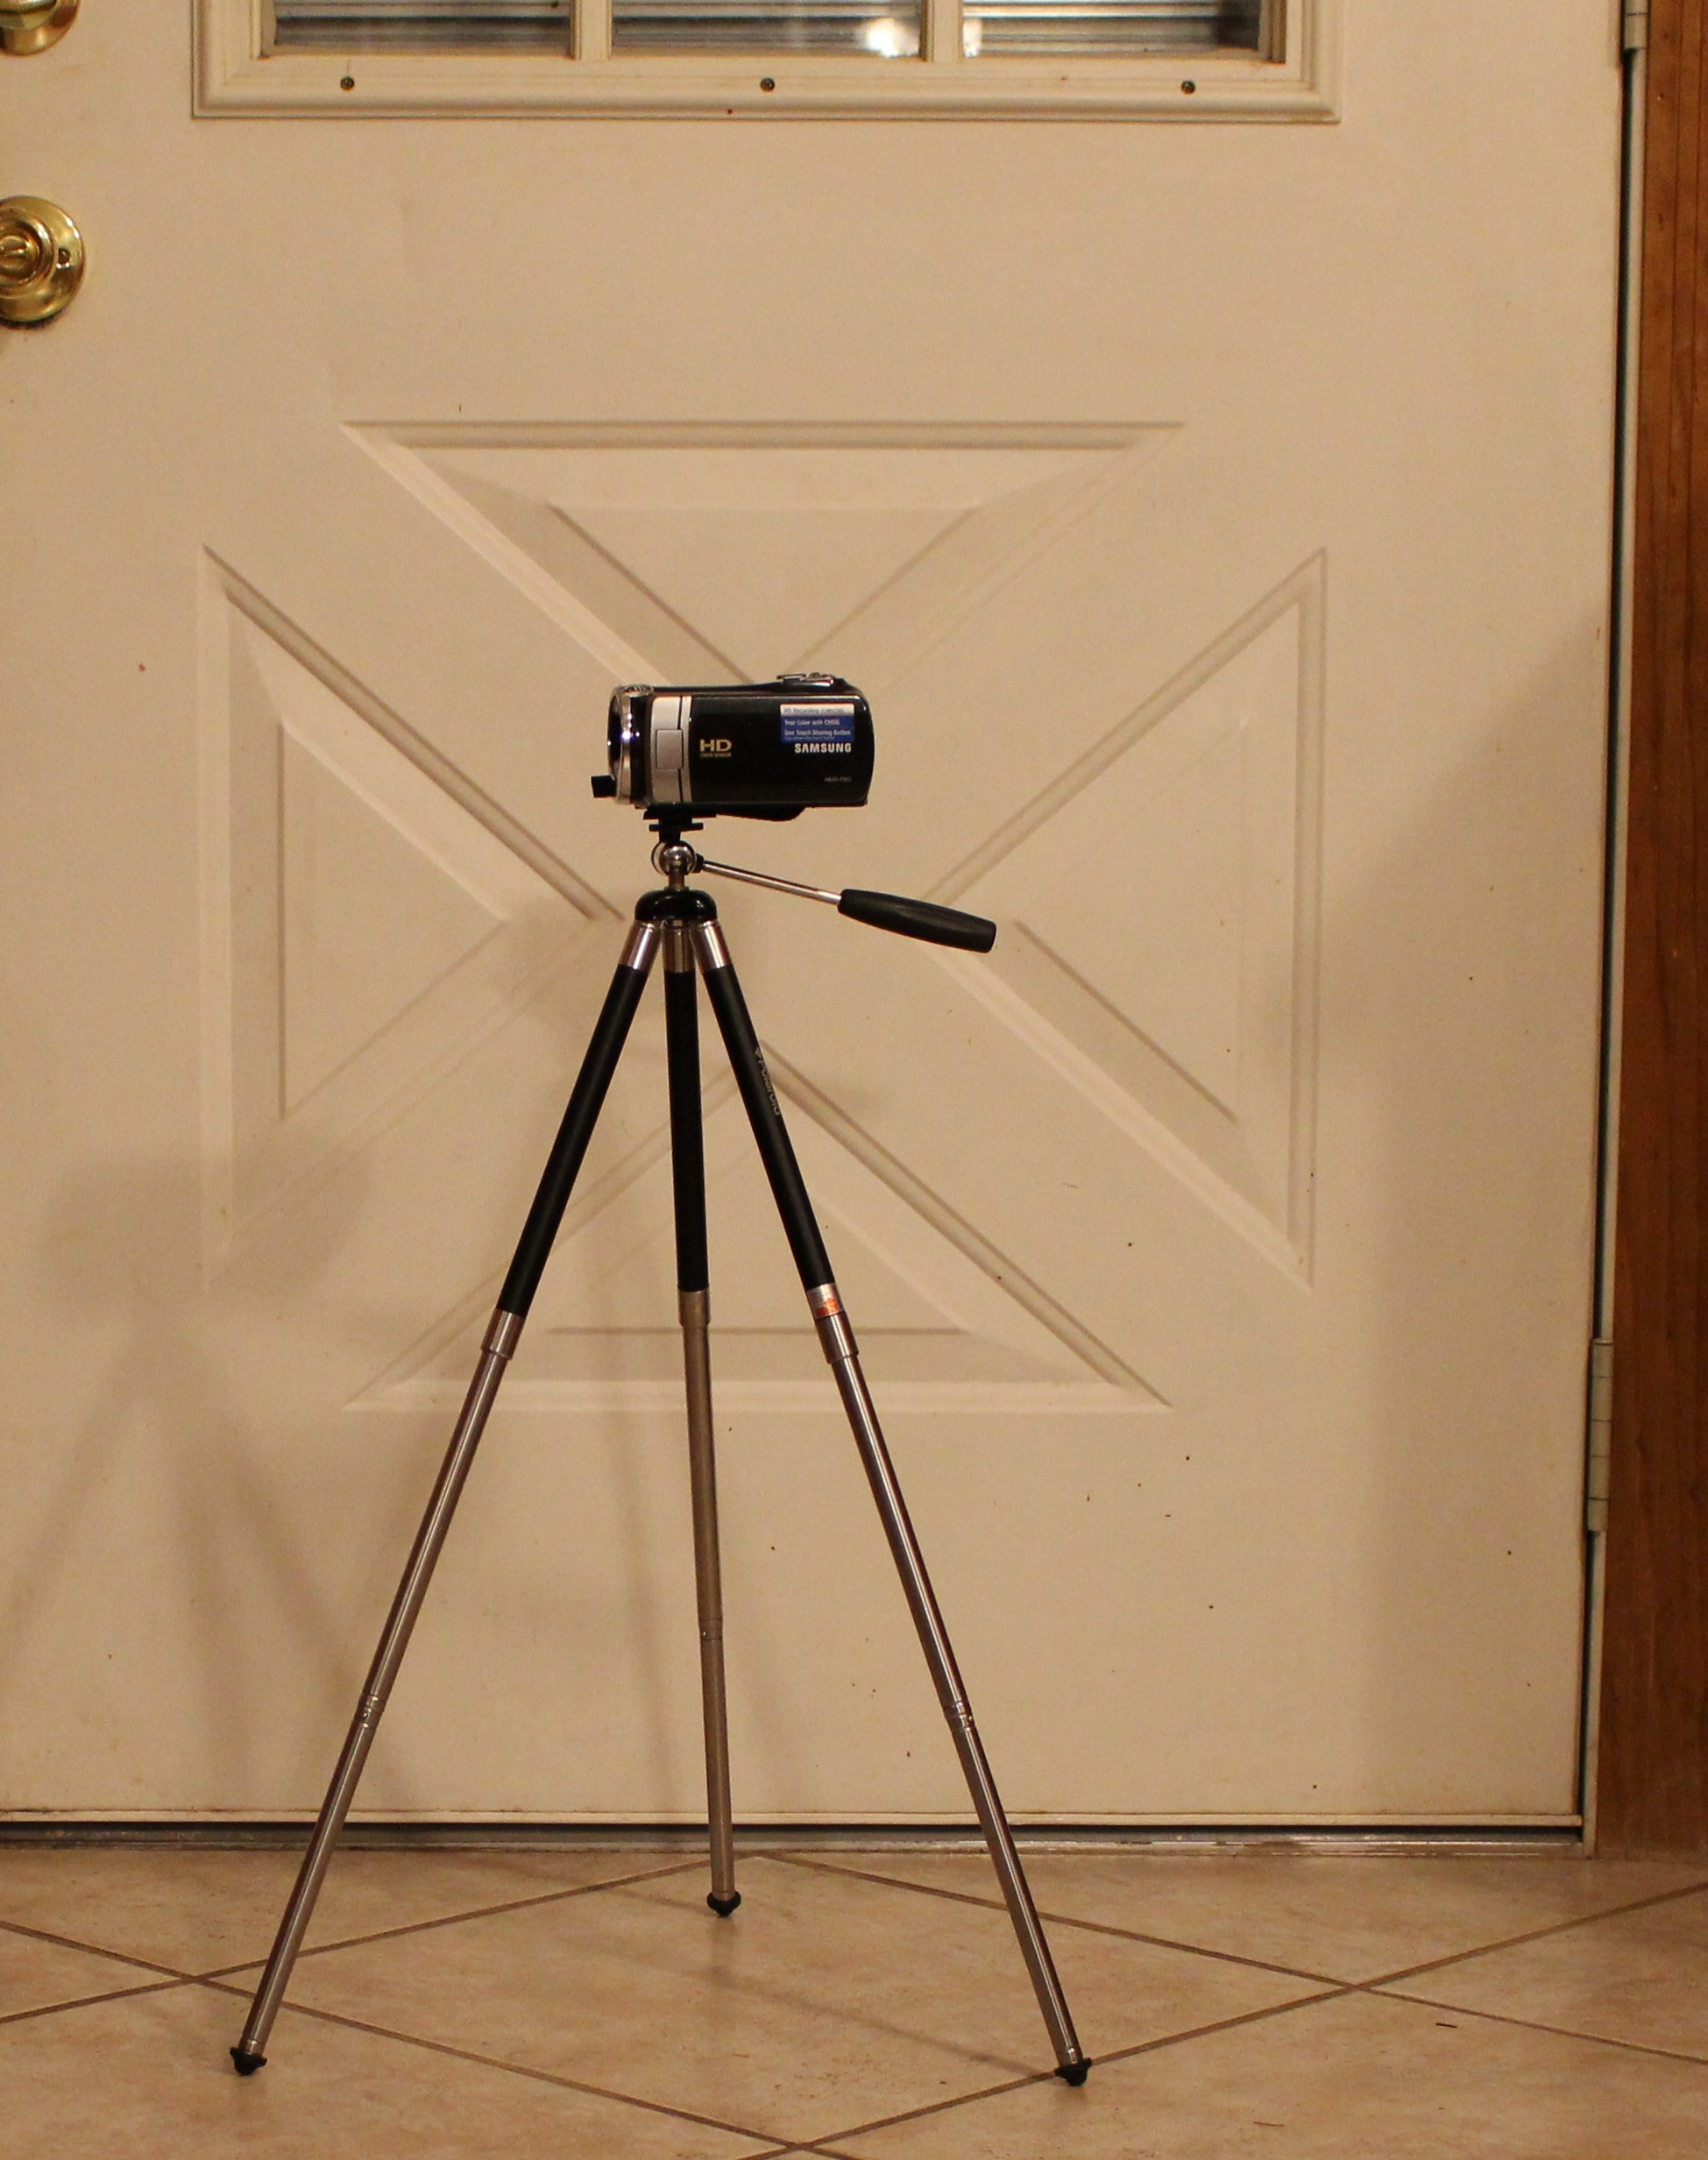
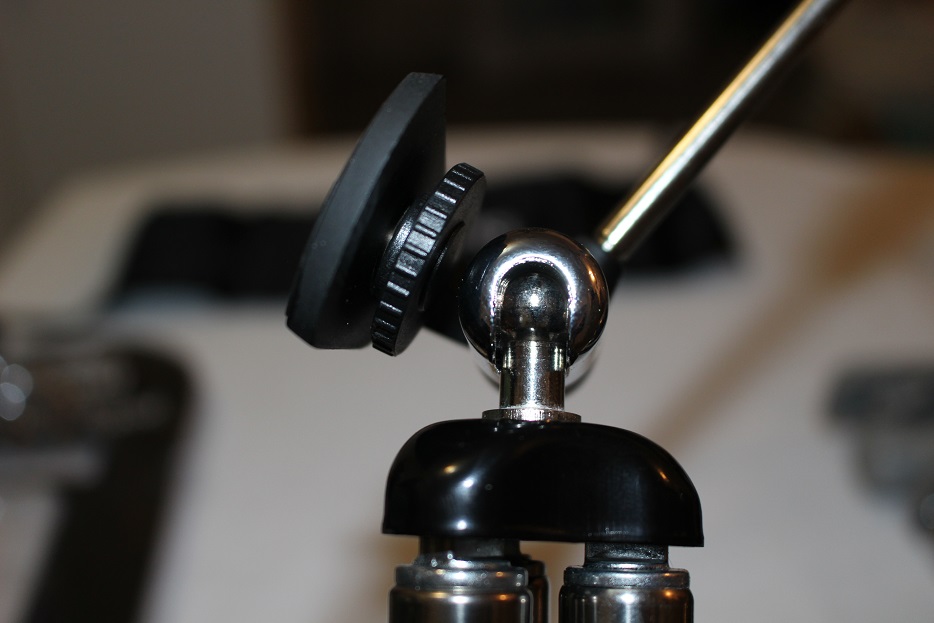
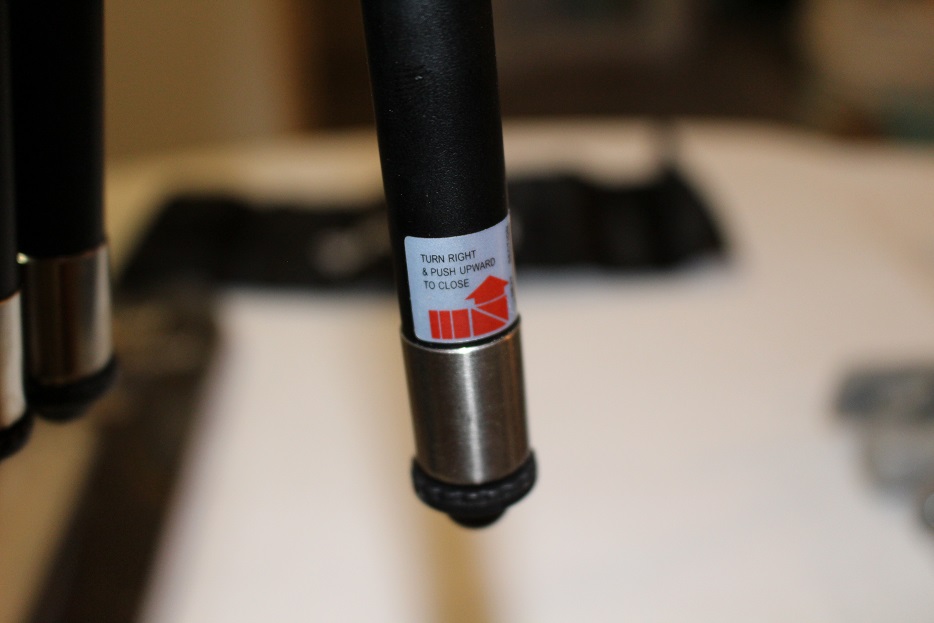
This Polaroid 42″ Travel Tripod has become my new favorite. There is no hinge style adjusting on the tripod mount. Unscrew the handle and the whole thing gets loose, up, down, and side to side goes limp. Then put the camera where you want it and tighten it back up. The best part is that there is a solid piece connecting this neck to the tripod mount. This thing is as solid as a brick. No movement at all. The telescoping legs are more or less the same as the Sunpack and Vivitar travel tripod legs, but are a little different. They turn one way, and must have a slot that they fall into to lock the legs at the height you want. Click this link to go to Amazon.com and purchase one for yourself – Polaroid 42″ Travel Tripod Includes Deluxe Tripod Carrying Case For Digital Cameras & Camcorders
Sunpack 42 inch Travel Tripod Broken
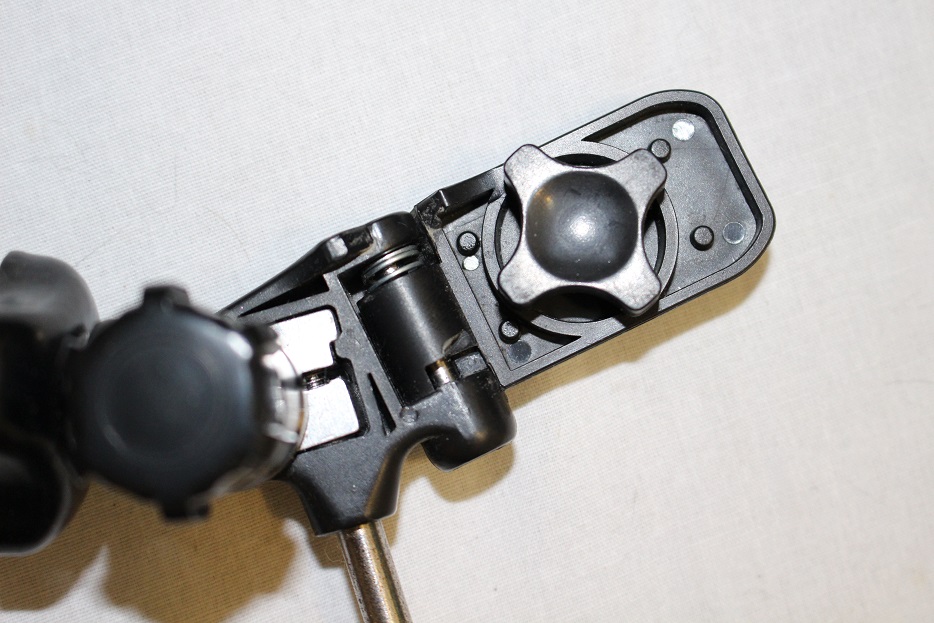
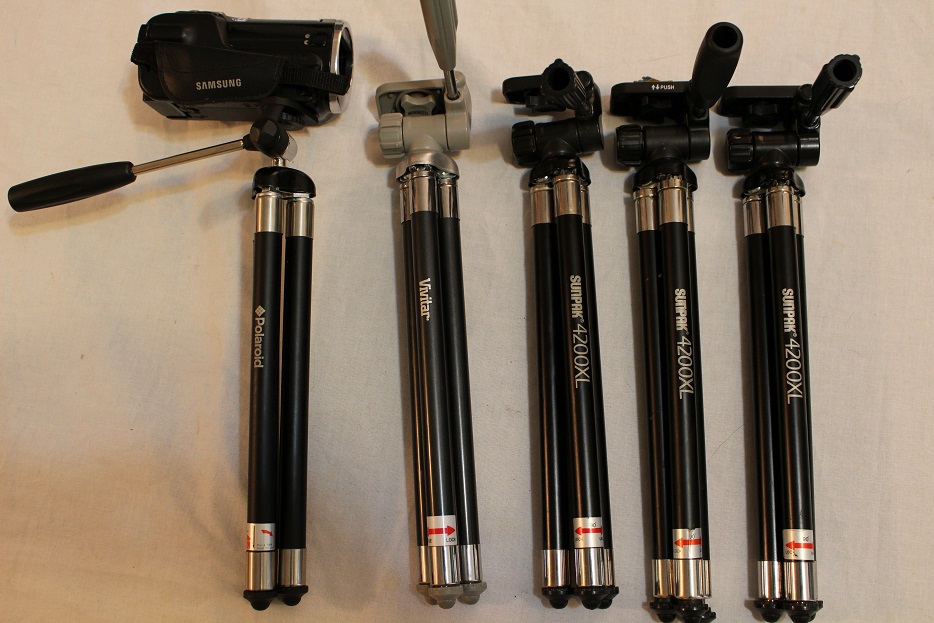
I have owned several Sunpack 4200XL travel tripods for a while now, and I recently bought a Polaroid Travel Tripod and a Vivitar Travel Tripod. I am on my third Sunpack travel tripod now. I primarily use this type of tripod to film with my Samsung HMX-F90. I originally found these Sunpack tripods at Best Buy, and the other two I got from Amazon.com.
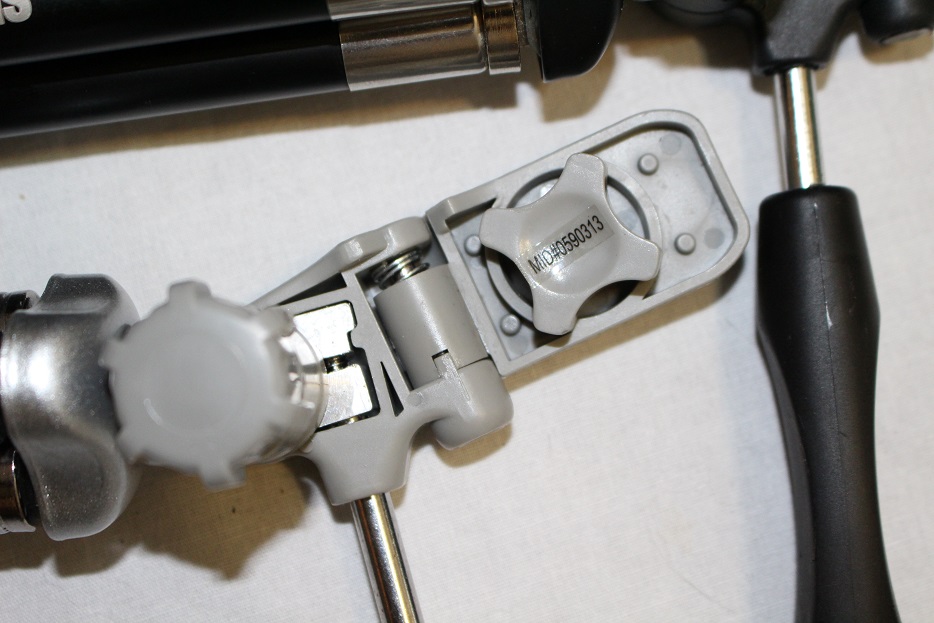
The hinge that allows you to change your camera view from horizontal to vertical keeps breaking on the Sunpacks. The small tab that locks it into place while changing the position keeps snapping off over time. This allows the tripod mount to “jiggle” and makes for shaky videos. Other than that the legs lock in place and have been great. If you click on the image of the Sunpack travel tripod you will see the “missing” piece where the tripod mount hinges from horizontal to vertical.
The best Thing About the Polaroid 42 inch Travel Tripod
Polaroid 42 inch Travel Tripod – How I Use
Polaroid 42 inch Travel Tripod Mount
Polaroid 42 inch Travel Tripod Cam
Polaroid 42 inch Travel Tripod Fully Extended
It is mobile. I can use the tripod itself to hold the camera level as I am walking or scanning. Also the tripod will fit in my bag or backpack, and it also fits in my vehicle. A regular sized tripod is cumbersome and gets in the way. I am always trying to be quick and a regular sized tripod always bumps stuff.
I have owned several Sunpack 4200XL travel tripods for a while now, and I recently bought a Polaroid Travel Tripod and a Vivitar Travel Tripod. I am on my third Sunpack travel tripod now. I primarily use this type of tripod to film with my Samsung HMX-F90. I originally found these Sunpack tripods at Best Buy, and the other two I got from Amazon.com.
Sunpack 4200XL Travel Tripod
Sunpack 42 inch Travel Tripod Broken
The hinge that allows you to change your camera view from horizontal to vertical keeps breaking on the Sunpacks. The small tab that locks it into place while changing the position keeps snapping off over time. This allows the tripod mount to “jiggle” and makes for shaky videos. Other than that the legs lock in place and have been great. If you click on the image of the Sunpack travel tripod you will see the “missing” piece where the tripod mount hinges from horizontal to vertical.
Vivitar 41 inch 8 Section Tripod
Vivitar 41 inch Travel Tripod Mount
The vivitar is real similar to the Sunpack 4200XL. The hinge is the same, but seems like it is a little stronger. I mean that there is a bigger space between the two slots that hold the tripod mount in place. So it may not break off as easily as the Sunpack does. The telescoping legs are the same as the Sunpack and may even be made by the same company. You can see in the image that the Vivitar 41 inch travel tripod is made in a similar fashion as the Sunpack 42 inch travel tripod.
Polaroid 42 inch Travel Tripod PLTRI42
Polaroid 42 inch Travel Tripod Mount
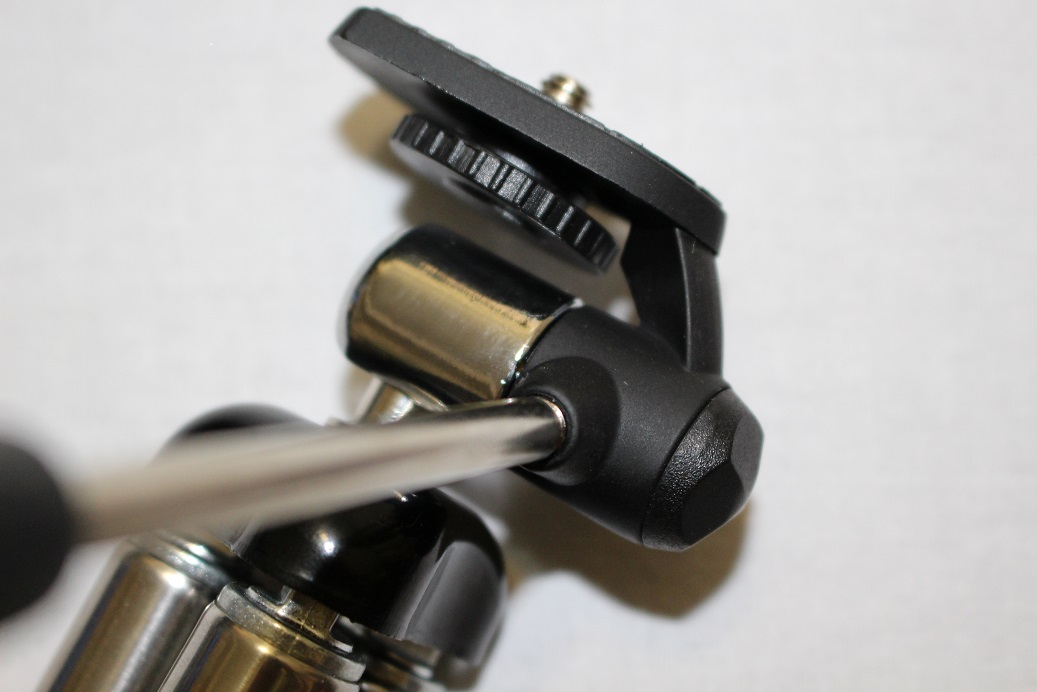
This Polaroid 42″ Travel Tripod has become my new favorite. There is no hinge style adjusting on the tripod mount. Unscrew the handle and the whole thing gets loose, up, down, and side to side goes limp. Then put the camera where you want it and tighten it back up. The best part is that there is a solid piece connecting this neck to the tripod mount. This thing is as solid as a brick. No movement at all. The telescoping legs are more or less the same as the Sunpack and Vivitar travel tripod legs, but are a little different. They turn one way, and must have a slot that they fall into to lock the legs at the height you want. Click this link to go to Amazon.com and purchase one for yourself – Polaroid 42″ Travel Tripod Includes Deluxe Tripod Carrying Case For Digital Cameras & Camcorders
Polaroid 42 inch Travel Tripod Cam
Polaroid 42 inch Travel Tripod Fully Extended
You can see in the image that the hinge part is entirely different on the Polaroid 42 inch Travel Tripod than on the Sunpack or Vivitar travel tripods. I am so happy that I found this because it would always happen when I had an important item to video. Now I don’t have to worry about it breaking.
Click this image to go to the Live Guppy WebCam Page
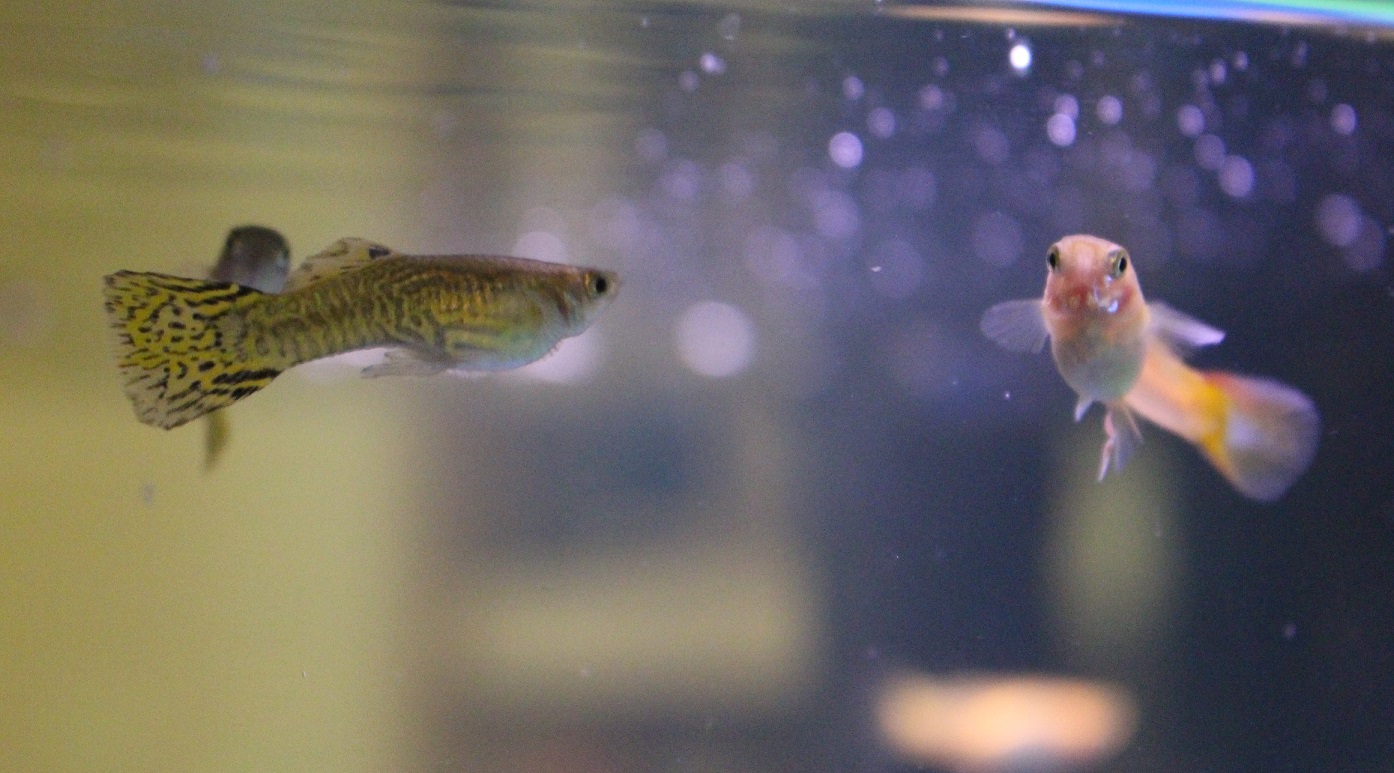
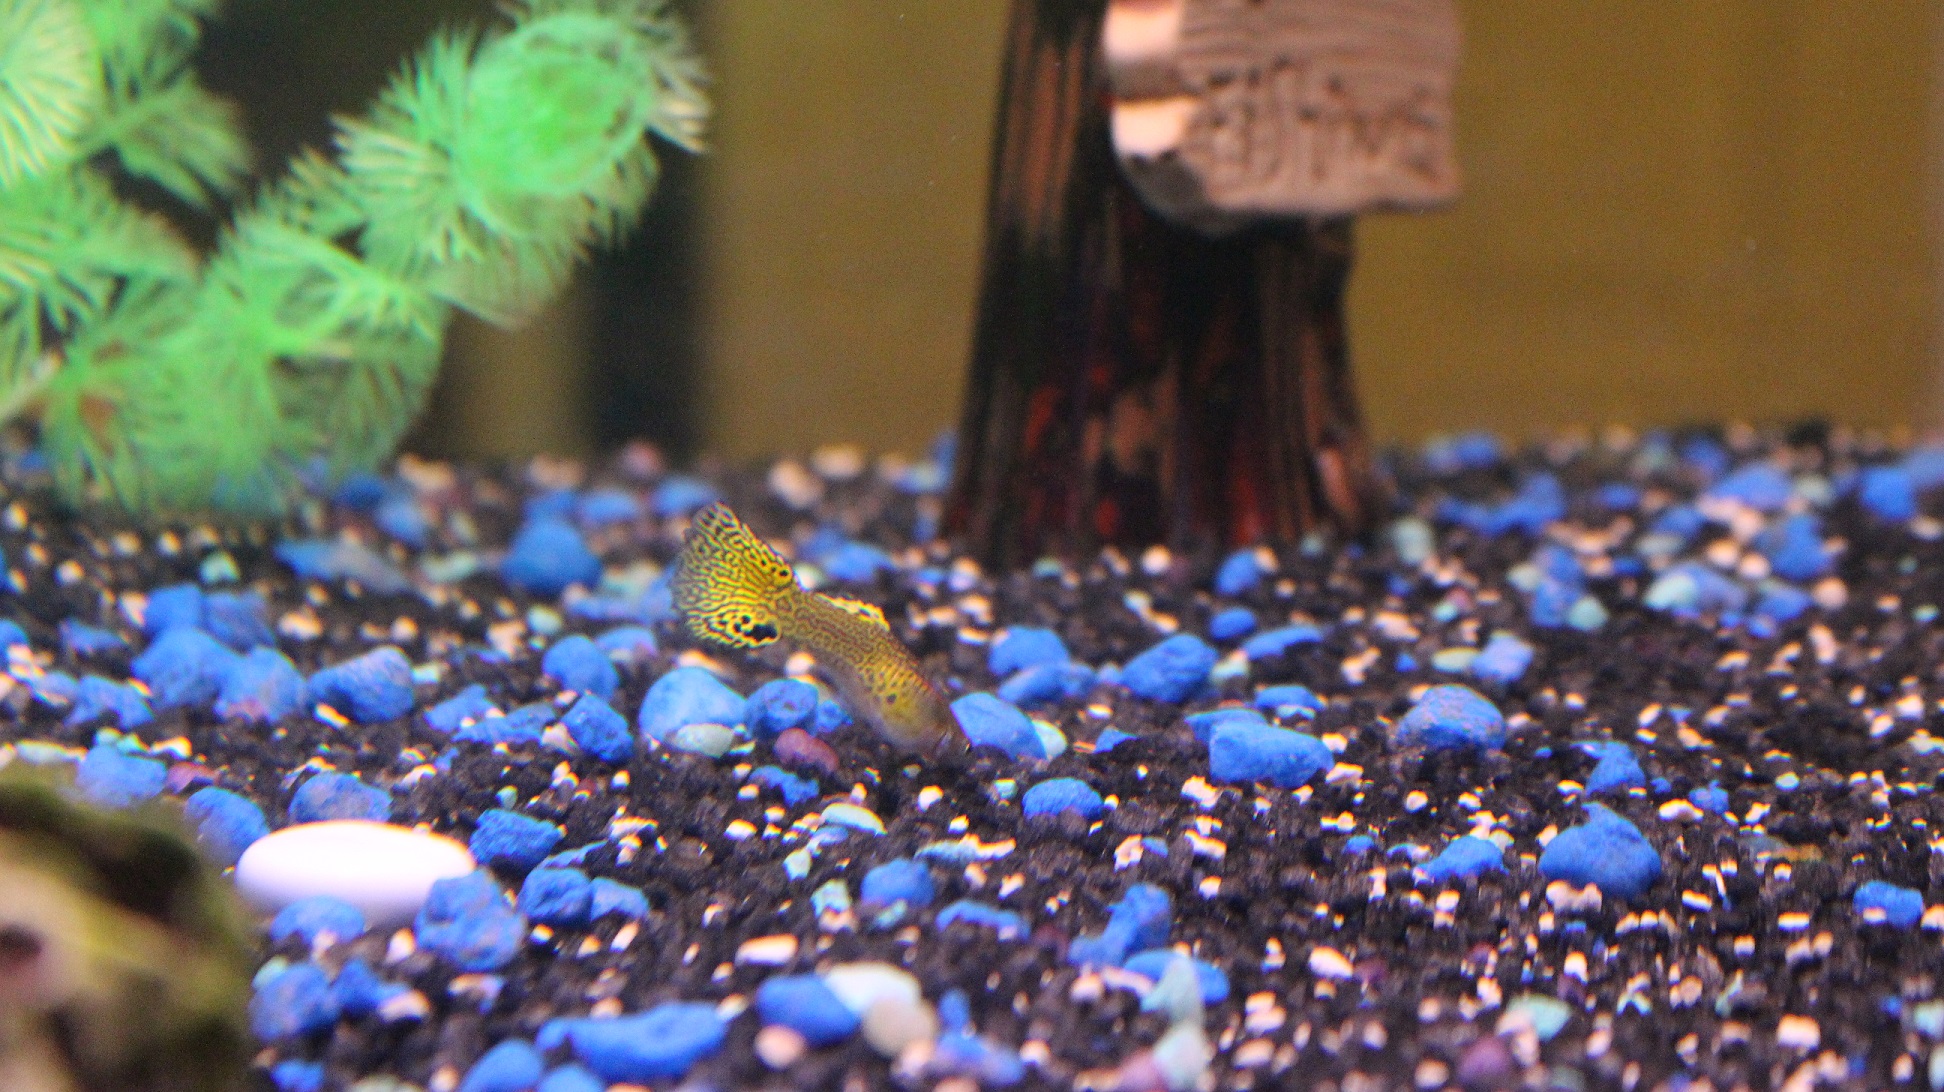
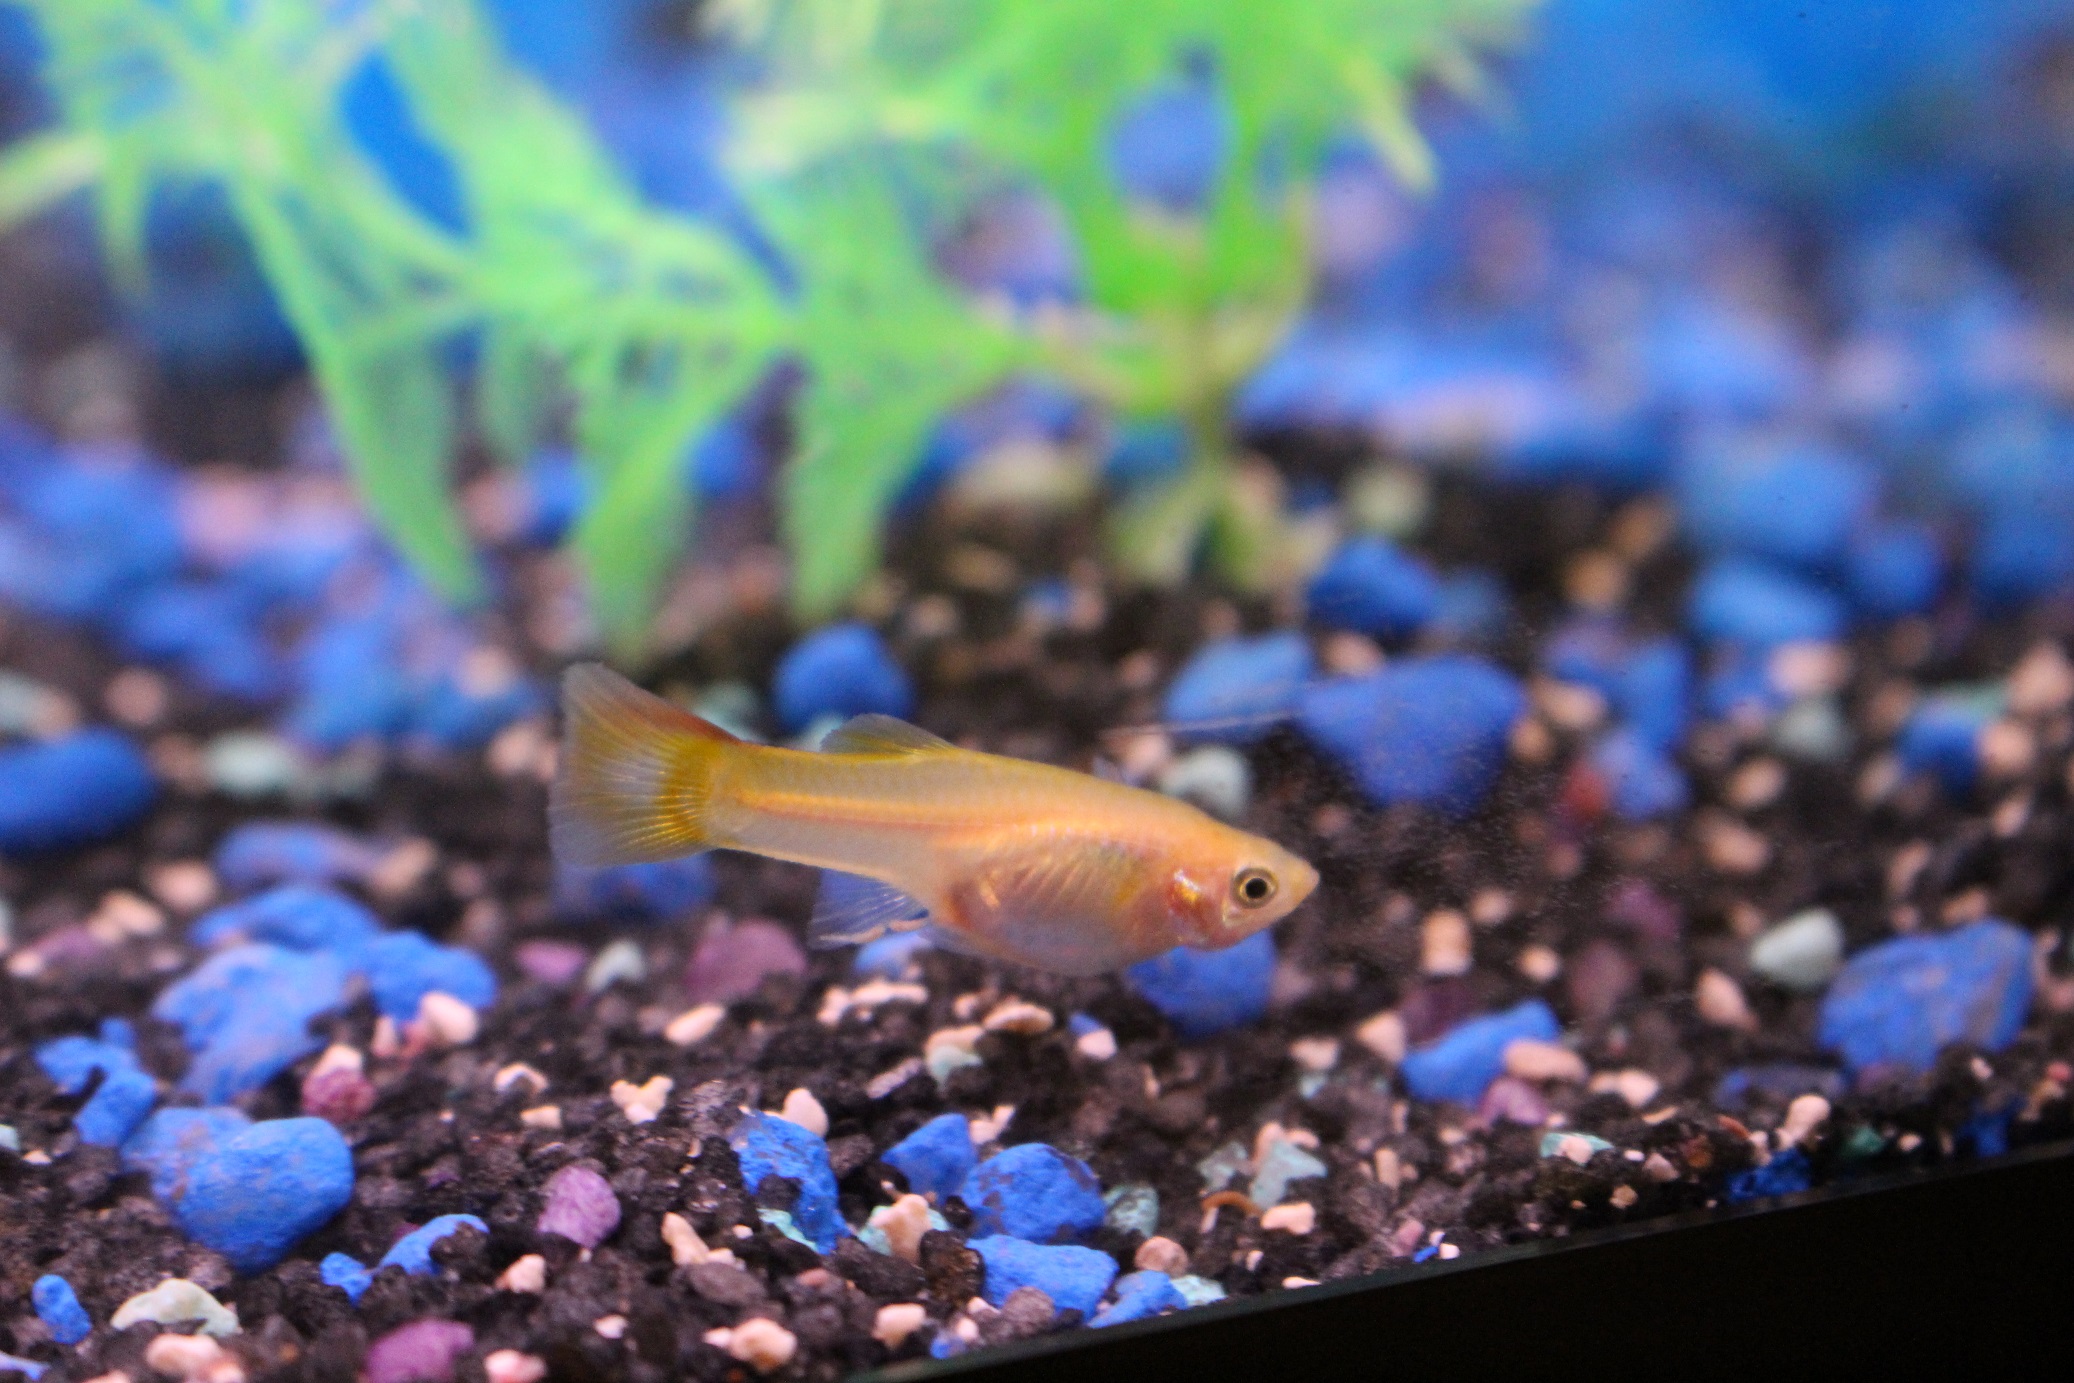
The Cobra Guppy is a variegated type of guppy that resembles several different color variations. My Cobra Guppies are yellow in color with leopard type stripes on their body and tails towards the tail. Photos of them follow. I have set up a webcam for this fish tank that updates a still image every 15 seconds.
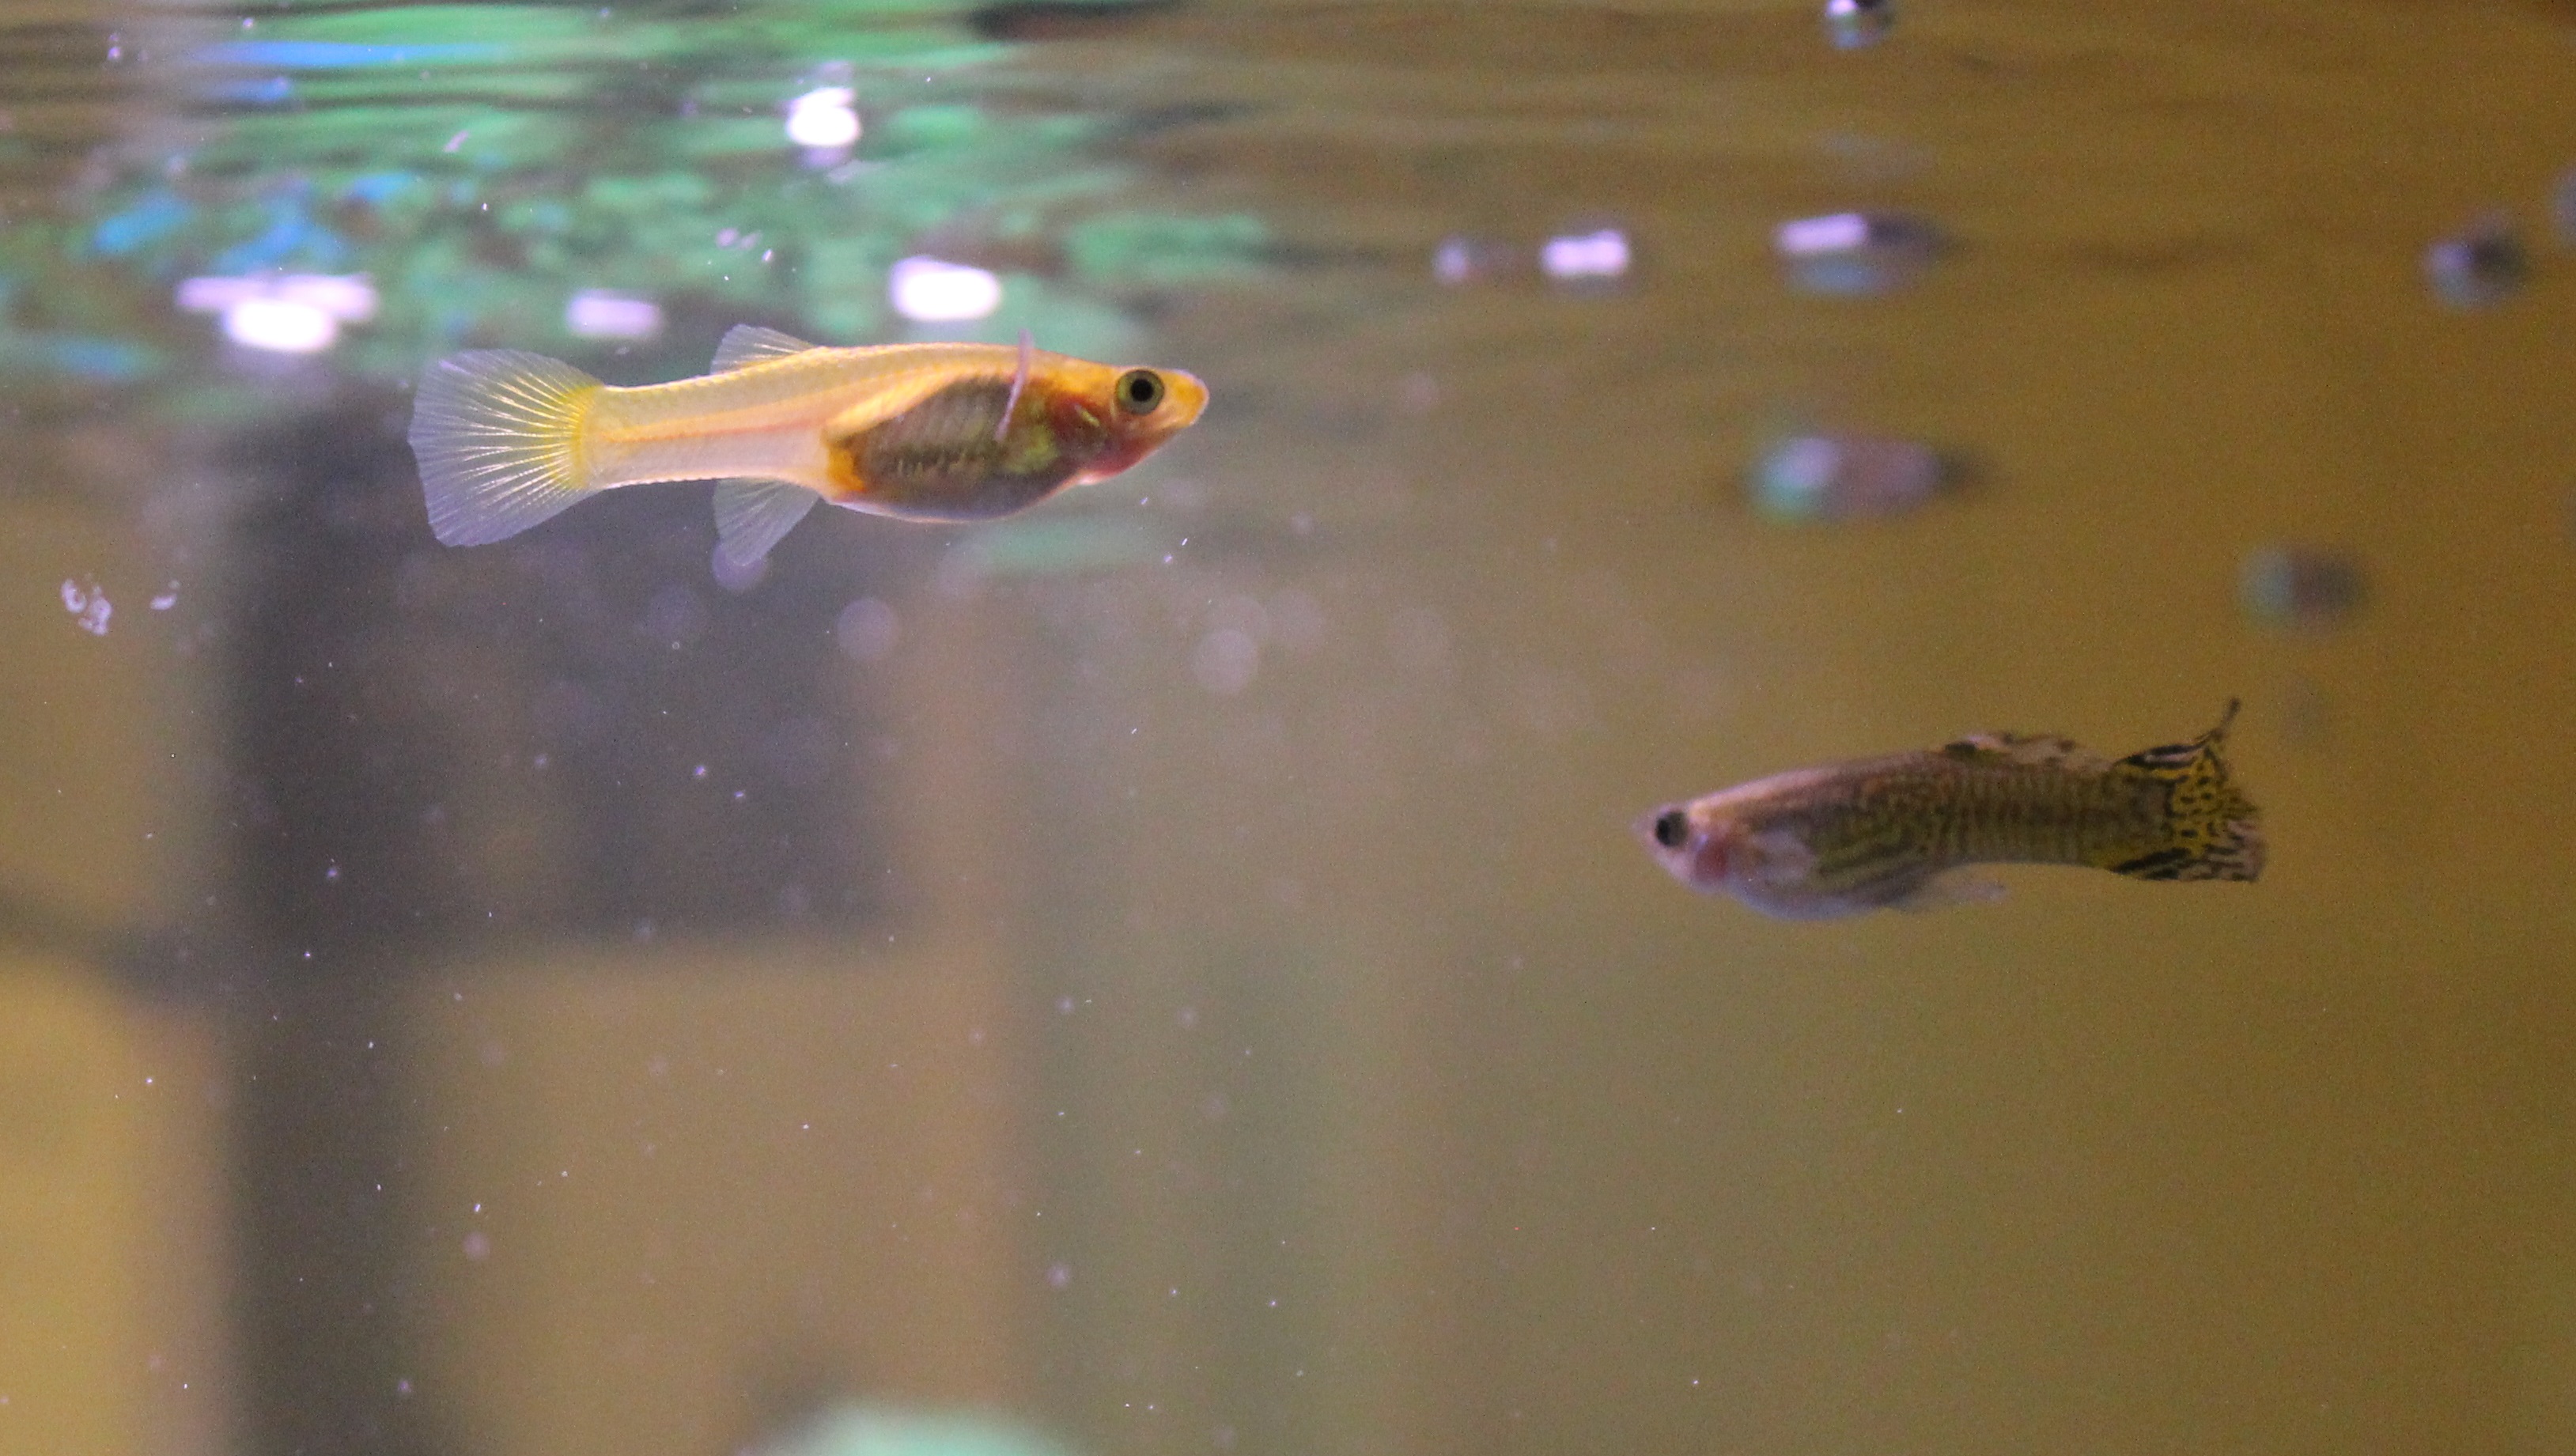
Female and Male Cobra Guppy
There are some other color variations that I have seen that are still called Cobra Guppy. I chose these because of the striping patterns.
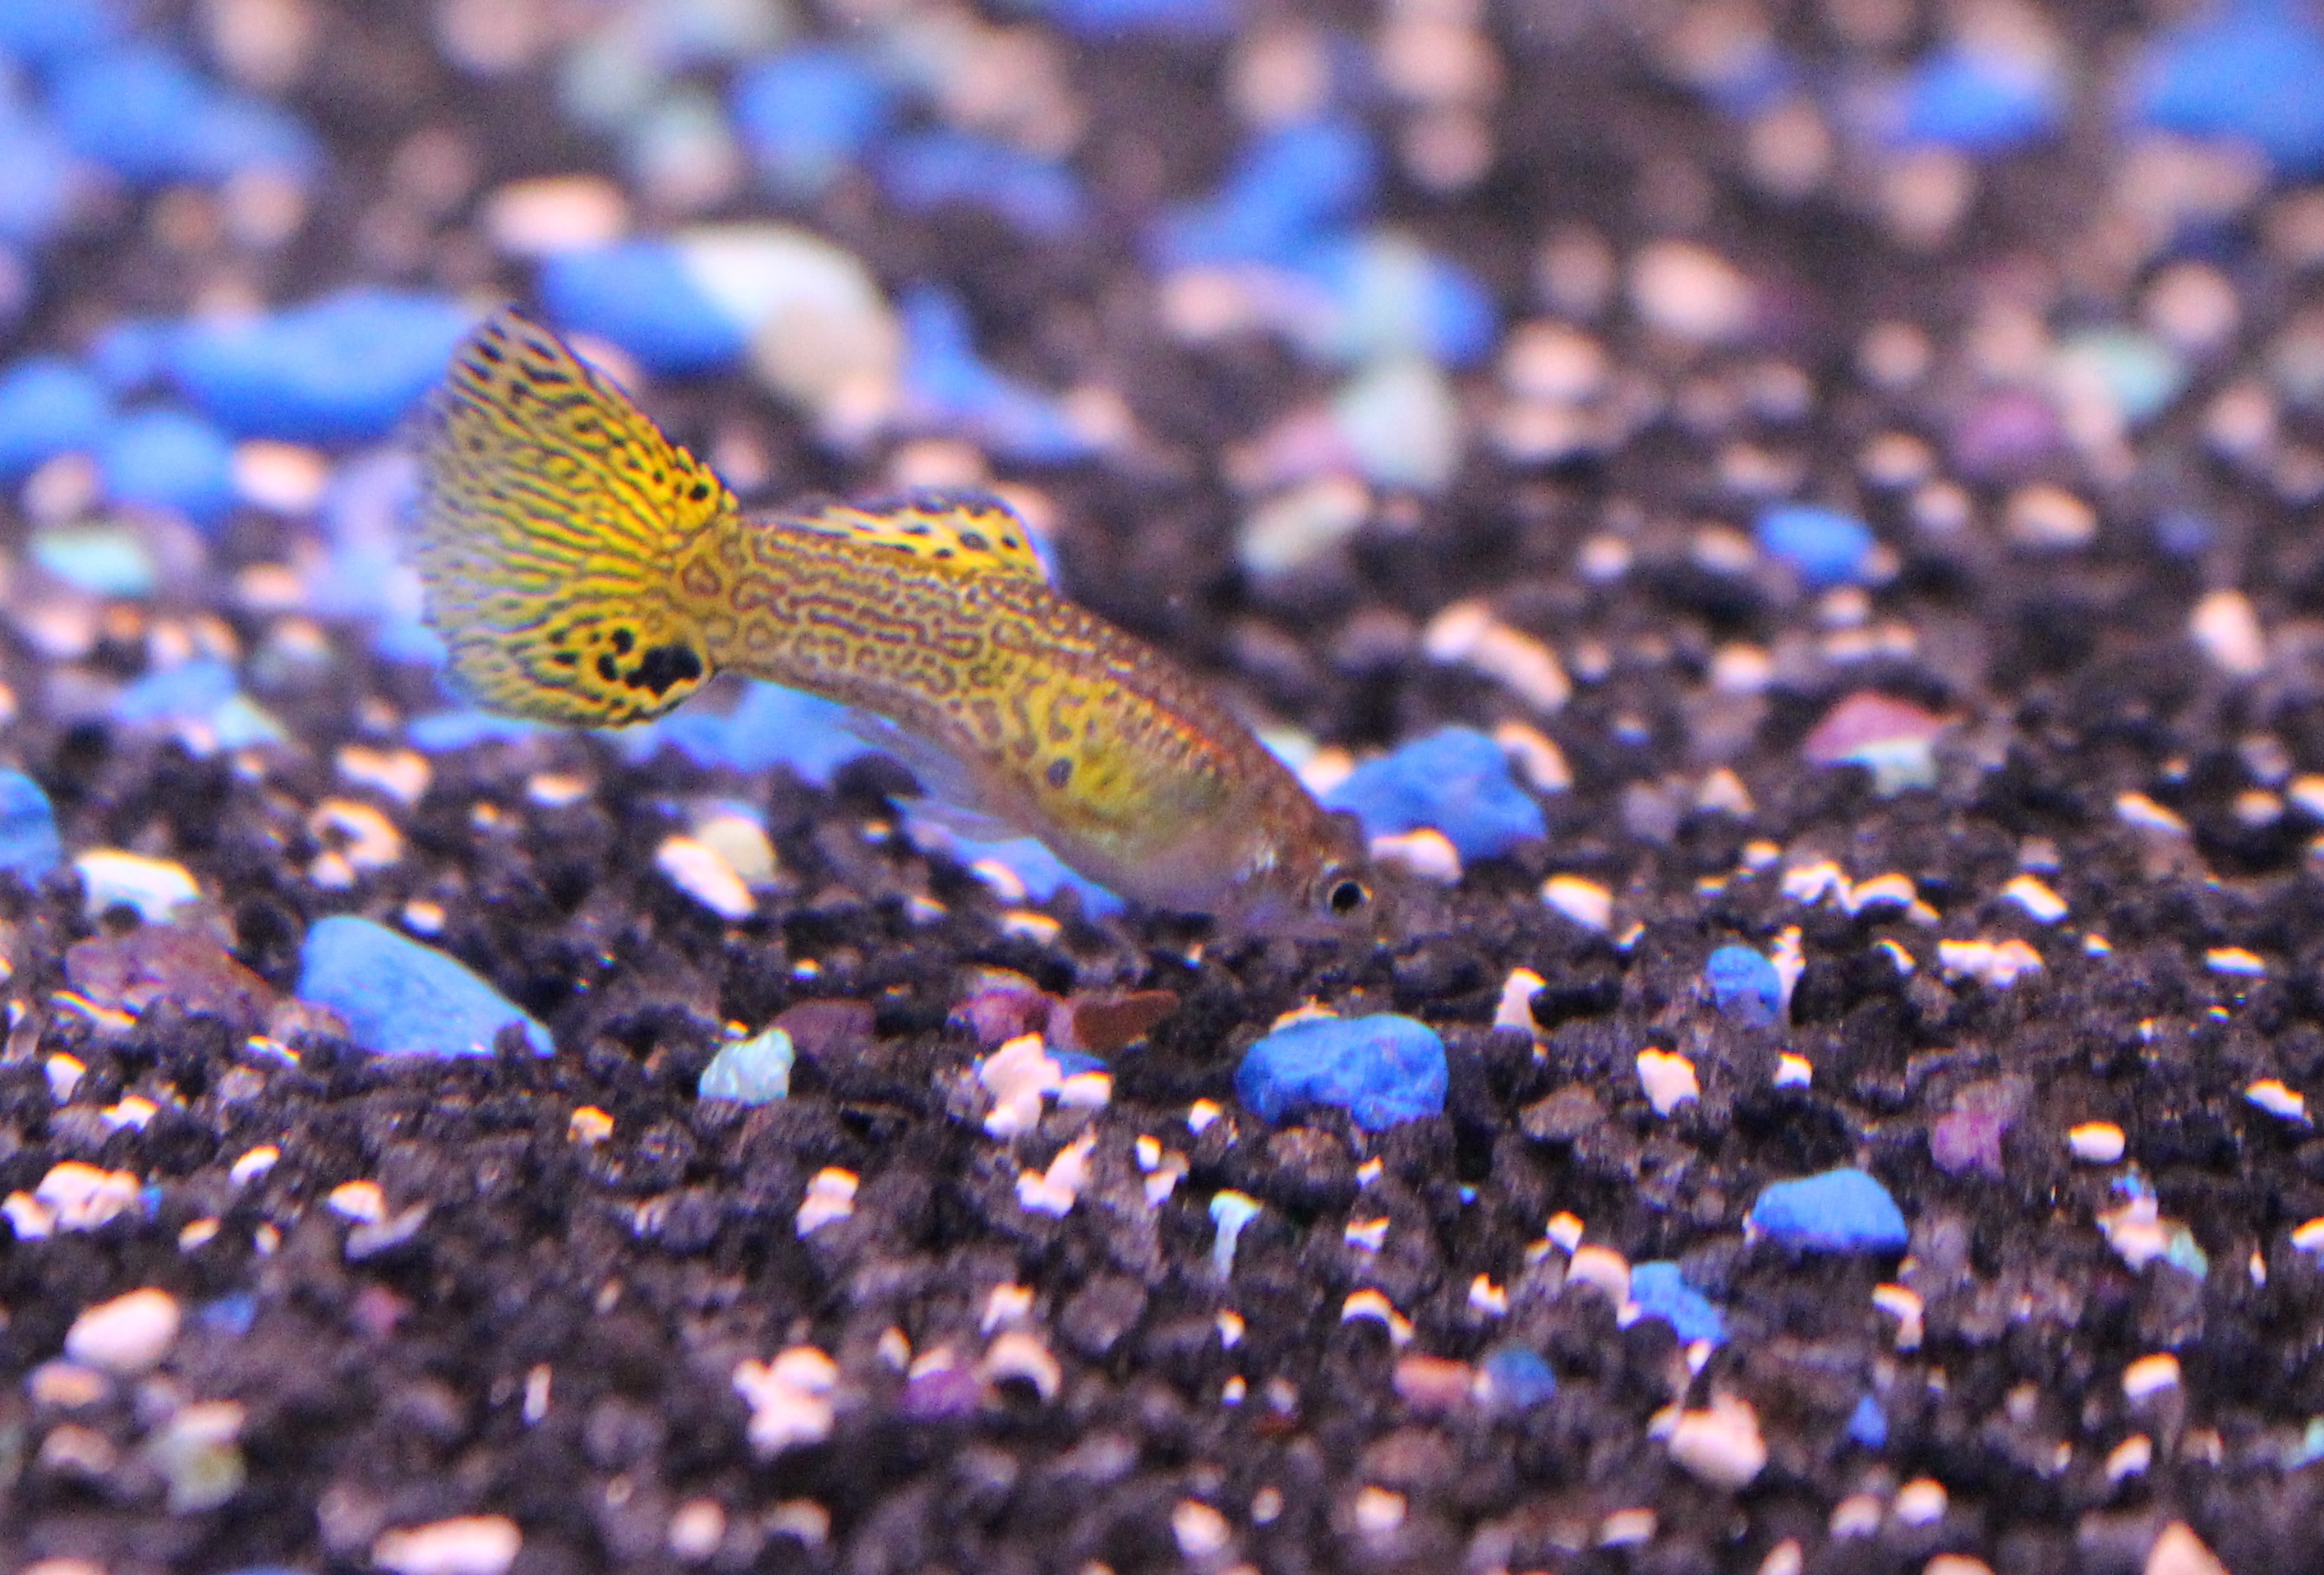
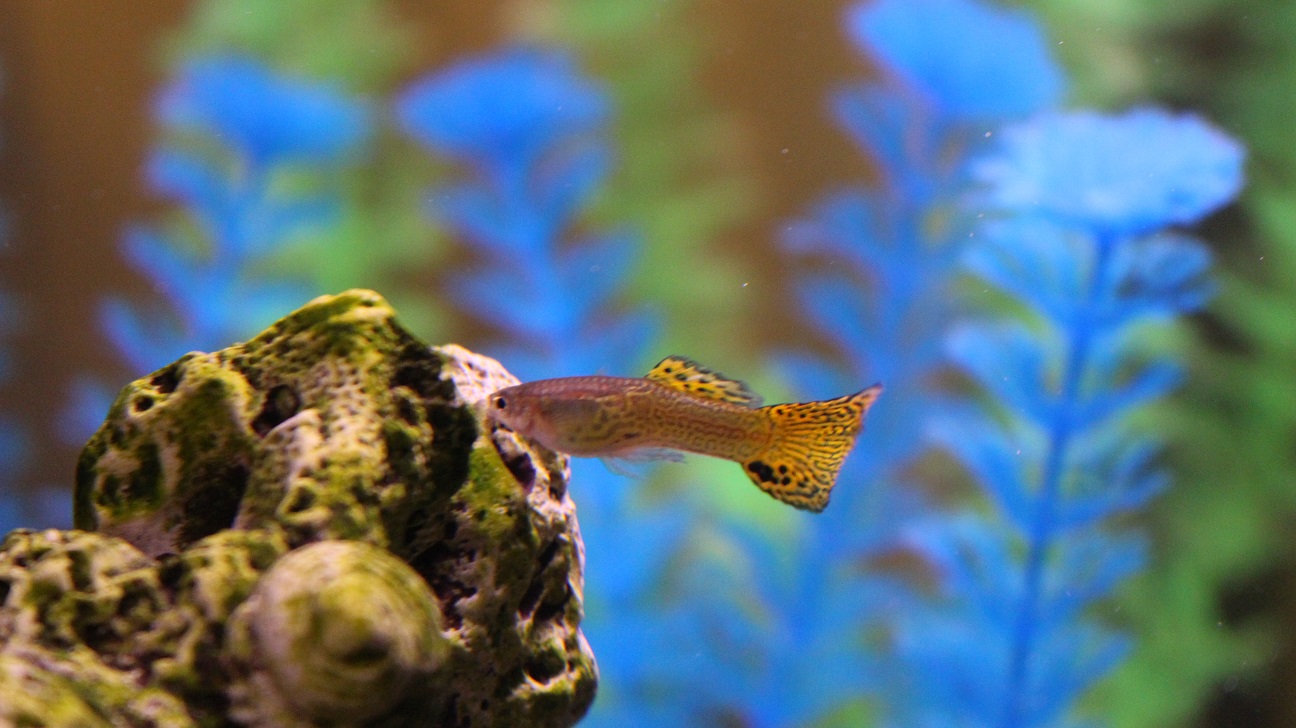
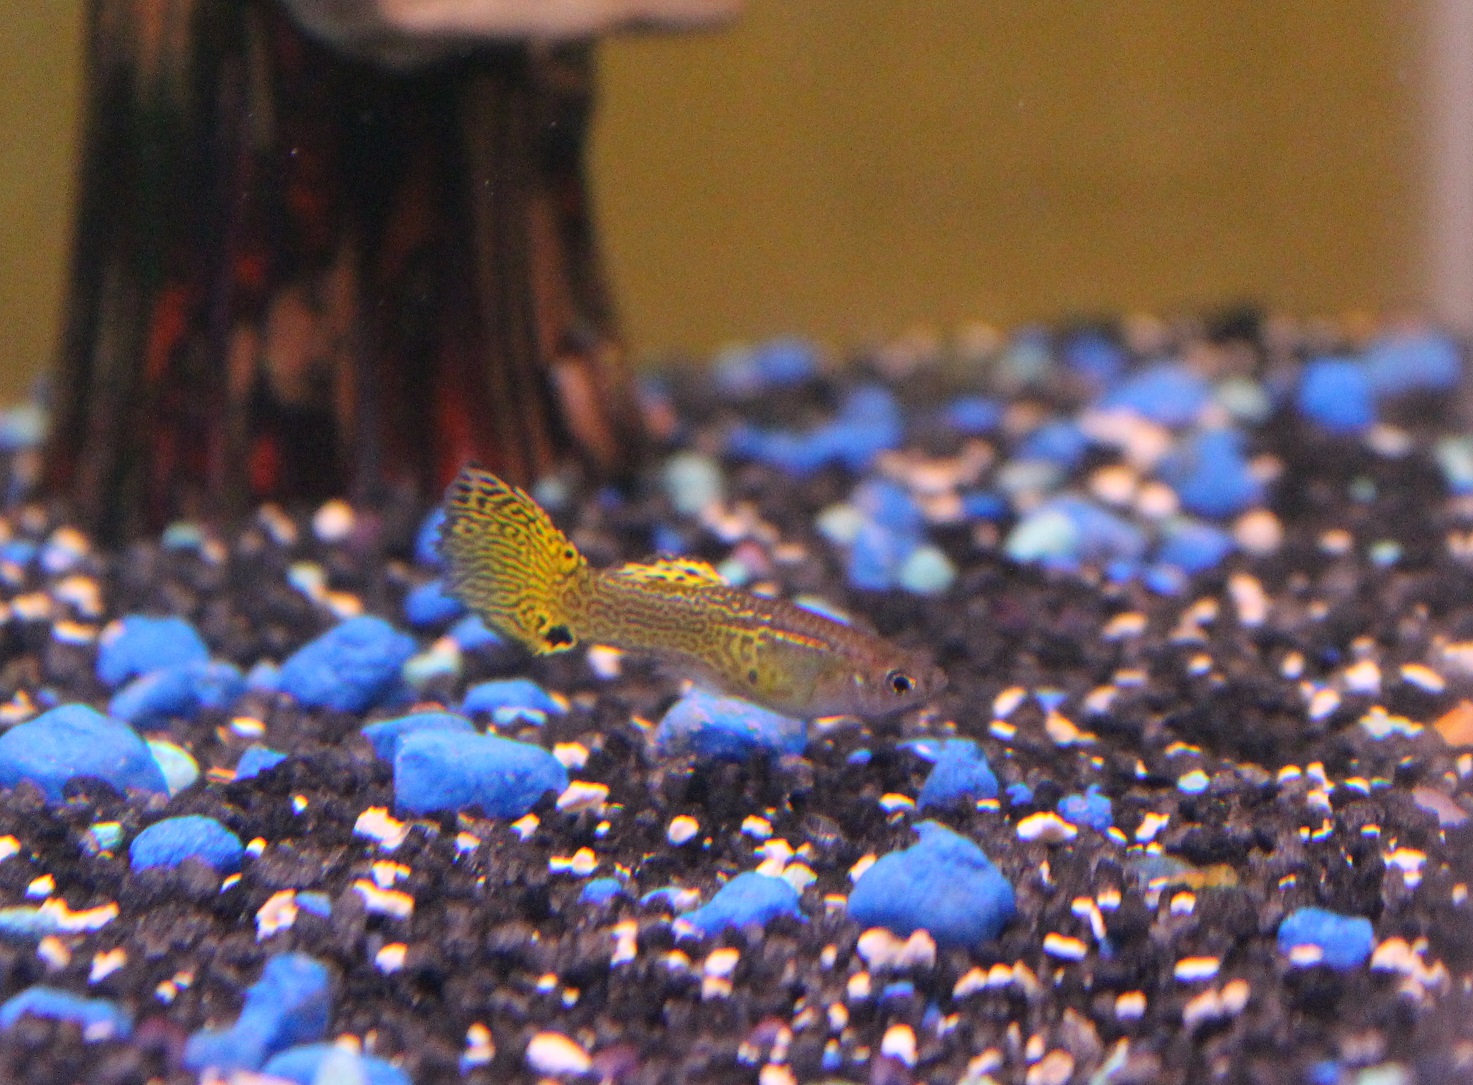
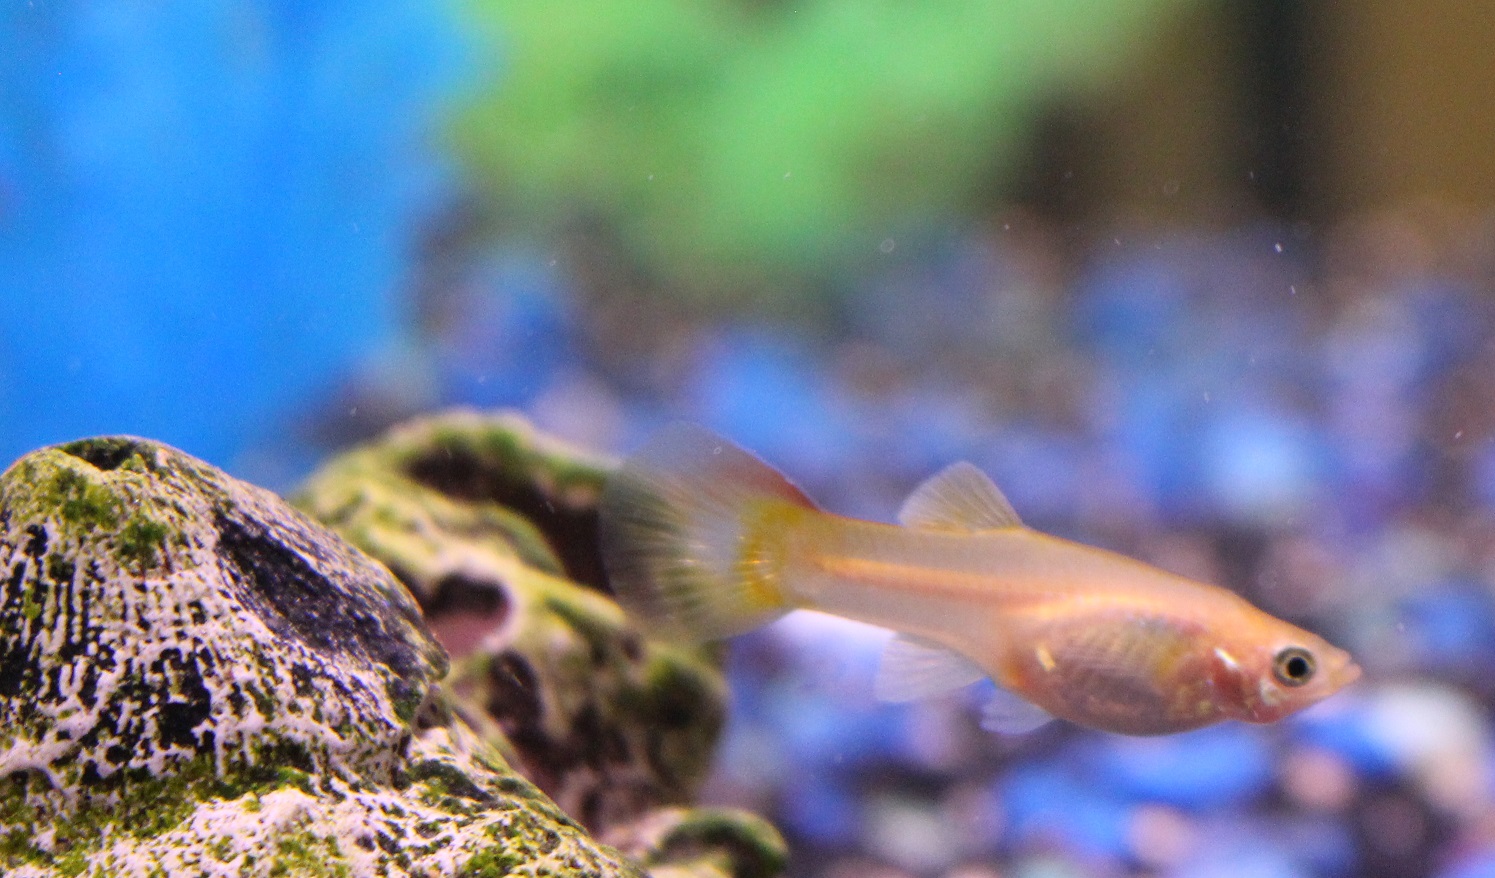
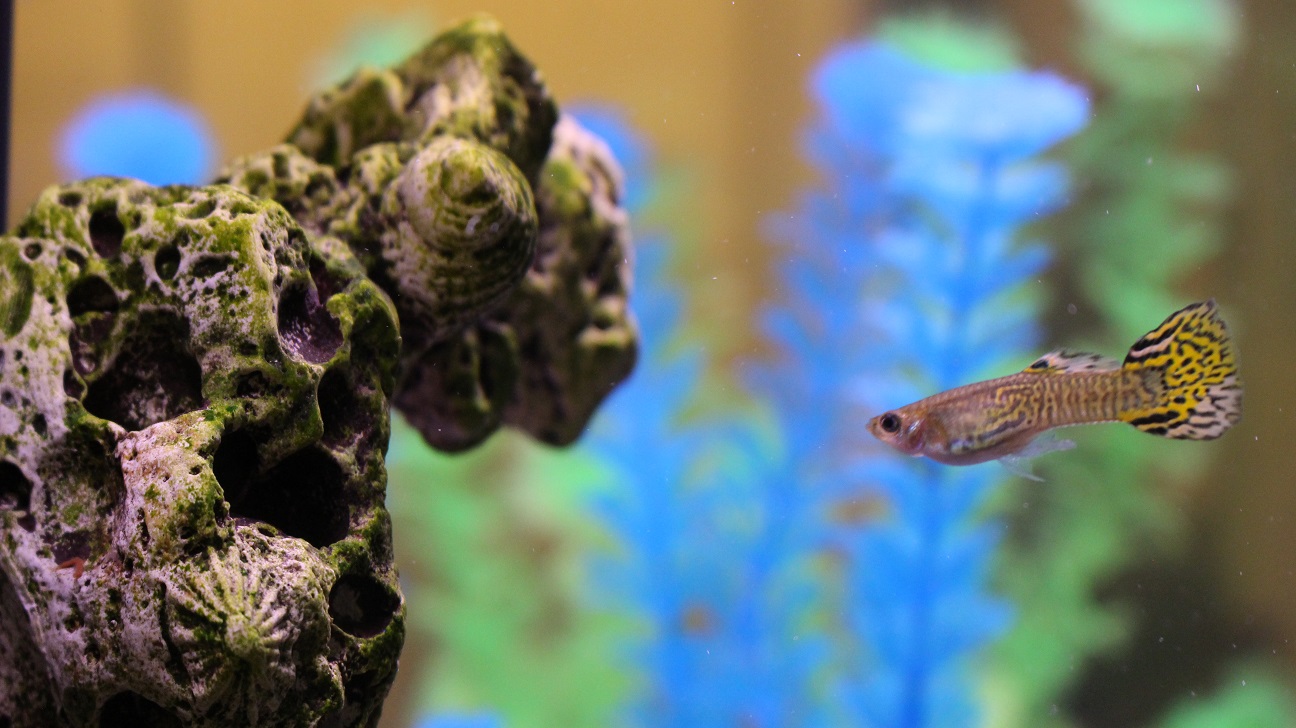
Male Cobra Guppy
Male Cobra Guppy
Male Cobra Guppy
Click on the images of the Guppies to see a larger version of the image. The designs on the sides of the males are pretty neat.

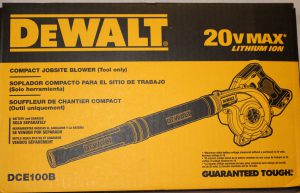 I recently purchased another cordless blower. A DEWALT DCE100B 20V MAX Compact Jobsite Blower