Automatic Waterer for your Chickens, Ducks, Peacocks, Dogs, Cats, Goats, Pets, Emus, Ostrich, Pheasants, and more – 5

Looking for Automatic Chicken Waterer Parts List?

Water Supply with control


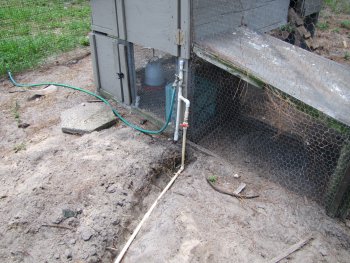
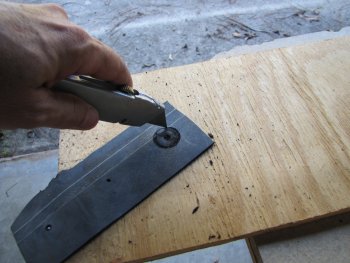
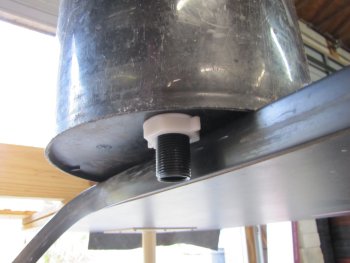
The most important part of this project is a constant water supply. This water supply is under pressure. I am not sure if a standard toilet fill valve will work on a low pressure or gravity feed system. It could be tested with a few fittings and an afternoon. The ball valve is important in case this thing tips over or the bucket or cup develops a crack. Then the water can be shut off at the source and still have water in the chicken coop area.

Water supply to the Bucket Reservior ready


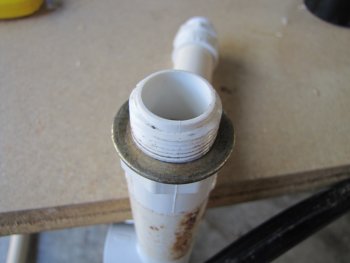
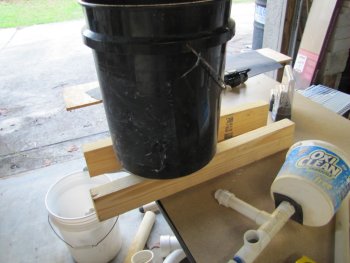
All the water supply lines are in place and ready to place the bucket reservior in place and connect. I turned the water on one time to flush the line and have nice fresh water for my new valve. I am sure the sand is not friendly to it.
We have power


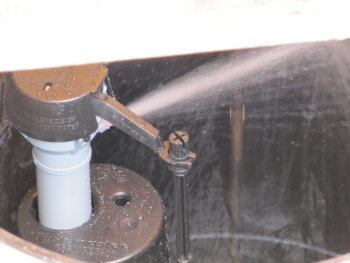
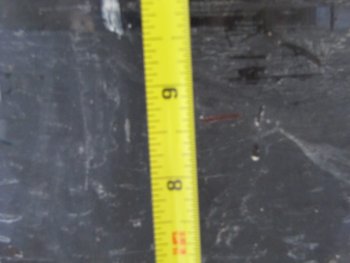
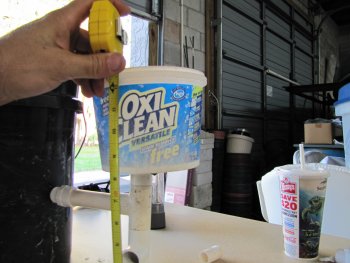
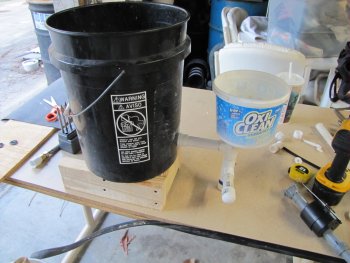
Ok. The bucket is now filling up and we can field test the cup assembly. The valve can be adjusted now for the top height of the water to come up or down by 1 or 2 inches. The spread is still about 3 1/2″.
It is working


Ok we are in business for the moment. Water is coming into the cup. This is a plus. Now to see what happens next.


I think this is going to work it is not stopping yet


Still filling up and seems to be working. Is this it?
Toilet fill Valve needs some Adjustment


Here we go, filled up to the top and is running over. Time to adjust the toilet fill valve and bring the water level down an inch or so.
Water is Good!


AAAAHHHHHHH!!!!!!
We have a Winner!


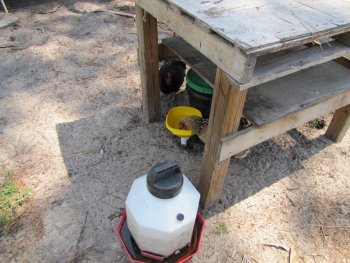
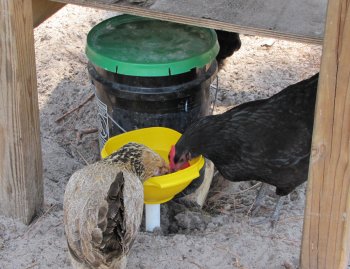
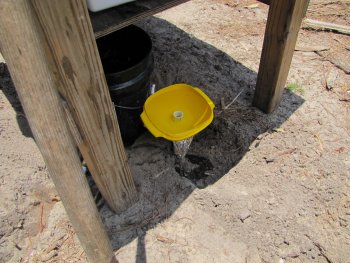
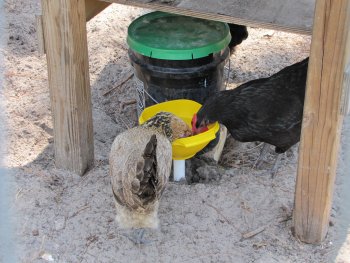
Seems to be working out, the other watering device is right there. All dirty as usual. They have been drinking out of the other one for almost a year now. I tried to put the new automatic watering system in a position where they cannot poop in it.

Business as Usual


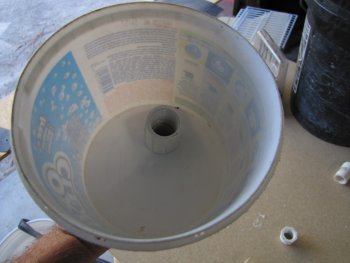
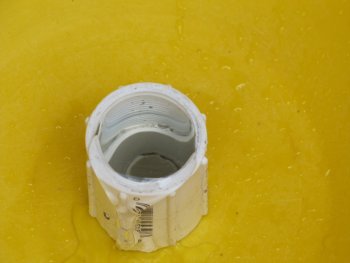
Added a lid and we are now on a path to better living. This project was well worth the effort. I had many ideas and PVC seems to bring it together. PVC also helps it to be servicable. A cup or other contraption could have been caulked in place, but that can never be cleaned without turning it all upside down. I have an idea for a tee handle to be put on the threaded coupler inside the cup so it can be removed easier. After a few days it did not want to come off.
Link to the next Automatic Chicken Watering System article with several weeks of use.

Make a T-handle for the main cup

How to build an Automatic Animal Waterer – Automatic Chicken Waterer – Automatic Bird Waterer – 4

Looking for Automatic Chicken Waterer Parts List?

This is the 4th chapter in How to build an Automatic Watering Station for your Animals, Chickens, Birds, and whatever else can drink water. This system is very versatile and can be designed and customized to fit many different situations.
The Fill valve threads are under the Bucket Reservior

Here you see the threads of the toilet fill valve through the bucket reservior. Now we need to build a stand so we can allow this fitting to be free and not in a bind.

Testing for size


Testing the 2 by lumber for size. I am using pine lumber, but pressure treated is the way to go. A cinder block or a series of bricks will also work, but wood is lighter and can be customized indefinitely. Mark the wood so the container will be well supported.

Build a custom stand


The stand is finished. It is solid. This design will support the bucket reservior and allow the toilet fill valve threads to be connected freely.

Mark the bucket for the Cup Assembly


Now that we know where we are with a stand we can line up the cup assembly to mark for the through seal hole. Again this is just a female thread with a bushing to take up some space and a piece of pond liner as the gasket. The only manufactured product I can find to do this is a water heater pan. The fitting that comes with it is perfect, but it is 1 1/4″ fitting. Some hardware stores would have rubber gaskets or washers that will work better, but it may take a while to actually find the one that will work for your system.
Bucket Reservior and Cup Assembly
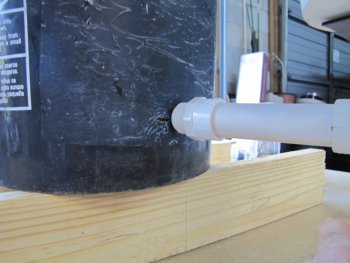
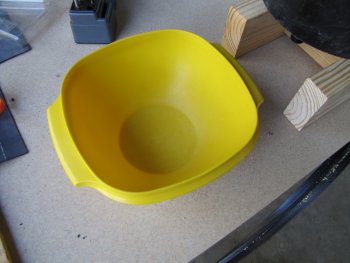
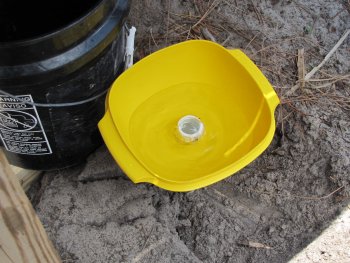
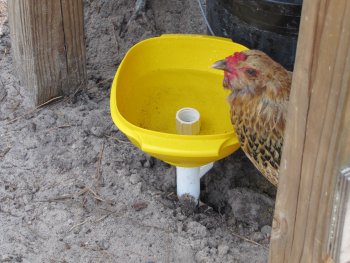
Ok we are connected and ready to water test. After water testing, I found this cup container to be too flimsy and I switched to the tupperware bowl, which worked out much better. I placed a tee on the pipe coming out of the bucket reservior to go down to a cap that is at the right size to help hold up the cup assembly. I also placed another tee so that I could maybe put another cup in place near this one or even in another cage.


It is getting finished – Field testing is near.

Now to Install in the Field – Automatic Chicken Watering System – 5

Build an Automatic Bird Watering Station – Automatic Chicken Waterer – Water Your Birds – 3

In the last segment we measured the fill valve float to get our height. This measurement can change depending on where you have the fill valve set to. If you have smaller birds you may want it lower than higher. Larger birds would be higher. There is also a “too high”, because then they cannot comfortably reach it.

Measure the Bucket for Height

Measure and make a mark on the bucket where the center of the float is going to be. This is the control line.

This line represents the top of the water, no matter what container you are using for a cup. Water is the ultimate leveling system. This is where you can see exactly how high you want your watering cup to sit. You can adjust it somewhat in the field, by digging into the ground, or setting it up on bricks or wood.
Drill the seal hole

Be careful, the plastic can tear or break. This was the first cup I tried. I like to recycle anything that has another purpose. Also, the design allows to switch this part out and “use” another one, or a better one. This container was good, until it filled with water. It proved to be too flimsy and tipped over. The cup is better when it is not as wide, but tall enough.
Cut out the Gasket
Cut out a few gaskets. I was going to double these up, but there is no need. One layer will do. I am using a piece of a pond liner. I used my paddle bit to mark a hole, then cut with a razor knife. The size after that can vary, but just a 3″ x 3″ square is fine.
Bushing to take up some space


Put a bushing over the threads going into the bucket or the cup. The plastic is so thin, the fitting on the other side has to seat all the way down, and they just don’t go down that far. There is not a lot of pressure so it just has to press against it.
Sealing inside the containers
The fitting on the inside of the container is a female thread fitting that is also pvc. A brass fitting would work also. The connection to the bucket reservior is a more permanent seal. The seal on the cup is temporary, because it remains “servicable” or even “replacable”.


Line up the Cup system


Next we have to line up the cup system and see where it falls in with the control line. You can see the 12″ mark at the top of the cup. The 8 1/2″  mark is the bottom of the cup. This won’t even let water come in over our seal fitting. We are going to have to lower the cup system.

Tupperware fit the bill


Now that we are on the cup, after I water tested the new Automatic Chicken Watering system, I found the OxyClean container just fell over. I know part of it was that I did not center the hole, but it really just fell over. So I hunted for a new container, and I came up with this tupperware bowl. It was the correct size, height, and strength. The tupperware bowl has not been used in a while (so we could part with it) and is very strong. When I drilled the hole it wanted to break up a little (it is probably 20 years old or more), but did fine as far as the size, so the seal worked out fine.

On to the next round!!!!

Next article for Putting it All Together

Looking for Automatic Chicken Waterer Parts List?

How To: Build a Homemade Automatic Chicken Waterer – Automatic Poultry Watering System – 2

Looking for Automatic Chicken Waterer Parts List?

A homemade automatic chicken waterer is not to hard to put together. The whole idea here is to have a reservoir to fill up and establish the “height” for the cup. A 5 gallon bucket is very convenient for this, because it is tall enough to house the fill valve, large enough to sit and not tip over easy, and can get a lid that fits pretty easily. There is a 3″ or so spread between the top of the fill valve where the water stops, and the bottom of where the arm swings where the water kicks on. The cup has to be maintained at the correct height. There is a balance between how high you can put the cup and how high the chickens can comfortably drink from. The whole point in doing this is so the chickens can drink.

Homemade Automatic Chicken Waterer Valve to PVC transition Hose

This is the same fitting that is in your home connecting the toilet to the water source. The toilet fill valve is a 5/8″ thread. There is not a PVC fitting for this size, but there is brass fittings. This hose is better anyway, because the hose lets play exist between the bucket and the water line.

What you are seeing in the photo are 3 items:

Homemade Automatic Chicken Waterer Parts Layout

  1. The Toilet Fill Valve Hose. 5/8″ thread on the fill valve to – whatever you want to attach to. In this case I am making my way to 1/2″ pvc as my water supply line. This is the one under pressure so it should be the one with the best effort and setup.
  2. The fitting to go from the other end of the hose to the PVC.
  3. PVC fitting with slip or glue on the other end.

This is the parts list to build the Automatic Chicken Watering System. I have already changed from the larger PVC pipe coming out of the bucket to smaller (3/4″) pipe. The idea was that the pipe itself was going to be the “cup”, but it looked like it would be too heavy once it all went together.

Homemade Automatic Chicken Waterer - Plain old Toilet Fill Valve

The other thing was that it gets into some money with all the larger parts.

The fitting to go inside the bucket to fill it with water is already included and is really one of the best “seals” you can get.Homemade Automatic Chicken Waterer - 1 inch paddle bit to drill seal hole


The 1 inch paddle bit will drill the through seal hole for the fill valve and a 3/4″ thread for the outlet valve. You want to find a bit that is just bigger than the threads without any play, if at all possible.


Homemade Automatic Chicken Waterer - Measuring the toilet fill valve

Measuring the fill valve is important to establish the ultimate height of the cup. Usually the toilet fill valve can be adjusted by about 4 inches or so. This can raise or lower the cup the chickens drink out of. The center of the float at the top of the float arm pivot is the control measurement of the system. This is going to be where the level of water fills to everytime.

Homemade Automatic Chicken Waterer - Find out where the center of the float is at the top

If you lower the float arm pivot and measure, it should be around 3 1/2″. This is the minimum height the cup can be to function properly. It may have to be taller due to the coupling seal fitting to let the water into it.


Click on the image to be taken to Amazon.com product page for purchase.

To be continued – It’s time to drill some holes.

Homemade Automatic Chicken Waterer 3


VIDEO – Build your own DIY Automatic Chicken Waterer


Build your own Homemade Automatic Chicken Waterer. This is a walkthrough slideshow video of the process of the automatic chicken waterer. This project and concept can be used for many different applications.

Looking for Automatic Chicken Waterer Parts List?

Automatic Chicken Waterer – How to Build an Automatic Poultry Waterer – Homemade Chicken Watering System

Automatic Chicken Watering System


This is a small project that can have lasting results with your chicken chores. The automatic chicken watering system is a homemade device that will extend the watering of your poultry indefinitely. All parts can be collected from home or purchased at any hardware store. Parts can be salvaged from other projects and collected over time.

Please click over to the second page where it starts at the beginning.


To be continued…..

Here is a link to the beginning article.

Homemade Automatic Chicken Waterer – 2

Looking for Automatic Chicken Waterer Parts List?